var gform;gform||(document.addEventListener("gform_main_scripts_loaded",function(){gform.scriptsLoaded=!0}),window.addEventListener("DOMContentLoaded",function(){gform.domLoaded=!0}),gform={domLoaded:!1,scriptsLoaded:!1,initializeOnLoaded:function(o){gform.domLoaded&&gform.scriptsLoaded?o():!gform.domLoaded&&gform.scriptsLoaded?window.addEventListener("DOMContentLoaded",o):document.addEventListener("gform_main_scripts_loaded",o)},hooks:{action:{},filter:{}},addAction:function(o,n,r,t){gform.addHook("action",o,n,r,t)},addFilter:function(o,n,r,t){gform.addHook("filter",o,n,r,t)},doAction:function(o){gform.doHook("action",o,arguments)},applyFilters:function(o){return gform.doHook("filter",o,arguments)},removeAction:function(o,n){gform.removeHook("action",o,n)},removeFilter:function(o,n,r){gform.removeHook("filter",o,n,r)},addHook:function(o,n,r,t,i){null==gform.hooks[o][n]&&(gform.hooks[o][n]=[]);var e=gform.hooks[o][n];null==i&&(i=n+"_"+e.length),gform.hooks[o][n].push({tag:i,callable:r,priority:t=null==t?10:t})},doHook:function(n,o,r){var t;if(r=Array.prototype.slice.call(r,1),null!=gform.hooks[n][o]&&((o=gform.hooks[n][o]).sort(function(o,n){return o.priority-n.priority}),o.forEach(function(o){"function"!=typeof(t=o.callable)&&(t=window[t]),"action"==n?t.apply(null,r):r[0]=t.apply(null,r)})),"filter"==n)return r[0]},removeHook:function(o,n,t,i){var r;null!=gform.hooks[o][n]&&(r=(r=gform.hooks[o][n]).filter(function(o,n,r){return!!(null!=i&&i!=o.tag||null!=t&&t!=o.priority)}),gform.hooks[o][n]=r)}});
window._wpemojiSettings = {"baseUrl":"https:\/\/s.w.org\/images\/core\/emoji\/15.0.3\/72x72\/","ext":".png","svgUrl":"https:\/\/s.w.org\/images\/core\/emoji\/15.0.3\/svg\/","svgExt":".svg","source":{"concatemoji":"https:\/\/cleanplates.com\/wp-includes\/js\/wp-emoji-release.min.js?ver=6.5.2"}};
/*! This file is auto-generated */
!function(i,n){var o,s,e;function c(e){try{var t={supportTests:e,timestamp:(new Date).valueOf()};sessionStorage.setItem(o,JSON.stringify(t))}catch(e){}}function p(e,t,n){e.clearRect(0,0,e.canvas.width,e.canvas.height),e.fillText(t,0,0);var t=new Uint32Array(e.getImageData(0,0,e.canvas.width,e.canvas.height).data),r=(e.clearRect(0,0,e.canvas.width,e.canvas.height),e.fillText(n,0,0),new Uint32Array(e.getImageData(0,0,e.canvas.width,e.canvas.height).data));return t.every(function(e,t){return e===r[t]})}function u(e,t,n){switch(t){case"flag":return n(e,"\ud83c\udff3\ufe0f\u200d\u26a7\ufe0f","\ud83c\udff3\ufe0f\u200b\u26a7\ufe0f")?!1:!n(e,"\ud83c\uddfa\ud83c\uddf3","\ud83c\uddfa\u200b\ud83c\uddf3")&&!n(e,"\ud83c\udff4\udb40\udc67\udb40\udc62\udb40\udc65\udb40\udc6e\udb40\udc67\udb40\udc7f","\ud83c\udff4\u200b\udb40\udc67\u200b\udb40\udc62\u200b\udb40\udc65\u200b\udb40\udc6e\u200b\udb40\udc67\u200b\udb40\udc7f");case"emoji":return!n(e,"\ud83d\udc26\u200d\u2b1b","\ud83d\udc26\u200b\u2b1b")}return!1}function f(e,t,n){var r="undefined"!=typeof WorkerGlobalScope&&self instanceof WorkerGlobalScope?new OffscreenCanvas(300,150):i.createElement("canvas"),a=r.getContext("2d",{willReadFrequently:!0}),o=(a.textBaseline="top",a.font="600 32px Arial",{});return e.forEach(function(e){o[e]=t(a,e,n)}),o}function t(e){var t=i.createElement("script");t.src=e,t.defer=!0,i.head.appendChild(t)}"undefined"!=typeof Promise&&(o="wpEmojiSettingsSupports",s=["flag","emoji"],n.supports={everything:!0,everythingExceptFlag:!0},e=new Promise(function(e){i.addEventListener("DOMContentLoaded",e,{once:!0})}),new Promise(function(t){var n=function(){try{var e=JSON.parse(sessionStorage.getItem(o));if("object"==typeof e&&"number"==typeof e.timestamp&&(new Date).valueOf()<e.timestamp+604800&&"object"==typeof e.supportTests)return e.supportTests}catch(e){}return null}();if(!n){if("undefined"!=typeof Worker&&"undefined"!=typeof OffscreenCanvas&&"undefined"!=typeof URL&&URL.createObjectURL&&"undefined"!=typeof Blob)try{var e="postMessage("+f.toString()+"("+[JSON.stringify(s),u.toString(),p.toString()].join(",")+"));",r=new Blob([e],{type:"text/javascript"}),a=new Worker(URL.createObjectURL(r),{name:"wpTestEmojiSupports"});return void(a.onmessage=function(e){c(n=e.data),a.terminate(),t(n)})}catch(e){}c(n=f(s,u,p))}t(n)}).then(function(e){for(var t in e)n.supports[t]=e[t],n.supports.everything=n.supports.everything&&n.supports[t],"flag"!==t&&(n.supports.everythingExceptFlag=n.supports.everythingExceptFlag&&n.supports[t]);n.supports.everythingExceptFlag=n.supports.everythingExceptFlag&&!n.supports.flag,n.DOMReady=!1,n.readyCallback=function(){n.DOMReady=!0}}).then(function(){return e}).then(function(){var e;n.supports.everything||(n.readyCallback(),(e=n.source||{}).concatemoji?t(e.concatemoji):e.wpemoji&&e.twemoji&&(t(e.twemoji),t(e.wpemoji)))}))}((window,document),window._wpemojiSettings);
https://cleanplates.com/wp-includes/js/jquery/jquery.min.js
https://cleanplates.com/wp-includes/js/jquery/jquery-migrate.min.js
https://cleanplates.com/wp-includes/js/underscore.min.js
https://cleanplates.com/wp-includes/js/dist/vendor/wp-polyfill-inert.min.js
https://cleanplates.com/wp-includes/js/dist/vendor/regenerator-runtime.min.js
https://cleanplates.com/wp-includes/js/dist/vendor/wp-polyfill.min.js
https://cleanplates.com/wp-includes/js/dist/hooks.min.js
https://cleanplates.com/wp-includes/js/dist/i18n.min.js
wp.i18n.setLocaleData( { 'text direction\u0004ltr': [ 'ltr' ] } );
https://cleanplates.com/wp-content/plugins/memberpress/js/login.js
https://cleanplates.com/wp-content/plugins/memberpress/js/jquery.payment.js
https://cleanplates.com/wp-content/plugins/memberpress/js/validate.js
var MeprI18n = {"states":{"IR":{"KHZ":"Khuzestan (\u062e\u0648\u0632\u0633\u062a\u0627\u0646)","THR":"Tehran (\u062a\u0647\u0631\u0627\u0646)","ILM":"Ilaam (\u0627\u06cc\u0644\u0627\u0645)","BHR":"Bushehr (\u0628\u0648\u0634\u0647\u0631)","ADL":"Ardabil (\u0627\u0631\u062f\u0628\u06cc\u0644)","ESF":"Isfahan (\u0627\u0635\u0641\u0647\u0627\u0646)","YZD":"Yazd (\u06cc\u0632\u062f)","KRH":"Kermanshah (\u06a9\u0631\u0645\u0627\u0646\u0634\u0627\u0647)","KRN":"Kerman (\u06a9\u0631\u0645\u0627\u0646)","HDN":"Hamadan (\u0647\u0645\u062f\u0627\u0646)","GZN":"Ghazvin (\u0642\u0632\u0648\u06cc\u0646)","ZJN":"Zanjan (\u0632\u0646\u062c\u0627\u0646)","LRS":"Luristan (\u0644\u0631\u0633\u062a\u0627\u0646)","ABZ":"Alborz (\u0627\u0644\u0628\u0631\u0632)","EAZ":"East Azarbaijan (\u0622\u0630\u0631\u0628\u0627\u06cc\u062c\u0627\u0646 \u0634\u0631\u0642\u06cc)","WAZ":"West Azarbaijan (\u0622\u0630\u0631\u0628\u0627\u06cc\u062c\u0627\u0646 \u063a\u0631\u0628\u06cc)","CHB":"Chaharmahal and Bakhtiari (\u0686\u0647\u0627\u0631\u0645\u062d\u0627\u0644 \u0648 \u0628\u062e\u062a\u06cc\u0627\u0631\u06cc)","SKH":"South Khorasan (\u062e\u0631\u0627\u0633\u0627\u0646 \u062c\u0646\u0648\u0628\u06cc)","RKH":"Razavi Khorasan (\u062e\u0631\u0627\u0633\u0627\u0646 \u0631\u0636\u0648\u06cc)","NKH":"North Khorasan (\u062e\u0631\u0627\u0633\u0627\u0646 \u062c\u0646\u0648\u0628\u06cc)","SMN":"Semnan (\u0633\u0645\u0646\u0627\u0646)","FRS":"Fars (\u0641\u0627\u0631\u0633)","QHM":"Qom (\u0642\u0645)","KRD":"Kurdistan \/ \u06a9\u0631\u062f\u0633\u062a\u0627\u0646)","KBD":"Kohgiluyeh and BoyerAhmad (\u06a9\u0647\u06af\u06cc\u0644\u0648\u06cc\u06cc\u0647 \u0648 \u0628\u0648\u06cc\u0631\u0627\u062d\u0645\u062f)","GLS":"Golestan (\u06af\u0644\u0633\u062a\u0627\u0646)","GIL":"Gilan (\u06af\u06cc\u0644\u0627\u0646)","MZN":"Mazandaran (\u0645\u0627\u0632\u0646\u062f\u0631\u0627\u0646)","MKZ":"Markazi (\u0645\u0631\u06a9\u0632\u06cc)","HRZ":"Hormozgan (\u0647\u0631\u0645\u0632\u06af\u0627\u0646)","SBN":"Sistan and Baluchestan (\u0633\u06cc\u0633\u062a\u0627\u0646 \u0648 \u0628\u0644\u0648\u0686\u0633\u062a\u0627\u0646)"},"TH":{"TH-37":"Amnat Charoen (อำนาจเจริญ)","TH-15":"Ang Thong (อ่างทอง)","TH-14":"Ayutthaya (พระนครศรีอยุธยา)","TH-10":"Bangkok (กรุงเทพมหานคร)","TH-38":"Bueng Kan (บึงกาฬ)","TH-31":"Buri Ram (บุรีรัมย์)","TH-24":"Chachoengsao (ฉะเชิงเทรา)","TH-18":"Chai Nat (ชัยนาท)","TH-36":"Chaiyaphum (ชัยภูมิ)","TH-22":"Chanthaburi (จันทบุรี)","TH-50":"Chiang Mai (เชียงใหม่)","TH-57":"Chiang Rai (เชียงราย)","TH-20":"Chonburi (ชลบุรี)","TH-86":"Chumphon (ชุมพร)","TH-46":"Kalasin (กาฬสินธุ์)","TH-62":"Kamphaeng Phet (กำแพงเพชร)","TH-71":"Kanchanaburi (กาญจนบุรี)","TH-40":"Khon Kaen (ขอนแก่น)","TH-81":"Krabi (กระบี่)","TH-52":"Lampang (ลำปาง)","TH-51":"Lamphun (ลำพูน)","TH-42":"Loei (เลย)","TH-16":"Lopburi (ลพบุรี)","TH-58":"Mae Hong Son (แม่ฮ่องสอน)","TH-44":"Maha Sarakham (มหาสารคาม)","TH-49":"Mukdahan (มุกดาหาร)","TH-26":"Nakhon Nayok (นครนายก)","TH-73":"Nakhon Pathom (นครปฐม)","TH-48":"Nakhon Phanom (นครพนม)","TH-30":"Nakhon Ratchasima (นครราชสีมา)","TH-60":"Nakhon Sawan (นครสวรรค์)","TH-80":"Nakhon Si Thammarat (นครศรีธรรมราช)","TH-55":"Nan (น่าน)","TH-96":"Narathiwat (นราธิวาส)","TH-39":"Nong Bua Lam Phu (หนองบัวลำภู)","TH-43":"Nong Khai (หนองคาย)","TH-12":"Nonthaburi (นนทบุรี)","TH-13":"Pathum Thani (ปทุมธานี)","TH-94":"Pattani (ปัตตานี)","TH-82":"Phang Nga (พังงา)","TH-93":"Phatthalung (พัทลุง)","TH-56":"Phayao (พะเยา)","TH-67":"Phetchabun (เพชรบูรณ์)","TH-76":"Phetchaburi (เพชรบุรี)","TH-66":"Phichit (พิจิตร)","TH-65":"Phitsanulok (พิษณุโลก)","TH-54":"Phrae (แพร่)","TH-83":"Phuket (ภูเก็ต)","TH-25":"Prachin Buri (ปราจีนบุรี)","TH-77":"Prachuap Khiri Khan (ประจวบคีรีขันธ์)","TH-85":"Ranong (ระนอง)","TH-70":"Ratchaburi (ราชบุรี)","TH-21":"Rayong (ระยอง)","TH-45":"Roi Et (ร้อยเอ็ด)","TH-27":"Sa Kaeo (สระแก้ว)","TH-47":"Sakon Nakhon (สกลนคร)","TH-11":"Samut Prakan (สมุทรปราการ)","TH-74":"Samut Sakhon (สมุทรสาคร)","TH-75":"Samut Songkhram (สมุทรสงคราม)","TH-19":"Saraburi (สระบุรี)","TH-91":"Satun (สตูล)","TH-17":"Sing Buri (สิงห์บุรี)","TH-33":"Sisaket (ศรีสะเกษ)","TH-90":"Songkhla (สงขลา)","TH-64":"Sukhothai (สุโขทัย)","TH-72":"Suphan Buri (สุพรรณบุรี)","TH-84":"Surat Thani (สุราษฎร์ธานี)","TH-32":"Surin (สุรินทร์)","TH-63":"Tak (ตาก)","TH-92":"Trang (ตรัง)","TH-23":"Trat (ตราด)","TH-34":"Ubon Ratchathani (อุบลราชธานี)","TH-41":"Udon Thani (อุดรธานี)","TH-61":"Uthai Thani (อุทัยธานี)","TH-53":"Uttaradit (อุตรดิตถ์)","TH-95":"Yala (ยะลา)","TH-35":"Yasothon (ยโสธร)"},"JP":{"JP01":"Hokkaido","JP02":"Aomori","JP03":"Iwate","JP04":"Miyagi","JP05":"Akita","JP06":"Yamagata","JP07":"Fukushima","JP08":"Ibaraki","JP09":"Tochigi","JP10":"Gunma","JP11":"Saitama","JP12":"Chiba","JP13":"Tokyo","JP14":"Kanagawa","JP15":"Niigata","JP16":"Toyama","JP17":"Ishikawa","JP18":"Fukui","JP19":"Yamanashi","JP20":"Nagano","JP21":"Gifu","JP22":"Shizuoka","JP23":"Aichi","JP24":"Mie","JP25":"Shiga","JP26":"Kyouto","JP27":"Osaka","JP28":"Hyougo","JP29":"Nara","JP30":"Wakayama","JP31":"Tottori","JP32":"Shimane","JP33":"Okayama","JP34":"Hiroshima","JP35":"Yamaguchi","JP36":"Tokushima","JP37":"Kagawa","JP38":"Ehime","JP39":"Kochi","JP40":"Fukuoka","JP41":"Saga","JP42":"Nagasaki","JP43":"Kumamoto","JP44":"Oita","JP45":"Miyazaki","JP46":"Kagoshima","JP47":"Okinawa"},"IT":{"AG":"Agrigento","AL":"Alessandria","AN":"Ancona","AO":"Aosta","AR":"Arezzo","AP":"Ascoli Piceno","AT":"Asti","AV":"Avellino","BA":"Bari","BT":"Barletta-Andria-Trani","BL":"Belluno","BN":"Benevento","BG":"Bergamo","BI":"Biella","BO":"Bologna","BZ":"Bolzano","BS":"Brescia","BR":"Brindisi","CA":"Cagliari","CL":"Caltanissetta","CB":"Campobasso","CI":"Carbonia-Iglesias","CE":"Caserta","CT":"Catania","CZ":"Catanzaro","CH":"Chieti","CO":"Como","CS":"Cosenza","CR":"Cremona","KR":"Crotone","CN":"Cuneo","EN":"Enna","FM":"Fermo","FE":"Ferrara","FI":"Firenze","FG":"Foggia","FC":"Forl\u00ec-Cesena","FR":"Frosinone","GE":"Genova","GO":"Gorizia","GR":"Grosseto","IM":"Imperia","IS":"Isernia","SP":"La Spezia","AQ":"L'Aquila","LT":"Latina","LE":"Lecce","LC":"Lecco","LI":"Livorno","LO":"Lodi","LU":"Lucca","MC":"Macerata","MN":"Mantova","MS":"Massa-Carrara","MT":"Matera","ME":"Messina","MI":"Milano","MO":"Modena","MB":"Monza e della Brianza","NA":"Napoli","NO":"Novara","NU":"Nuoro","OT":"Olbia-Tempio","OR":"Oristano","PD":"Padova","PA":"Palermo","PR":"Parma","PV":"Pavia","PG":"Perugia","PU":"Pesaro e Urbino","PE":"Pescara","PC":"Piacenza","PI":"Pisa","PT":"Pistoia","PN":"Pordenone","PZ":"Potenza","PO":"Prato","RG":"Ragusa","RA":"Ravenna","RC":"Reggio Calabria","RE":"Reggio Emilia","RI":"Rieti","RN":"Rimini","RM":"Roma","RO":"Rovigo","SA":"Salerno","VS":"Medio Campidano","SS":"Sassari","SV":"Savona","SI":"Siena","SR":"Siracusa","SO":"Sondrio","TA":"Taranto","TE":"Teramo","TR":"Terni","TO":"Torino","OG":"Ogliastra","TP":"Trapani","TN":"Trento","TV":"Treviso","TS":"Trieste","UD":"Udine","VA":"Varese","VE":"Venezia","VB":"Verbano-Cusio-Ossola","VC":"Vercelli","VR":"Verona","VV":"Vibo Valentia","VI":"Vicenza","VT":"Viterbo"},"TR":{"TR01":"Adana","TR02":"Adıyaman","TR03":"Afyon","TR04":"Ağrı","TR05":"Amasya","TR06":"Ankara","TR07":"Antalya","TR08":"Artvin","TR09":"Aydın","TR10":"Balıkesir","TR11":"Bilecik","TR12":"Bingöl","TR13":"Bitlis","TR14":"Bolu","TR15":"Burdur","TR16":"Bursa","TR17":"Çanakkale","TR18":"Çankırı","TR19":"Çorum","TR20":"Denizli","TR21":"Diyarbakır","TR22":"Edirne","TR23":"Elazığ","TR24":"Erzincan","TR25":"Erzurum","TR26":"Eskişehir","TR27":"Gaziantep","TR28":"Giresun","TR29":"Gümüşhane","TR30":"Hakkari","TR31":"Hatay","TR32":"Isparta","TR33":"İçel","TR34":"İstanbul","TR35":"İzmir","TR36":"Kars","TR37":"Kastamonu","TR38":"Kayseri","TR39":"Kırklareli","TR40":"Kırşehir","TR41":"Kocaeli","TR42":"Konya","TR43":"Kütahya","TR44":"Malatya","TR45":"Manisa","TR46":"Kahramanmaraş","TR47":"Mardin","TR48":"Muğla","TR49":"Muş","TR50":"Nevşehir","TR51":"Niğde","TR52":"Ordu","TR53":"Rize","TR54":"Sakarya","TR55":"Samsun","TR56":"Siirt","TR57":"Sinop","TR58":"Sivas","TR59":"Tekirdağ","TR60":"Tokat","TR61":"Trabzon","TR62":"Tunceli","TR63":"Şanlıurfa","TR64":"Uşak","TR65":"Van","TR66":"Yozgat","TR67":"Zonguldak","TR68":"Aksaray","TR69":"Bayburt","TR70":"Karaman","TR71":"Kırıkkale","TR72":"Batman","TR73":"Şırnak","TR74":"Bartın","TR75":"Ardahan","TR76":"Iğdır","TR77":"Yalova","TR78":"Karabük","TR79":"Kilis","TR80":"Osmaniye","TR81":"Düzce"},"HK":{"HONG KONG":"Hong Kong Island","KOWLOON":"Kowloon","NEW TERRITORIES":"New Territories"},"PE":{"CAL":"El Callao","LMA":"Municipalidad Metropolitana de Lima","AMA":"Amazonas","ANC":"Ancash","APU":"Apurímac","ARE":"Arequipa","AYA":"Ayacucho","CAJ":"Cajamarca","CUS":"Cusco","HUV":"Huancavelica","HUC":"Huánuco","ICA":"Ica","JUN":"Junín","LAL":"La Libertad","LAM":"Lambayeque","LIM":"Lima","LOR":"Loreto","MDD":"Madre de Dios","MOQ":"Moquegua","PAS":"Pasco","PIU":"Piura","PUN":"Puno","SAM":"San Martín","TAC":"Tacna","TUM":"Tumbes","UCA":"Ucayali"},"US":{"AL":"Alabama","AK":"Alaska","AZ":"Arizona","AR":"Arkansas","CA":"California","CO":"Colorado","CT":"Connecticut","DE":"Delaware","DC":"District Of Columbia","FL":"Florida","GA":"Georgia","HI":"Hawaii","ID":"Idaho","IL":"Illinois","IN":"Indiana","IA":"Iowa","KS":"Kansas","KY":"Kentucky","LA":"Louisiana","ME":"Maine","MD":"Maryland","MA":"Massachusetts","MI":"Michigan","MN":"Minnesota","MS":"Mississippi","MO":"Missouri","MT":"Montana","NE":"Nebraska","NV":"Nevada","NH":"New Hampshire","NJ":"New Jersey","NM":"New Mexico","NY":"New York","NC":"North Carolina","ND":"North Dakota","OH":"Ohio","OK":"Oklahoma","OR":"Oregon","PA":"Pennsylvania","RI":"Rhode Island","SC":"South Carolina","SD":"South Dakota","TN":"Tennessee","TX":"Texas","UT":"Utah","VT":"Vermont","VA":"Virginia","WA":"Washington","WV":"West Virginia","WI":"Wisconsin","WY":"Wyoming","AA":"Armed Forces (AA)","AE":"Armed Forces (AE)","AP":"Armed Forces (AP)","AS":"American Samoa","GU":"Guam","MP":"Northern Mariana Islands","PR":"Puerto Rico","UM":"US Minor Outlying Islands","VI":"US Virgin Islands"},"BR":{"AC":"Acre","AL":"Alagoas","AP":"Amapá","AM":"Amazonas","BA":"Bahia","CE":"Ceará","DF":"Distrito Federal","ES":"Espírito Santo","GO":"Goiás","MA":"Maranhão","MT":"Mato Grosso","MS":"Mato Grosso do Sul","MG":"Minas Gerais","PA":"Pará","PB":"Paraíba","PR":"Paraná","PE":"Pernambuco","PI":"Piauí","RJ":"Rio de Janeiro","RN":"Rio Grande do Norte","RS":"Rio Grande do Sul","RO":"Rondônia","RR":"Roraima","SC":"Santa Catarina","SP":"São Paulo","SE":"Sergipe","TO":"Tocantins"},"BD":{"BAG":"Bagerhat","BAN":"Bandarban","BAR":"Barguna","BARI":"Barisal","BHO":"Bhola","BOG":"Bogra","BRA":"Brahmanbaria","CHA":"Chandpur","CHI":"Chittagong","CHU":"Chuadanga","COM":"Comilla","COX":"Cox's Bazar","DHA":"Dhaka","DIN":"Dinajpur","FAR":"Faridpur ","FEN":"Feni","GAI":"Gaibandha","GAZI":"Gazipur","GOP":"Gopalganj","HAB":"Habiganj","JAM":"Jamalpur","JES":"Jessore","JHA":"Jhalokati","JHE":"Jhenaidah","JOY":"Joypurhat","KHA":"Khagrachhari","KHU":"Khulna","KIS":"Kishoreganj","KUR":"Kurigram","KUS":"Kushtia","LAK":"Lakshmipur","LAL":"Lalmonirhat","MAD":"Madaripur","MAG":"Magura","MAN":"Manikganj ","MEH":"Meherpur","MOU":"Moulvibazar","MUN":"Munshiganj","MYM":"Mymensingh","NAO":"Naogaon","NAR":"Narail","NARG":"Narayanganj","NARD":"Narsingdi","NAT":"Natore","NAW":"Nawabganj","NET":"Netrakona","NIL":"Nilphamari","NOA":"Noakhali","PAB":"Pabna","PAN":"Panchagarh","PAT":"Patuakhali","PIR":"Pirojpur","RAJB":"Rajbari","RAJ":"Rajshahi","RAN":"Rangamati","RANP":"Rangpur","SAT":"Satkhira","SHA":"Shariatpur","SHE":"Sherpur","SIR":"Sirajganj","SUN":"Sunamganj","SYL":"Sylhet","TAN":"Tangail","THA":"Thakurgaon"},"HU":{"BK":"B\u00e1cs-Kiskun","BE":"B\u00e9k\u00e9s","BA":"Baranya","BZ":"Borsod-Aba\u00faj-Zempl\u00e9n","BU":"Budapest","CS":"Csongr\u00e1d","FE":"Fej\u00e9r","GS":"Gy\u0151r-Moson-Sopron","HB":"Hajd\u00fa-Bihar","HE":"Heves","JN":"J\u00e1sz-Nagykun-Szolnok","KE":"Kom\u00e1rom-Esztergom","NO":"N\u00f3gr\u00e1d","PE":"Pest","SO":"Somogy","SZ":"Szabolcs-Szatm\u00e1r-Bereg","TO":"Tolna","VA":"Vas","VE":"Veszpr\u00e9m","ZA":"Zala"},"NZ":{"NL":"Northland","AK":"Auckland","WA":"Waikato","BP":"Bay of Plenty","TK":"Taranaki","HB":"Hawke’s Bay","MW":"Manawatu-Wanganui","WE":"Wellington","NS":"Nelson","MB":"Marlborough","TM":"Tasman","WC":"West Coast","CT":"Canterbury","OT":"Otago","SL":"Southland"},"CA":{"AB":"Alberta","BC":"British Columbia","MB":"Manitoba","NB":"New Brunswick","NL":"Newfoundland","NT":"Northwest Territories","NS":"Nova Scotia","NU":"Nunavut","ON":"Ontario","PE":"Prince Edward Island","QC":"Quebec","SK":"Saskatchewan","YT":"Yukon Territory"},"BG":{"BG-01":"Blagoevgrad","BG-02":"Burgas","BG-08":"Dobrich","BG-07":"Gabrovo","BG-26":"Haskovo","BG-09":"Kardzhali","BG-10":"Kyustendil","BG-11":"Lovech","BG-12":"Montana","BG-13":"Pazardzhik","BG-14":"Pernik","BG-15":"Pleven","BG-16":"Plovdiv","BG-17":"Razgrad","BG-18":"Ruse","BG-27":"Shumen","BG-19":"Silistra","BG-20":"Sliven","BG-21":"Smolyan","BG-23":"Sofia","BG-22":"Sofia-Grad","BG-24":"Stara Zagora","BG-25":"Targovishte","BG-03":"Varna","BG-04":"Veliko Tarnovo","BG-05":"Vidin","BG-06":"Vratsa","BG-28":"Yambol"},"NP":{"ILL":"Illam","JHA":"Jhapa","PAN":"Panchthar","TAP":"Taplejung","BHO":"Bhojpur","DKA":"Dhankuta","MOR":"Morang","SUN":"Sunsari","SAN":"Sankhuwa","TER":"Terhathum","KHO":"Khotang","OKH":"Okhaldhunga","SAP":"Saptari","SIR":"Siraha","SOL":"Solukhumbu","UDA":"Udayapur","DHA":"Dhanusa","DLK":"Dolakha","MOH":"Mohottari","RAM":"Ramechha","SAR":"Sarlahi","SIN":"Sindhuli","BHA":"Bhaktapur","DHD":"Dhading","KTM":"Kathmandu","KAV":"Kavrepalanchowk","LAL":"Lalitpur","NUW":"Nuwakot","RAS":"Rasuwa","SPC":"Sindhupalchowk","BAR":"Bara","CHI":"Chitwan","MAK":"Makwanpur","PAR":"Parsa","RAU":"Rautahat","GOR":"Gorkha","KAS":"Kaski","LAM":"Lamjung","MAN":"Manang","SYN":"Syangja","TAN":"Tanahun","BAG":"Baglung","PBT":"Parbat","MUS":"Mustang","MYG":"Myagdi","AGR":"Agrghakanchi","GUL":"Gulmi","KAP":"Kapilbastu","NAW":"Nawalparasi","PAL":"Palpa","RUP":"Rupandehi","DAN":"Dang","PYU":"Pyuthan","ROL":"Rolpa","RUK":"Rukum","SAL":"Salyan","BAN":"Banke","BDA":"Bardiya","DAI":"Dailekh","JAJ":"Jajarkot","SUR":"Surkhet","DOL":"Dolpa","HUM":"Humla","JUM":"Jumla","KAL":"Kalikot","MUG":"Mugu","ACH":"Achham","BJH":"Bajhang","BJU":"Bajura","DOT":"Doti","KAI":"Kailali","BAI":"Baitadi","DAD":"Dadeldhura","DAR":"Darchula","KAN":"Kanchanpur"},"PT":{"NO":"Norte","CE":"Centro","LT":"Lisboa e Vale do Tejo","AG":"Algarve","AT":"Alentejo","MD":"Madeira","AC":"A\u00e7ores"},"DE":{"BW":"Baden-W\u00fcrttemberg","BY":"Bavaria","BE":"Berlin","BB":"Brandenburg","HB":"Bremen","HH":"Hamburg","HE":"Hesse","NI":"Lower Saxony","MV":"Mecklenburg-Vorpommern","NW":"North Rhine-Westphalia","RP":"Rhineland-Palatinate","SL":"Saarland","SN":"Saxony","ST":"Saxony-Anhalt","SH":"Schleswig-Holstein","TH":"Thuringia"},"CN":{"CN1":"Yunnan \/ 云南","CN2":"Beijing \/ 北京","CN3":"Tianjin \/ 天津","CN4":"Hebei \/ 河北","CN5":"Shanxi \/ 山西","CN6":"Inner Mongolia \/ 內蒙古","CN7":"Liaoning \/ 辽宁","CN8":"Jilin \/ 吉林","CN9":"Heilongjiang \/ 黑龙江","CN10":"Shanghai \/ 上海","CN11":"Jiangsu \/ 江苏","CN12":"Zhejiang \/ 浙江","CN13":"Anhui \/ 安徽","CN14":"Fujian \/ 福建","CN15":"Jiangxi \/ 江西","CN16":"Shandong \/ 山东","CN17":"Henan \/ 河南","CN18":"Hubei \/ 湖北","CN19":"Hunan \/ 湖南","CN20":"Guangdong \/ 广东","CN21":"Guangxi Zhuang \/ 广西壮族","CN22":"Hainan \/ 海南","CN23":"Chongqing \/ 重庆","CN24":"Sichuan \/ 四川","CN25":"Guizhou \/ 贵州","CN26":"Shaanxi \/ 陕西","CN27":"Gansu \/ 甘肃","CN28":"Qinghai \/ 青海","CN29":"Ningxia Hui \/ 宁夏","CN30":"Macau \/ 澳门","CN31":"Tibet \/ 西藏","CN32":"Xinjiang \/ 新疆"},"MY":{"JHR":"Johor","KDH":"Kedah","KTN":"Kelantan","MLK":"Melaka","NSN":"Negeri Sembilan","PHG":"Pahang","PRK":"Perak","PLS":"Perlis","PNG":"Pulau Pinang","SBH":"Sabah","SWK":"Sarawak","SGR":"Selangor","TRG":"Terengganu","KUL":"W.P. Kuala Lumpur","LBN":"W.P. Labuan","PJY":"W.P. Putrajaya"},"ID":{"AC":"Daerah Istimewa Aceh","SU":"Sumatera Utara","SB":"Sumatera Barat","RI":"Riau","KR":"Kepulauan Riau","JA":"Jambi","SS":"Sumatera Selatan","BB":"Bangka Belitung","BE":"Bengkulu","LA":"Lampung","JK":"DKI Jakarta","JB":"Jawa Barat","BT":"Banten","JT":"Jawa Tengah","JI":"Jawa Timur","YO":"Daerah Istimewa Yogyakarta","BA":"Bali","NB":"Nusa Tenggara Barat","NT":"Nusa Tenggara Timur","KB":"Kalimantan Barat","KT":"Kalimantan Tengah","KI":"Kalimantan Timur","KS":"Kalimantan Selatan","KU":"Kalimantan Utara","SA":"Sulawesi Utara","ST":"Sulawesi Tengah","SG":"Sulawesi Tenggara","SR":"Sulawesi Barat","SN":"Sulawesi Selatan","GO":"Gorontalo","MA":"Maluku","MU":"Maluku Utara","PA":"Papua","PB":"Papua Barat"},"ZA":{"EC":"Eastern Cape","FS":"Free State","GP":"Gauteng","KZN":"KwaZulu-Natal","LP":"Limpopo","MP":"Mpumalanga","NC":"Northern Cape","NW":"North West","WC":"Western Cape"},"AU":{"ACT":"Australian Capital Territory","NSW":"New South Wales","NT":"Northern Territory","QLD":"Queensland","SA":"South Australia","TAS":"Tasmania","VIC":"Victoria","WA":"Western Australia"},"MX":{"Distrito Federal":"Distrito Federal","Jalisco":"Jalisco","Nuevo Leon":"Nuevo Le\u00f3n","Aguascalientes":"Aguascalientes","Baja California":"Baja California","Baja California Sur":"Baja California Sur","Campeche":"Campeche","Chiapas":"Chiapas","Chihuahua":"Chihuahua","Coahuila":"Coahuila","Colima":"Colima","Durango":"Durango","Guanajuato":"Guanajuato","Guerrero":"Guerrero","Hidalgo":"Hidalgo","Estado de Mexico":"Edo. de M\u00e9xico","Michoacan":"Michoac\u00e1n","Morelos":"Morelos","Nayarit":"Nayarit","Oaxaca":"Oaxaca","Puebla":"Puebla","Queretaro":"Quer\u00e9taro","Quintana Roo":"Quintana Roo","San Luis Potosi":"San Luis Potos\u00ed","Sinaloa":"Sinaloa","Sonora":"Sonora","Tabasco":"Tabasco","Tamaulipas":"Tamaulipas","Tlaxcala":"Tlaxcala","Veracruz":"Veracruz","Yucatan":"Yucat\u00e1n","Zacatecas":"Zacatecas"},"ES":{"C":"A Coruña","VI":"Araba\/Álava","AB":"Albacete","A":"Alicante","AL":"Almería","O":"Asturias","AV":"Ávila","BA":"Badajoz","PM":"Baleares","B":"Barcelona","BU":"Burgos","CC":"Cáceres","CA":"Cádiz","S":"Cantabria","CS":"Castellón","CE":"Ceuta","CR":"Ciudad Real","CO":"Córdoba","CU":"Cuenca","GI":"Girona","GR":"Granada","GU":"Guadalajara","SS":"Gipuzkoa","H":"Huelva","HU":"Huesca","J":"Jaén","LO":"La Rioja","GC":"Las Palmas","LE":"León","L":"Lleida","LU":"Lugo","M":"Madrid","MA":"Málaga","ML":"Melilla","MU":"Murcia","NA":"Navarra","OR":"Ourense","P":"Palencia","PO":"Pontevedra","SA":"Salamanca","TF":"Santa Cruz de Tenerife","SG":"Segovia","SE":"Sevilla","SO":"Soria","T":"Tarragona","TE":"Teruel","TO":"Toledo","V":"Valencia","VA":"Valladolid","BI":"Bizkaia","ZA":"Zamora","Z":"Zaragoza"},"IN":{"AP":"Andra Pradesh","AR":"Arunachal Pradesh","AS":"Assam","BR":"Bihar","CT":"Chhattisgarh","GA":"Goa","GJ":"Gujarat","HR":"Haryana","HP":"Himachal Pradesh","JK":"Jammu and Kashmir","JH":"Jharkhand","KA":"Karnataka","KL":"Kerala","MP":"Madhya Pradesh","MH":"Maharashtra","MN":"Manipur","ML":"Meghalaya","MZ":"Mizoram","NL":"Nagaland","OR":"Orissa","PB":"Punjab","RJ":"Rajasthan","SK":"Sikkim","TN":"Tamil Nadu","TS":"Telangana","TR":"Tripura","UK":"Uttarakhand","UP":"Uttar Pradesh","WB":"West Bengal","AN":"Andaman and Nicobar Islands","CH":"Chandigarh","DN":"Dadar and Nagar Haveli","DD":"Daman and Diu","DL":"Delhi","LD":"Lakshadeep","PY":"Pondicherry (Puducherry)"}},"ajaxurl":"https:\/\/cleanplates.com\/wp-admin\/admin-ajax.php","please_select_state":"-- Select State --"};
https://cleanplates.com/wp-content/plugins/memberpress/js/i18n.js
https://cleanplates.com/wp-includes/js/jquery/ui/core.min.js
https://cleanplates.com/wp-includes/js/jquery/ui/datepicker.min.js
jQuery(function(jQuery){jQuery.datepicker.setDefaults({"closeText":"Close","currentText":"Today","monthNames":["January","February","March","April","May","June","July","August","September","October","November","December"],"monthNamesShort":["Jan","Feb","Mar","Apr","May","Jun","Jul","Aug","Sep","Oct","Nov","Dec"],"nextText":"Next","prevText":"Previous","dayNames":["Sunday","Monday","Tuesday","Wednesday","Thursday","Friday","Saturday"],"dayNamesShort":["Sun","Mon","Tue","Wed","Thu","Fri","Sat"],"dayNamesMin":["S","M","T","W","T","F","S"],"dateFormat":"MM d, yy","firstDay":1,"isRTL":false});});
https://cleanplates.com/wp-content/plugins/memberpress/js/jquery-ui-timepicker-addon.js
var MeprDatePicker = {"translations":{"closeText":"Done","currentText":"Today","monthNamesShort":["Jan","Feb","Mar","Apr","May","Jun","Jul","Aug","Sep","Oct","Nov","Dec"],"dayNamesMin":["Su","Mo","Tu","We","Th","Fr","Sa"]},"timeFormat":"","dateFormat":"MM d, yy","showTime":""};
https://cleanplates.com/wp-content/plugins/memberpress/js/date_picker.js
var MeprSignup = {"coupon_nonce":"77ef22fdbe","spc_enabled":"1","spc_invoice":"1","no_compatible_pms":"There are no payment methods available that can purchase this product, please contact the site administrator or purchase it separately.","switch_pm_prompt":"It looks like your purchase requires %s. No problem! Just click below to switch.","switch_pm":"Switch to %s","cancel":"Cancel","warning_icon_url":"https:\/\/cleanplates.com\/wp-content\/plugins\/memberpress\/images\/mepr-notice-icon-error.png"};
https://cleanplates.com/wp-content/plugins/toolbox/src/uikit/js/uikit-icons.min.js
var PushlySDK = window.PushlySDK || [];
function pushly() { PushlySDK.push(arguments) }
pushly('load', {
domainKey: decodeURIComponent("i84DPRHUIod7WNMyqEXSpROsyv2hU2aZYrur"),
sw: "/wp-content/plugins/pushly/assets/js/pushly-sdk-worker.js.php",
swScope: "/wp-content/plugins/pushly/" });
/** DO NOT MODIFY THIS CODE**/
!function(_window, _document) {
var OB_ADV_ID = '00115c545f4ece0b9fad1739176d766745';
if (_window.obApi) {
var toArray = function(object) {
return Object.prototype.toString.call(object) === '[object Array]' ? object : [object];
};
_window.obApi.marketerId = toArray(_window.obApi.marketerId).concat(toArray(OB_ADV_ID));
return;
}
var api = _window.obApi = function() {
api.dispatch ? api.dispatch.apply(api, arguments) : api.queue.push(arguments);
};
api.version = '1.1';
api.loaded = true;
api.marketerId = OB_ADV_ID;
api.queue = [];
var tag = _document.createElement('script');
tag.async = true;
tag.src = '//amplify.outbrain.com/cp/obtp.js';
tag.type = 'text/javascript';
var script = _document.getElementsByTagName('script')[0];
script.parentNode.insertBefore(tag, script);
}(window, document);obApi('track', 'PAGE_VIEW');(function ($) {
$(document).ready(function() {
var contentContainer = $(".articleBody");
var paragraphs = contentContainer.find("p");if (paragraphs.length >= 2) {
// Create the <ins> element
var chatDiv = $('<ins class="direqt-embed" style="display: block; width: 100%" data-start-hint="faq" data-story-id="auto" data-bot-id="65f06f674337adcf907e29eb"></ins>')
.insertAfter(paragraphs.eq(1));// Create the <script> element using plain JavaScript
var scriptElement = document.createElement('script');
scriptElement.src = 'https://chat.direqt.ai/embed.js';
scriptElement.async = true;// Use plain JavaScript to insert the <script> element directly after the <ins> tag
// Convert chatDiv to a native DOM element to use native DOM methods
chatDiv.get(0).parentNode.insertBefore(scriptElement, chatDiv.get(0).nextSibling);
}
});
})(jQuery);
https://cdn.tpdads.com/configs/cleanplates.js
Skip to content Your Guide to Preserving Garlic This Winter (Plus Our Favorite Roasted Garlic Recipe) By Julie Laing
|
November 15, 2021
I love adding garlic to my cooking for its distinctive flavor (tricky breath issues aside). But because it tastes so great, it’s easy to forget its remarkable health benefits. The perks of eating garlic are numerous: garlic stimulates cells that fight viruses , it supports gut health, and it can help prevent diseases ranging from cancer to diabetes with its remarkable antioxidant and anti-inflammatory properties .
Read next: 7 Plant-Based Recipes Everyone Will Love
People have been ingesting garlic for its benefits since at least 1550 BCE, long before studies were being done or supplements were available. And research shows that home-cooked garlic holds onto the same antioxidant properties found in raw cloves, so almost any way you prepare it, garlic has the potential to boost your immunity.
Every fall, I plant more than 400 cloves of hard-neck garlic for a giant crop the following summer. What isn’t replanted the next fall, I store in several ways to use all winter. Whether you grow garlic in your own garden (or you simply buy a few heads at a time at the market), here are a few key ways to safely store it, along with my favorite way to eat it:
How to preserve garlic Make garlic cubes. When I’m harvesting garlic and separating cloves to replant, some always get nicked or lose their protective papery skin. If you ever have a few skin-free garlic cloves on your hands, mince them, pack them into an ice-cube tray, cover with olive oil, and freeze. Once the cubes are firm, pop them free and store them in a freezer-proof bag or container. I like to add them (still frozen) to a hot pan or stockpot; the oil layer defrosts before the minced garlic burns. Garlic that’s frozen in oil keeps for months, whereas garlic in oil at room temperature or stored for more than four days in the refrigerator is at risk for botulism.
Pickle it . It’s common to throw some garlic cloves into the brine when you pickle cucumbers, but often, they end up getting thrown away. Here’s the thing: these cloves aren’t just good for adding flavor to pickles; they’re delicious in their own right. You can drop whole pickled cloves into cocktails, mince or puree them for a pasta or dip, or slice them and serve in a salad.
Cure them. This one’s for the gardeners: Once the leaves start to yellow in midsummer, I like to pull all the plants and lay them in a single layer in a warm, dry place, avoiding direct sunlight and intense heat. When the leaves become crackling dry, cut off the tops, leaving about an inch above the bulb. When the neck is completely dry, cut off the roots and brush dirt from the papery skin. Store the heads in a dry, dark space in a temperature just above freezing.
Why I love roasting whole heads of garlic I love roasting whole heads of garlic; as they caramelize in their skins, becoming soft and golden, the cloves lose their sharp, raw bite. You can throw a head or two on the grill while you’re preparing a meal, or roast whole heads alongside other vegetables in a toaster oven. You can spread the creamy result on toast, stir into hummus, shake with a salad dressing — or, you can make this delicious, immunity-boosting soup that’s my go-to every winter:
Immunity-Boosting Garlic Soup Ingredients 2 T extra-virgin olive oil
1 T fresh or 1 t dried thyme
freshly ground black pepper to taste
Directions Wrap each whole head of garlic in foil. Bake for 15 to 25 minutes, until the papery skin begins to brown and the cloves are slightly soft. Let sit until cool enough to handle, then separate the cloves and unwrap or squeeze them from their skin. Set aside.
In a large stockpot, heat olive oil over medium heat. Add the onion and cook for 10 minutes, until onion begins to brown. Stir in the garlic, thyme, salt, and pepper, and then pour in the stock. Raise the heat to bring the soup to a boil, then lower it to simmer for 15 minutes. Taste and adjust the seasoning as needed.
Using an immersion or upright blender, blend the soup to your desired texture.
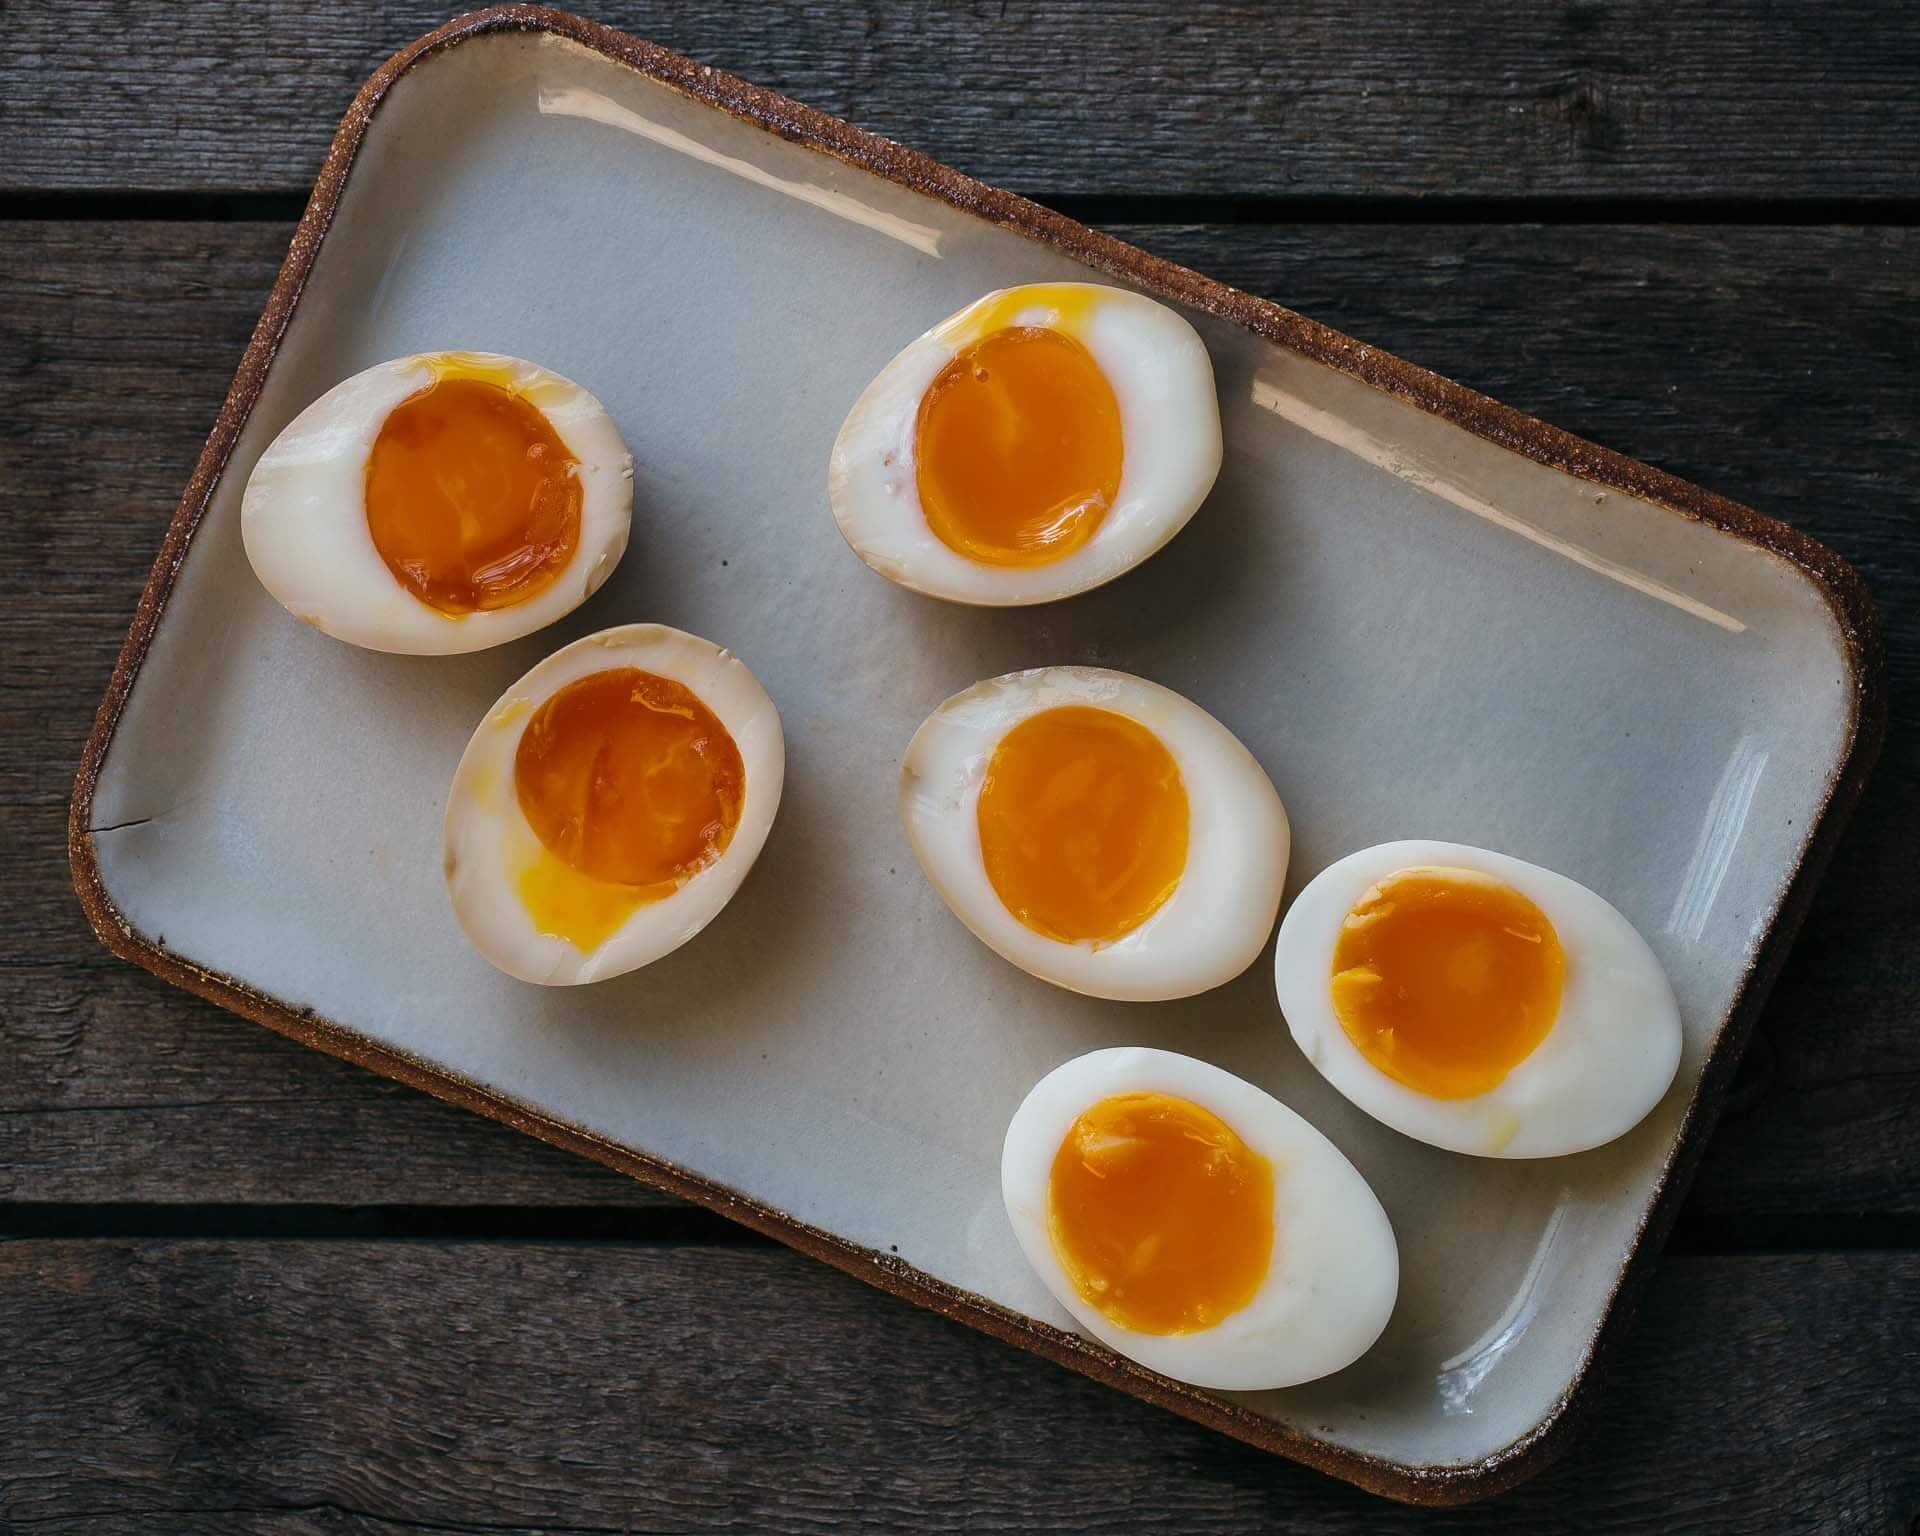
Temper the eggs: In a small bowl, use a wire whisk to beat the eggs to a uniform color. Whisk three or four spoonfuls of hot soup into the eggs until the mixture is warm. Remove the soup from the heat, and add the eggs in a thin stream, stirring continually with the whisk as you pour.
Sprinkle cheese to taste and serve immediately.
What our editors love right now
Be the first to know.
Sign Up Today
https://cleanplates.com/wp-content/plugins/memberpress/js/signup.js
// Create a new script element
var script = document.createElement('script');
const version = new Date().valueOf()
// Set the source attribute with the dynamic version
script.src = 'https://instaread.co/js/instaread_playerslug.min.js?version=' + version;
// Append the script to the document
document.head.appendChild(script);
// Define a function to be executed after the script is loaded
script.onload = function () {
const titleSlug = instareadPlayerTitleSlug(
document.querySelector("title").innerHTML
);
const article_url = instareadPlayerTitleSlug(document.location.href);
const instareadPlayerIframe = document.getElementById("instaread_iframe");
const publication = "cleanplates"
instareadPlayerIframe.setAttribute(
"src", `https://instaread.co/player?article=${titleSlug}&publication=${publication}&article_encoder=slugjs&article_key=titletag&version=${version}&article_url=${article_url}`
);
}
(function(w, d, s, id) {
w.PUBX=w.PUBX || {pub: "clean_plates", discover: false, lazy: true};
var js, pjs = d.getElementsByTagName(s)[0];
if (d.getElementById(id)) return;
js = d.createElement(s); js.id = id; js.async = true;
js.src = "https://main.pubexchange.com/loader.min.js";
pjs.parentNode.insertBefore(js, pjs);
}(window, document, "script", "pubexchange-jssdk"));
gform.initializeOnLoaded( function() {gformInitSpinner( 390934726, 'https://cleanplates.com/wp-content/plugins/gravityforms/images/spinner.svg', true );jQuery('#gform_ajax_frame_390934726').on('load',function(){var contents = jQuery(this).contents().find('*').html();var is_postback = contents.indexOf('GF_AJAX_POSTBACK') >= 0;if(!is_postback){return;}var form_content = jQuery(this).contents().find('#gform_wrapper_390934726');var is_confirmation = jQuery(this).contents().find('#gform_confirmation_wrapper_390934726').length > 0;var is_redirect = contents.indexOf('gformRedirect(){') >= 0;var is_form = form_content.length > 0 && ! is_redirect && ! is_confirmation;var mt = parseInt(jQuery('html').css('margin-top'), 10) + parseInt(jQuery('body').css('margin-top'), 10) + 100;if(is_form){jQuery('#gform_wrapper_390934726').html(form_content.html());if(form_content.hasClass('gform_validation_error')){jQuery('#gform_wrapper_390934726').addClass('gform_validation_error');} else {jQuery('#gform_wrapper_390934726').removeClass('gform_validation_error');}setTimeout( function() { /* delay the scroll by 50 milliseconds to fix a bug in chrome */ jQuery(document).scrollTop(jQuery('#gform_wrapper_390934726').offset().top - mt); }, 50 );if(window['gformInitDatepicker']) {gformInitDatepicker();}if(window['gformInitPriceFields']) {gformInitPriceFields();}var current_page = jQuery('#gform_source_page_number_8').val();gformInitSpinner( 390934726, 'https://cleanplates.com/wp-content/plugins/gravityforms/images/spinner.svg', true );jQuery(document).trigger('gform_page_loaded', [390934726, current_page]);window['gf_submitting_390934726'] = false;}else if(!is_redirect){var confirmation_content = jQuery(this).contents().find('.GF_AJAX_POSTBACK').html();if(!confirmation_content){confirmation_content = contents;}setTimeout(function(){jQuery('#gform_wrapper_390934726').replaceWith(confirmation_content);jQuery(document).scrollTop(jQuery('#gf_390934726').offset().top - mt);jQuery(document).trigger('gform_confirmation_loaded', [390934726]);window['gf_submitting_390934726'] = false;wp.a11y.speak(jQuery('#gform_confirmation_message_390934726').text());}, 50);}else{jQuery('#gform_390934726').append(contents);if(window['gformRedirect']) {gformRedirect();}}jQuery(document).trigger("gform_pre_post_render", [{ formId: "8", currentPage: "current_page", abort: function() { this.preventDefault(); } }]); if (event.defaultPrevented) { return; } const gformWrapperDiv = document.getElementById( "gform_wrapper_8" ); if ( gformWrapperDiv ) { const visibilitySpan = document.createElement( "span" ); visibilitySpan.id = "gform_visibility_test_8"; gformWrapperDiv.insertAdjacentElement( "afterend", visibilitySpan ); } const visibilityTestDiv = document.getElementById( "gform_visibility_test_8" ); let postRenderFired = false; function triggerPostRender() { if ( postRenderFired ) { return; } postRenderFired = true; jQuery( document ).trigger( 'gform_post_render', [8, current_page] ); gform.utils.trigger( { event: 'gform/postRender', native: false, data: { formId: 8, currentPage: current_page } } ); if ( visibilityTestDiv ) { visibilityTestDiv.parentNode.removeChild( visibilityTestDiv ); } } function debounce( func, wait, immediate ) { var timeout; return function() { var context = this, args = arguments; var later = function() { timeout = null; if ( !immediate ) func.apply( context, args ); }; var callNow = immediate && !timeout; clearTimeout( timeout ); timeout = setTimeout( later, wait ); if ( callNow ) func.apply( context, args ); }; } const debouncedTriggerPostRender = debounce( function() { triggerPostRender(); }, 200 ); if ( visibilityTestDiv && visibilityTestDiv.offsetParent === null ) { const observer = new MutationObserver( ( mutations ) => { mutations.forEach( ( mutation ) => { if ( mutation.type === 'attributes' && visibilityTestDiv.offsetParent !== null ) { debouncedTriggerPostRender(); observer.disconnect(); } }); }); observer.observe( document.body, { attributes: true, childList: false, subtree: true, attributeFilter: [ 'style', 'class' ], }); } else { triggerPostRender(); } } );} );
gform.initializeOnLoaded( function() {gformInitSpinner( 1166750959, 'https://cleanplates.com/wp-content/plugins/gravityforms/images/spinner.svg', true );jQuery('#gform_ajax_frame_1166750959').on('load',function(){var contents = jQuery(this).contents().find('*').html();var is_postback = contents.indexOf('GF_AJAX_POSTBACK') >= 0;if(!is_postback){return;}var form_content = jQuery(this).contents().find('#gform_wrapper_1166750959');var is_confirmation = jQuery(this).contents().find('#gform_confirmation_wrapper_1166750959').length > 0;var is_redirect = contents.indexOf('gformRedirect(){') >= 0;var is_form = form_content.length > 0 && ! is_redirect && ! is_confirmation;var mt = parseInt(jQuery('html').css('margin-top'), 10) + parseInt(jQuery('body').css('margin-top'), 10) + 100;if(is_form){jQuery('#gform_wrapper_1166750959').html(form_content.html());if(form_content.hasClass('gform_validation_error')){jQuery('#gform_wrapper_1166750959').addClass('gform_validation_error');} else {jQuery('#gform_wrapper_1166750959').removeClass('gform_validation_error');}setTimeout( function() { /* delay the scroll by 50 milliseconds to fix a bug in chrome */ jQuery(document).scrollTop(jQuery('#gform_wrapper_1166750959').offset().top - mt); }, 50 );if(window['gformInitDatepicker']) {gformInitDatepicker();}if(window['gformInitPriceFields']) {gformInitPriceFields();}var current_page = jQuery('#gform_source_page_number_8').val();gformInitSpinner( 1166750959, 'https://cleanplates.com/wp-content/plugins/gravityforms/images/spinner.svg', true );jQuery(document).trigger('gform_page_loaded', [1166750959, current_page]);window['gf_submitting_1166750959'] = false;}else if(!is_redirect){var confirmation_content = jQuery(this).contents().find('.GF_AJAX_POSTBACK').html();if(!confirmation_content){confirmation_content = contents;}setTimeout(function(){jQuery('#gform_wrapper_1166750959').replaceWith(confirmation_content);jQuery(document).scrollTop(jQuery('#gf_1166750959').offset().top - mt);jQuery(document).trigger('gform_confirmation_loaded', [1166750959]);window['gf_submitting_1166750959'] = false;wp.a11y.speak(jQuery('#gform_confirmation_message_1166750959').text());}, 50);}else{jQuery('#gform_1166750959').append(contents);if(window['gformRedirect']) {gformRedirect();}}jQuery(document).trigger("gform_pre_post_render", [{ formId: "8", currentPage: "current_page", abort: function() { this.preventDefault(); } }]); if (event.defaultPrevented) { return; } const gformWrapperDiv = document.getElementById( "gform_wrapper_8" ); if ( gformWrapperDiv ) { const visibilitySpan = document.createElement( "span" ); visibilitySpan.id = "gform_visibility_test_8"; gformWrapperDiv.insertAdjacentElement( "afterend", visibilitySpan ); } const visibilityTestDiv = document.getElementById( "gform_visibility_test_8" ); let postRenderFired = false; function triggerPostRender() { if ( postRenderFired ) { return; } postRenderFired = true; jQuery( document ).trigger( 'gform_post_render', [8, current_page] ); gform.utils.trigger( { event: 'gform/postRender', native: false, data: { formId: 8, currentPage: current_page } } ); if ( visibilityTestDiv ) { visibilityTestDiv.parentNode.removeChild( visibilityTestDiv ); } } function debounce( func, wait, immediate ) { var timeout; return function() { var context = this, args = arguments; var later = function() { timeout = null; if ( !immediate ) func.apply( context, args ); }; var callNow = immediate && !timeout; clearTimeout( timeout ); timeout = setTimeout( later, wait ); if ( callNow ) func.apply( context, args ); }; } const debouncedTriggerPostRender = debounce( function() { triggerPostRender(); }, 200 ); if ( visibilityTestDiv && visibilityTestDiv.offsetParent === null ) { const observer = new MutationObserver( ( mutations ) => { mutations.forEach( ( mutation ) => { if ( mutation.type === 'attributes' && visibilityTestDiv.offsetParent !== null ) { debouncedTriggerPostRender(); observer.disconnect(); } }); }); observer.observe( document.body, { attributes: true, childList: false, subtree: true, attributeFilter: [ 'style', 'class' ], }); } else { triggerPostRender(); } } );} );
(function(d,u,ac){var s=d.createElement('script');s.type='text/javascript';s.src='https://a.omappapi.com/app/js/api.min.js';s.async=true;s.dataset.user=u;s.dataset.campaign=ac;d.getElementsByTagName('head')[0].appendChild(s);})(document,163062,'ar3bevprumlagpkwgohv');
(function(d,u,ac){var s=d.createElement('script');s.type='text/javascript';s.src='https://a.omappapi.com/app/js/api.min.js';s.async=true;s.dataset.user=u;s.dataset.campaign=ac;d.getElementsByTagName('head')[0].appendChild(s);})(document,163062,'bch9zgxf3xlbqcbrurtg');
var ar3bevprumlagpkwgohv_shortcode = true;var bch9zgxf3xlbqcbrurtg_shortcode = true;
https://cleanplates.com/wp-content/plugins/bb-plugin/js/jquery.imagesloaded.min.js
https://cleanplates.com/wp-content/plugins/bb-plugin/js/jquery.ba-throttle-debounce.min.js
window.wpParselySiteId = 'cleanplates.com';
https://cleanplates.com/wp-content/plugins/wp-parsely/build/loader.js
https://cleanplates.com/wp-content/themes/bb-theme-child/js/footer.min.js
https://cleanplates.com/wp-content/plugins/page-links-to/dist/new-tab.js
(function(d){var s=d.createElement("script");s.type="text/javascript";s.src="https://a.omappapi.com/app/js/api.min.js";s.async=true;s.id="omapi-script";d.getElementsByTagName("head")[0].appendChild(s);})(document);
https://cleanplates.com/wp-content/plugins/bb-plugin/js/jquery.magnificpopup.min.js
https://cleanplates.com/wp-content/plugins/bb-plugin/js/jquery.fitvids.min.js
var themeopts = {"medium_breakpoint":"990","mobile_breakpoint":"641","scrollTopPosition":"800"};
https://cleanplates.com/wp-content/themes/bb-theme/js/theme.min.js
https://cleanplates.com/wp-includes/js/dist/vendor/react.min.js
https://cleanplates.com/wp-includes/js/dist/vendor/react-dom.min.js
https://cleanplates.com/wp-includes/js/dist/escape-html.min.js
https://cleanplates.com/wp-includes/js/dist/element.min.js
https://cleanplates.com/wp-content/plugins/clean-plates-timber/js/clean-plates.js
https://cleanplates.com/wp-includes/js/dist/dom-ready.min.js
https://cleanplates.com/wp-includes/js/dist/a11y.min.js
https://cleanplates.com/wp-content/plugins/gravityforms/js/jquery.json.min.js
var gform_i18n = {"datepicker":{"days":{"monday":"Mo","tuesday":"Tu","wednesday":"We","thursday":"Th","friday":"Fr","saturday":"Sa","sunday":"Su"},"months":{"january":"January","february":"February","march":"March","april":"April","may":"May","june":"June","july":"July","august":"August","september":"September","october":"October","november":"November","december":"December"},"firstDay":1,"iconText":"Select date"}};
var gf_legacy_multi = [];
var gform_gravityforms = {"strings":{"invalid_file_extension":"This type of file is not allowed. Must be one of the following:","delete_file":"Delete this file","in_progress":"in progress","file_exceeds_limit":"File exceeds size limit","illegal_extension":"This type of file is not allowed.","max_reached":"Maximum number of files reached","unknown_error":"There was a problem while saving the file on the server","currently_uploading":"Please wait for the uploading to complete","cancel":"Cancel","cancel_upload":"Cancel this upload","cancelled":"Cancelled"},"vars":{"images_url":"https:\/\/cleanplates.com\/wp-content\/plugins\/gravityforms\/images"}};
var gf_global = {"gf_currency_config":{"name":"U.S. Dollar","symbol_left":"$","symbol_right":"","symbol_padding":"","thousand_separator":",","decimal_separator":".","decimals":2,"code":"USD"},"base_url":"https:\/\/cleanplates.com\/wp-content\/plugins\/gravityforms","number_formats":[],"spinnerUrl":"https:\/\/cleanplates.com\/wp-content\/plugins\/gravityforms\/images\/spinner.svg","version_hash":"cd1c92821f8683535b0c1f366b1d8b12","strings":{"newRowAdded":"New row added.","rowRemoved":"Row removed","formSaved":"The form has been saved. The content contains the link to return and complete the form."}};
var gf_global = {"gf_currency_config":{"name":"U.S. Dollar","symbol_left":"$","symbol_right":"","symbol_padding":"","thousand_separator":",","decimal_separator":".","decimals":2,"code":"USD"},"base_url":"https:\/\/cleanplates.com\/wp-content\/plugins\/gravityforms","number_formats":[],"spinnerUrl":"https:\/\/cleanplates.com\/wp-content\/plugins\/gravityforms\/images\/spinner.svg","version_hash":"cd1c92821f8683535b0c1f366b1d8b12","strings":{"newRowAdded":"New row added.","rowRemoved":"Row removed","formSaved":"The form has been saved. The content contains the link to return and complete the form."}};
https://cleanplates.com/wp-content/plugins/gravityforms/js/gravityforms.min.js
https://cleanplates.com/wp-content/plugins/gravityforms/js/placeholders.jquery.min.js
https://cleanplates.com/wp-content/plugins/gravityforms/assets/js/dist/utils.min.js
https://cleanplates.com/wp-content/plugins/gravityforms/assets/js/dist/vendor-theme.min.js
var gform_theme_config = {"common":{"form":{"honeypot":{"version_hash":"cd1c92821f8683535b0c1f366b1d8b12"}}},"hmr_dev":"","public_path":"https:\/\/cleanplates.com\/wp-content\/plugins\/gravityforms\/assets\/js\/dist\/"};
https://cleanplates.com/wp-content/plugins/gravityforms/assets/js/dist/scripts-theme.min.js
https://cleanplates.com/wp-content/plugins/optinmonster/assets/dist/js/helper.min.js
jQuery('.soliloquy-container').removeClass('no-js');
gform.initializeOnLoaded( function() { jQuery(document).on('gform_post_render', function(event, formId, currentPage){if(formId == 8) {if(typeof Placeholders != 'undefined'){
Placeholders.enable();
}jQuery( "#gform_8" ).on( 'submit', function( event ) {
jQuery( '<input>' )
.attr( 'type', 'hidden' )
.attr( 'name', 'gf_zero_spam_key' )
.attr( 'value', 'IX0ESiTziYfmVNNQOMy3z9RHjgGf0VgF9I0IpzL8Qa87yM0lRradVjPFvaF8FS1T' )
.attr( 'autocomplete', 'new-password' )
.appendTo( jQuery( this ) );
} );} } );jQuery(document).on('gform_post_conditional_logic', function(event, formId, fields, isInit){} ) } );
gform.initializeOnLoaded( function() {jQuery(document).trigger("gform_pre_post_render", [{ formId: "8", currentPage: "1", abort: function() { this.preventDefault(); } }]); if (event.defaultPrevented) { return; } const gformWrapperDiv = document.getElementById( "gform_wrapper_8" ); if ( gformWrapperDiv ) { const visibilitySpan = document.createElement( "span" ); visibilitySpan.id = "gform_visibility_test_8"; gformWrapperDiv.insertAdjacentElement( "afterend", visibilitySpan ); } const visibilityTestDiv = document.getElementById( "gform_visibility_test_8" ); let postRenderFired = false; function triggerPostRender() { if ( postRenderFired ) { return; } postRenderFired = true; jQuery( document ).trigger( 'gform_post_render', [8, 1] ); gform.utils.trigger( { event: 'gform/postRender', native: false, data: { formId: 8, currentPage: 1 } } ); if ( visibilityTestDiv ) { visibilityTestDiv.parentNode.removeChild( visibilityTestDiv ); } } function debounce( func, wait, immediate ) { var timeout; return function() { var context = this, args = arguments; var later = function() { timeout = null; if ( !immediate ) func.apply( context, args ); }; var callNow = immediate && !timeout; clearTimeout( timeout ); timeout = setTimeout( later, wait ); if ( callNow ) func.apply( context, args ); }; } const debouncedTriggerPostRender = debounce( function() { triggerPostRender(); }, 200 ); if ( visibilityTestDiv && visibilityTestDiv.offsetParent === null ) { const observer = new MutationObserver( ( mutations ) => { mutations.forEach( ( mutation ) => { if ( mutation.type === 'attributes' && visibilityTestDiv.offsetParent !== null ) { debouncedTriggerPostRender(); observer.disconnect(); } }); }); observer.observe( document.body, { attributes: true, childList: false, subtree: true, attributeFilter: [ 'style', 'class' ], }); } else { triggerPostRender(); } } );
var omapi_localized = {
ajax: 'https://cleanplates.com/wp-admin/admin-ajax.php?optin-monster-ajax-route=1',
nonce: 'b1ded25f1b',
slugs:
{"ar3bevprumlagpkwgohv":{"slug":"ar3bevprumlagpkwgohv","mailpoet":false},"bch9zgxf3xlbqcbrurtg":{"slug":"bch9zgxf3xlbqcbrurtg","mailpoet":false}} };
var omapi_data = {"object_id":29635,"object_key":"post","object_type":"post","term_ids":[3173,3032,173,3973],"wp_json":"https:\/\/cleanplates.com\/wp-json","wc_active":false,"edd_active":false,"nonce":"43e346caed"};
var wpAjaxUrl='https://cleanplates.com/wp-admin/admin-ajax.php';var flBuilderUrl='https://cleanplates.com/wp-content/plugins/bb-plugin/';var FLBuilderLayoutConfig={anchorLinkAnimations:{duration:1000,easing:'swing',offset:100},paths:{pluginUrl:'https://cleanplates.com/wp-content/plugins/bb-plugin/',wpAjaxUrl:'https://cleanplates.com/wp-admin/admin-ajax.php'},breakpoints:{small:641,medium:961,large:1200},waypoint:{offset:80}};(function($){if(typeof FLBuilderLayout!='undefined'){return;}
FLBuilderLayout={init:function(){FLBuilderLayout._destroy();FLBuilderLayout._initClasses();FLBuilderLayout._initBackgrounds();FLBuilderLayout._initRowShapeLayerHeight();if(0===$('.fl-builder-edit').length){FLBuilderLayout._initModuleAnimations();FLBuilderLayout._initAnchorLinks();FLBuilderLayout._initHash();FLBuilderLayout._initForms();FLBuilderLayout._reorderMenu();}},refreshGalleries:function(element){var $element='undefined'==typeof element?$('body'):$(element),mfContent=$element.find('.fl-mosaicflow-content'),wmContent=$element.find('.fl-gallery'),mfObject=null;if(mfContent){mfObject=mfContent.data('mosaicflow');if(mfObject){mfObject.columns=$([]);mfObject.columnsHeights=[];mfContent.data('mosaicflow',mfObject);mfContent.mosaicflow('refill');}}
if(wmContent){wmContent.trigger('refreshWookmark');}},refreshGridLayout:function(element){var $element='undefined'==typeof element?$('body'):$(element),msnryContent=$element.find('.masonry');if(msnryContent.length){msnryContent.masonry('layout');}},reloadSlider:function(content){var $content='undefined'==typeof content?$('body'):$(content);if($content.find('.bx-viewport > div').length>0){$.each($content.find('.bx-viewport > div'),function(key,slider){setTimeout(function(){$(slider).data('bxSlider').reloadSlider();},100);});}},resizeAudio:function(element){var $element='undefined'==typeof element?$('body'):$(element),audioPlayers=$element.find('.wp-audio-shortcode.mejs-audio'),player=null,mejsPlayer=null,rail=null,railWidth=400;if(audioPlayers.length&&typeof mejs!=='undefined'){audioPlayers.each(function(){player=$(this);mejsPlayer=mejs.players[player.attr('id')];rail=player.find('.mejs-controls .mejs-time-rail');var innerMejs=player.find('.mejs-inner'),total=player.find('.mejs-controls .mejs-time-total');if(typeof mejsPlayer!=='undefined'){railWidth=Math.ceil(player.width()*0.8);if(innerMejs.length){rail.css('width',railWidth+'px!important');mejsPlayer.options.autosizeProgress=true;setTimeout(function(){mejsPlayer.setControlsSize();},50);player.find('.mejs-inner').css({visibility:'visible',height:'inherit'});}}});}},preloadAudio:function(element){var $element='undefined'==typeof element?$('body'):$(element),contentWrap=$element.closest('.fl-accordion-item'),audioPlayers=$element.find('.wp-audio-shortcode.mejs-audio');if(!contentWrap.hasClass('fl-accordion-item-active')&&audioPlayers.find('.mejs-inner').length){audioPlayers.find('.mejs-inner').css({visibility:'hidden',height:0});}},resizeSlideshow:function(){if(typeof YUI!=='undefined'){YUI().use('node-event-simulate',function(Y){Y.one(window).simulate("resize");});}},reloadGoogleMap:function(element){var $element='undefined'==typeof element?$('body'):$(element),googleMap=$element.find('iframe[src*="google.com/maps"]');if(googleMap.length){googleMap.attr('src',function(i,val){return val;});}},_destroy:function(){var win=$(window);win.off('scroll.fl-bg-parallax');win.off('resize.fl-bg-video');},_isTouch:function(){if(('ontouchstart'in window)||(window.DocumentTouch&&document instanceof DocumentTouch)){return true;}
return false;},_isMobile:function(){return/Mobile|Android|Silk\/|Kindle|BlackBerry|Opera Mini|Opera Mobi|webOS/i.test(navigator.userAgent);},_initClasses:function(){var body=$('body'),ua=navigator.userAgent;if(!body.hasClass('archive')&&$('.fl-builder-content-primary').length>0){body.addClass('fl-builder');}
if(FLBuilderLayout._isTouch()){body.addClass('fl-builder-touch');}
if(FLBuilderLayout._isMobile()){body.addClass('fl-builder-mobile');}
if($(window).width()<FLBuilderLayoutConfig.breakpoints.small){body.addClass('fl-builder-breakpoint-small');}
if($(window).width()>FLBuilderLayoutConfig.breakpoints.small&&$(window).width()<FLBuilderLayoutConfig.breakpoints.medium){body.addClass('fl-builder-breakpoint-medium');}
if($(window).width()>FLBuilderLayoutConfig.breakpoints.medium&&$(window).width()<FLBuilderLayoutConfig.breakpoints.large){body.addClass('fl-builder-breakpoint-large');}
if($(window).width()>FLBuilderLayoutConfig.breakpoints.large){body.addClass('fl-builder-breakpoint-default');}
if(ua.indexOf('Trident/7.0')>-1&&ua.indexOf('rv:11.0')>-1){body.addClass('fl-builder-ie-11');}},_initBackgrounds:function(){var win=$(window);if($('.fl-row-bg-parallax').length>0&&!FLBuilderLayout._isMobile()){FLBuilderLayout._scrollParallaxBackgrounds();FLBuilderLayout._initParallaxBackgrounds();win.on('resize.fl-bg-parallax',FLBuilderLayout._initParallaxBackgrounds);win.on('scroll.fl-bg-parallax',FLBuilderLayout._scrollParallaxBackgrounds);}
if($('.fl-bg-video').length>0){FLBuilderLayout._initBgVideos();FLBuilderLayout._resizeBgVideos();var resizeBGTimer=null;win.on('resize.fl-bg-video',function(e){clearTimeout(resizeBGTimer);resizeBGTimer=setTimeout(function(){FLBuilderLayout._resizeBgVideos(e);},100);});}},_initParallaxBackgrounds:function(){$('.fl-row-bg-parallax').each(FLBuilderLayout._initParallaxBackground);},_initParallaxBackground:function(){var row=$(this),content=row.find('> .fl-row-content-wrap'),winWidth=$(window).width(),screenSize='',imageSrc={default:'',medium:'',responsive:'',};imageSrc.default=row.data('parallax-image')||'';imageSrc.medium=row.data('parallax-image-medium')||imageSrc.default;imageSrc.responsive=row.data('parallax-image-responsive')||imageSrc.medium;if(winWidth>FLBuilderLayoutConfig.breakpoints.medium){screenSize='default';}else if(winWidth>FLBuilderLayoutConfig.breakpoints.small&&winWidth<=FLBuilderLayoutConfig.breakpoints.medium){screenSize='medium';}else if(winWidth<=FLBuilderLayoutConfig.breakpoints.small){screenSize='responsive';}
content.css('background-image','url('+imageSrc[screenSize]+')');row.data('current-image-loaded',screenSize);},_scrollParallaxBackgrounds:function(){$('.fl-row-bg-parallax').each(FLBuilderLayout._scrollParallaxBackground);},_scrollParallaxBackground:function(){var win=$(window),row=$(this),content=row.find('> .fl-row-content-wrap'),speed=row.data('parallax-speed'),offset=content.offset(),yPos=-((win.scrollTop()-offset.top)/ speed),initialOffset=(row.data('parallax-offset')!=null)?row.data('parallax-offset'):0,totalOffset=yPos-initialOffset;content.css('background-position','center '+totalOffset+'px');},_initBgVideos:function(){$('.fl-bg-video').each(FLBuilderLayout._initBgVideo);},_initBgVideo:function(){var wrap=$(this),width=wrap.data('width'),height=wrap.data('height'),mp4=wrap.data('mp4'),youtube=wrap.data('youtube'),vimeo=wrap.data('vimeo'),mp4Type=wrap.data('mp4-type'),webm=wrap.data('webm'),webmType=wrap.data('webm-type'),fallback=wrap.data('fallback'),loaded=wrap.data('loaded'),videoMobile=wrap.data('video-mobile'),fallbackTag='',videoTag=null,mp4Tag=null,webmTag=null;if(loaded){return;}
videoTag=$('<video autoplay loop muted playsinline></video>');if('undefined'!=typeof fallback&&''!=fallback){videoTag.attr('poster','data:image/gif;base64,R0lGODlhAQABAIAAAAAAAP///yH5BAEAAAAALAAAAAABAAEAAAIBRAA7')
videoTag.css({backgroundImage:'url("'+fallback+'")',backgroundColor:'transparent',backgroundRepeat:'no-repeat',backgroundSize:'cover',backgroundPosition:'center center',})}
if('undefined'!=typeof mp4&&''!=mp4){mp4Tag=$('<source />');mp4Tag.attr('src',mp4);mp4Tag.attr('type',mp4Type);videoTag.append(mp4Tag);}
if('undefined'!=typeof webm&&''!=webm){webmTag=$('<source />');webmTag.attr('src',webm);webmTag.attr('type',webmType);videoTag.append(webmTag);}
if(!FLBuilderLayout._isMobile()||(FLBuilderLayout._isMobile()&&"yes"==videoMobile)){if('undefined'!=typeof youtube){FLBuilderLayout._initYoutubeBgVideo.apply(this);}
else if('undefined'!=typeof vimeo){FLBuilderLayout._initVimeoBgVideo.apply(this);}
else{wrap.append(videoTag);}}
else{videoTag.attr('src','')
wrap.append(videoTag);}
wrap.data('loaded',true);},_initYoutubeBgVideo:function(){var playerWrap=$(this),videoId=playerWrap.data('video-id'),videoPlayer=playerWrap.find('.fl-bg-video-player'),enableAudio=playerWrap.data('enable-audio'),audioButton=playerWrap.find('.fl-bg-video-audio'),startTime='undefined'!==typeof playerWrap.data('start')?playerWrap.data('start'):0,startTime='undefined'!==typeof playerWrap.data('t')&&startTime===0?playerWrap.data('t'):startTime,endTime='undefined'!==typeof playerWrap.data('end')?playerWrap.data('end'):0,loop='undefined'!==typeof playerWrap.data('loop')?playerWrap.data('loop'):1,stateCount=0,player,fallback_showing;if(videoId){fallback=playerWrap.data('fallback')||false
if(fallback){playerWrap.find('iframe').remove()
fallbackTag=$('<div></div>');fallbackTag.addClass('fl-bg-video-fallback');fallbackTag.css('background-image','url('+playerWrap.data('fallback')+')');fallbackTag.css('background-size','cover');fallbackTag.css('transition','background-image 1s')
playerWrap.append(fallbackTag);fallback_showing=true;}
FLBuilderLayout._onYoutubeApiReady(function(YT){setTimeout(function(){player=new YT.Player(videoPlayer[0],{videoId:videoId,events:{onReady:function(event){if("no"===enableAudio||FLBuilderLayout._isMobile()){event.target.mute();}
else if("yes"===enableAudio&&event.target.isMuted){event.target.unMute();}
playerWrap.data('YTPlayer',player);FLBuilderLayout._resizeYoutubeBgVideo.apply(playerWrap);event.target.playVideo();if(audioButton.length>0&&!FLBuilderLayout._isMobile()){audioButton.on('click',{button:audioButton,player:player},FLBuilderLayout._toggleBgVideoAudio);}},onStateChange:function(event){if(event.data===1){if(fallback_showing){$('.fl-bg-video-fallback').css('background-image','url(data:image/gif;base64,R0lGODlhAQABAIAAAAAAAP///yH5BAEAAAAALAAAAAABAAEAAAIBRAA7)')}}
if(stateCount<4){stateCount++;}
if(stateCount>1&&(-1===event.data||2===event.data)&&"yes"===enableAudio){player.mute();player.playVideo();audioButton.show();}
if(event.data===YT.PlayerState.ENDED&&1===loop){if(startTime>0){player.seekTo(startTime);}
else{player.playVideo();}}},onError:function(event){console.info('YT Error: '+event.data)
FLBuilderLayout._onErrorYoutubeVimeo(playerWrap)}},playerVars:{playsinline:FLBuilderLayout._isMobile()?1:0,controls:0,showinfo:0,rel:0,start:startTime,end:endTime,}});},1);});}},_onErrorYoutubeVimeo:function(playerWrap){fallback=playerWrap.data('fallback')||false
if(!fallback){return false;}
playerWrap.find('iframe').remove()
fallbackTag=$('<div></div>');fallbackTag.addClass('fl-bg-video-fallback');fallbackTag.css('background-image','url('+playerWrap.data('fallback')+')');playerWrap.append(fallbackTag);},_onYoutubeApiReady:function(callback){if(window.YT&&YT.loaded){callback(YT);}else{setTimeout(function(){FLBuilderLayout._onYoutubeApiReady(callback);},350);}},_initVimeoBgVideo:function(){var playerWrap=$(this),videoId=playerWrap.data('video-id'),videoPlayer=playerWrap.find('.fl-bg-video-player'),enableAudio=playerWrap.data('enable-audio'),audioButton=playerWrap.find('.fl-bg-video-audio'),player,width=playerWrap.outerWidth(),ua=navigator.userAgent;if(typeof Vimeo!=='undefined'&&videoId){player=new Vimeo.Player(videoPlayer[0],{id:videoId,loop:true,title:false,portrait:false,background:true,autopause:false,muted:true});playerWrap.data('VMPlayer',player);if("no"===enableAudio){player.setVolume(0);}
else if("yes"===enableAudio){if(ua.indexOf("Safari")>-1||ua.indexOf("Chrome")>-1||ua.indexOf("Firefox")>-1){player.setVolume(0);audioButton.show();}
else{player.setVolume(1);}}
player.play().catch(function(error){FLBuilderLayout._onErrorYoutubeVimeo(playerWrap)});if(audioButton.length>0){audioButton.on('click',{button:audioButton,player:player},FLBuilderLayout._toggleBgVideoAudio);}}},_toggleBgVideoAudio:function(e){var player=e.data.player,control=e.data.button.find('.fl-audio-control');if(control.hasClass('fa-volume-off')){control.removeClass('fa-volume-off').addClass('fa-volume-up');e.data.button.find('.fa-times').hide();if('function'===typeof player.unMute){player.unMute();}
else{player.setVolume(1);}}
else{control.removeClass('fa-volume-up').addClass('fa-volume-off');e.data.button.find('.fa-times').show();if('function'===typeof player.unMute){player.mute();}
else{player.setVolume(0);}}},_videoBgSourceError:function(e){var source=$(e.target),wrap=source.closest('.fl-bg-video'),vid=wrap.find('video'),fallback=wrap.data('fallback'),fallbackTag='';source.remove();if(vid.find('source').length){return;}else if(''!==fallback){fallbackTag=$('<div></div>');fallbackTag.addClass('fl-bg-video-fallback');fallbackTag.css('background-image','url('+fallback+')');wrap.append(fallbackTag);vid.remove();}},_resizeBgVideos:function(){$('.fl-bg-video').each(function(){FLBuilderLayout._resizeBgVideo.apply(this);if($(this).parent().find('img').length>0){$(this).parent().imagesLoaded($.proxy(FLBuilderLayout._resizeBgVideo,this));}});},_resizeBgVideo:function(){if(0===$(this).find('video').length&&0===$(this).find('iframe').length){return;}
var wrap=$(this),wrapHeight=wrap.outerHeight(),wrapWidth=wrap.outerWidth(),vid=wrap.find('video'),vidHeight=wrap.data('height'),vidWidth=wrap.data('width'),newWidth=wrapWidth,newHeight=Math.round(vidHeight*wrapWidth/vidWidth),newLeft=0,newTop=0,iframe=wrap.find('iframe'),isRowFullHeight=$(this).closest('.fl-row-bg-video').hasClass('fl-row-full-height'),vidCSS={top:'50%',left:'50%',transform:'translate(-50%,-50%)',};if(vid.length){if(vidHeight===''||typeof vidHeight==='undefined'||vidWidth===''||typeof vidWidth==='undefined'){vid.css({'left':'0px','top':'0px','width':newWidth+'px'});vid.on('loadedmetadata',FLBuilderLayout._resizeOnLoadedMeta);return;}
if(!isRowFullHeight){if(newHeight<wrapHeight){newHeight=wrapHeight;newLeft=-((newWidth-wrapWidth)/ 2);newWidth=vidHeight?Math.round(vidWidth*wrapHeight/vidHeight):newWidth;}
else{newTop=-((newHeight-wrapHeight)/2);}
vidCSS={left:newLeft+'px',top:newTop+'px',height:newHeight+'px',width:newWidth+'px',}}
vid.css(vidCSS);}
else if(iframe.length){if(typeof wrap.data('youtube')!=='undefined'){FLBuilderLayout._resizeYoutubeBgVideo.apply(this);}}},_resizeOnLoadedMeta:function(){var video=$(this),wrapHeight=video.parent().outerHeight(),wrapWidth=video.parent().outerWidth(),vidWidth=video[0].videoWidth,vidHeight=video[0].videoHeight,newHeight=Math.round(vidHeight*wrapWidth/vidWidth),newWidth=wrapWidth,newLeft=0,newTop=0;if(newHeight<wrapHeight){newHeight=wrapHeight;newWidth=Math.round(vidWidth*wrapHeight/vidHeight);newLeft=-((newWidth-wrapWidth)/2);}
else{newTop=-((newHeight-wrapHeight)/2);}
video.parent().data('width',vidWidth);video.parent().data('height',vidHeight);video.css({'left':newLeft+'px','top':newTop+'px','width':newWidth+'px','height':newHeight+'px'});},_resizeYoutubeBgVideo:function(){var wrap=$(this),wrapWidth=wrap.outerWidth(),wrapHeight=wrap.outerHeight(),player=wrap.data('YTPlayer'),video=player?player.getIframe():null,aspectRatioSetting='16:9',aspectRatioArray=aspectRatioSetting.split(':'),aspectRatio=aspectRatioArray[0]/ aspectRatioArray[1],ratioWidth=wrapWidth / aspectRatio,ratioHeight=wrapHeight*aspectRatio,isWidthFixed=wrapWidth / wrapHeight>aspectRatio,width=isWidthFixed?wrapWidth:ratioHeight,height=isWidthFixed?ratioWidth:wrapHeight;if(video){$(video).width(width).height(height);}},_initModuleAnimations:function(){if(typeof jQuery.fn.waypoint!=='undefined'){$('.fl-animation').each(function(){var node=$(this),nodeTop=node.offset().top,winHeight=$(window).height(),bodyHeight=$('body').height(),waypoint=FLBuilderLayoutConfig.waypoint,offset='80%';if(typeof waypoint.offset!==undefined){offset=FLBuilderLayoutConfig.waypoint.offset+'%';}
if(bodyHeight-nodeTop<winHeight*0.2){offset='100%';}
node.waypoint({offset:offset,handler:FLBuilderLayout._doModuleAnimation});});}},_doModuleAnimation:function(){var module='undefined'==typeof this.element?$(this):$(this.element),delay=parseFloat(module.data('animation-delay')),duration=parseFloat(module.data('animation-duration'));if(!isNaN(duration)){module.css('animation-duration',duration+'s');}
if(!isNaN(delay)&&delay>0){setTimeout(function(){module.addClass('fl-animated');},delay*1000);}else{setTimeout(function(){module.addClass('fl-animated');},1);}},_initHash:function(){var hash=window.location.hash.replace('#','').split('/').shift(),element=null,tabs=null,responsiveLabel=null,tabIndex=null,label=null;if(''!==hash){try{element=$('#'+hash);if(element.length>0){if(element.hasClass('fl-accordion-item')){setTimeout(function(){element.find('.fl-accordion-button').trigger('click');},100);}
if(element.hasClass('fl-tabs-panel')){setTimeout(function(){tabs=element.closest('.fl-tabs');responsiveLabel=element.find('.fl-tabs-panel-label');tabIndex=responsiveLabel.data('index');label=tabs.find('.fl-tabs-labels .fl-tabs-label[data-index='+tabIndex+']');label[0].click();FLBuilderLayout._scrollToElement(element);},100);}}}
catch(e){}}},_initAnchorLinks:function(){$('a').each(FLBuilderLayout._initAnchorLink);},_initAnchorLink:function(){var link=$(this),href=link.attr('href'),loc=window.location,id=null,element=null,flNode=false;if('undefined'!=typeof href&&href.indexOf('#')>-1&&link.closest('svg').length<1){if(loc.pathname.replace(/^\//,'')==this.pathname.replace(/^\//,'')&&loc.hostname==this.hostname){try{id=href.split('#').pop();if(!id){return;}
element=$('#'+id);if(element.length>0){flNode=element.hasClass('fl-row')||element.hasClass('fl-col')||element.hasClass('fl-module');if(!element.hasClass('fl-no-scroll')&&(link.hasClass('fl-scroll-link')||flNode)){$(link).on('click',FLBuilderLayout._scrollToElementOnLinkClick);}
if(element.hasClass('fl-accordion-item')){$(link).on('click',FLBuilderLayout._scrollToAccordionOnLinkClick);}
if(element.hasClass('fl-tabs-panel')){$(link).on('click',FLBuilderLayout._scrollToTabOnLinkClick);}}}
catch(e){}}}},_scrollToElementOnLinkClick:function(e,callback){var element=$('#'+$(this).attr('href').split('#').pop());FLBuilderLayout._scrollToElement(element,callback);e.preventDefault();},_scrollToElement:function(element,callback){var config=FLBuilderLayoutConfig.anchorLinkAnimations,dest=0,win=$(window),doc=$(document);if(element.length>0){if('fixed'===element.css('position')||'fixed'===element.parent().css('position')){dest=element.position().top;}
else if(element.offset().top>doc.height()-win.height()){dest=doc.height()-win.height();}
else{dest=element.offset().top-config.offset;}
$('html, body').animate({scrollTop:dest},config.duration,config.easing,function(){if('undefined'!=typeof callback){callback();}
if(undefined!=element.attr('id')){if(history.pushState){history.pushState(null,null,'#'+element.attr('id'));}
else{window.location.hash=element.attr('id');}}});}},_scrollToAccordionOnLinkClick:function(e){var element=$('#'+$(this).attr('href').split('#').pop());if(element.length>0){var callback=function(){if(element){element.find('.fl-accordion-button').trigger('click');element=false;}};FLBuilderLayout._scrollToElementOnLinkClick.call(this,e,callback);}},_scrollToTabOnLinkClick:function(e){var element=$('#'+$(this).attr('href').split('#').pop()),tabs=null,label=null,responsiveLabel=null;if(element.length>0){tabs=element.closest('.fl-tabs');responsiveLabel=element.find('.fl-tabs-panel-label');tabIndex=responsiveLabel.data('index');label=tabs.find('.fl-tabs-labels .fl-tabs-label[data-index='+tabIndex+']');if(responsiveLabel.is(':visible')){var callback=function(){if(element){responsiveLabel.trigger($.Event('click',{which:1}));}};FLBuilderLayout._scrollToElementOnLinkClick.call(this,e,callback);}
else{label[0].click();FLBuilderLayout._scrollToElement(element);}
e.preventDefault();}},_initForms:function(){if(!FLBuilderLayout._hasPlaceholderSupport){$('.fl-form-field input').each(FLBuilderLayout._initFormFieldPlaceholderFallback);}
$('.fl-form-field input').on('focus',FLBuilderLayout._clearFormFieldError);},_hasPlaceholderSupport:function(){var input=document.createElement('input');return'undefined'!=input.placeholder;},_initFormFieldPlaceholderFallback:function(){var field=$(this),val=field.val(),placeholder=field.attr('placeholder');if('undefined'!=placeholder&&''===val){field.val(placeholder);field.on('focus',FLBuilderLayout._hideFormFieldPlaceholderFallback);field.on('blur',FLBuilderLayout._showFormFieldPlaceholderFallback);}},_hideFormFieldPlaceholderFallback:function(){var field=$(this),val=field.val(),placeholder=field.attr('placeholder');if(val==placeholder){field.val('');}},_showFormFieldPlaceholderFallback:function(){var field=$(this),val=field.val(),placeholder=field.attr('placeholder');if(''===val){field.val(placeholder);}},_clearFormFieldError:function(){var field=$(this);field.removeClass('fl-form-error');field.siblings('.fl-form-error-message').hide();},_initRowShapeLayerHeight:function(){FLBuilderLayout._adjustRowShapeLayerHeight();$(window).on('resize',FLBuilderLayout._adjustRowShapeLayerHeight);},_adjustRowShapeLayerHeight:function(){var rowShapeLayers=$('.fl-builder-shape-layer');$(rowShapeLayers).each(function(index){var rowShapeLayer=$(this),shape=$(rowShapeLayer).find('svg'),height=shape.height(),excludeShapes='.fl-builder-shape-circle, .fl-builder-shape-dot-cluster, .fl-builder-shape-topography, .fl-builder-shape-rect';if(!rowShapeLayer.is(excludeShapes)){$(shape).css('height',Math.ceil(height));}});},_string_to_slug:function(str){str=str.replace(/^\s+|\s+$/g,'');if('undefined'==typeof window._fl_string_to_slug_regex){regex=new RegExp('[^a-zA-Z0-9\'":() !.,-_|]','g');}else{regex=new RegExp('[^'+window._fl_string_to_slug_regex+'\'":\(\) !.,-_|\\\p{Letter}]','ug');}
str=str.replace(regex,'').replace(/\s+/g,' ');return str;},_reorderMenu:function(){if($('#wp-admin-bar-fl-builder-frontend-edit-link-default li').length>1){$('#wp-admin-bar-fl-builder-frontend-duplicate-link').appendTo('#wp-admin-bar-fl-builder-frontend-edit-link-default').css('padding-top','5px').css('border-top','2px solid #1D2125').css('margin-top','5px')}}};$(function(){FLBuilderLayout.init();});})(jQuery);jQuery(window).scroll(function(){if(jQuery(this).scrollTop()>90){jQuery('.leaderboard').slideUp("slow");}
else{jQuery('.leaderboard').slideDown("slow");}});(function($){FLThemeBuilderHeaderLayout={win:null,body:null,header:null,overlay:false,hasAdminBar:false,stickyOn:'',breakpointWidth:0,init:function(){var editing=$('html.fl-builder-edit').length,header=$('.fl-builder-content[data-type=header]'),menuModule=header.find('.fl-module-menu'),breakpoint=null;if(!editing&&header.length){header.imagesLoaded($.proxy(function(){this.win=$(window);this.body=$('body');this.header=header.eq(0);this.overlay=!!Number(header.attr('data-overlay'));this.hasAdminBar=!!$('body.admin-bar').length;this.stickyOn=this.header.data('sticky-on');breakpoint=this.header.data('sticky-breakpoint');if(''==this.stickyOn){if(typeof FLBuilderLayoutConfig.breakpoints[breakpoint]!==undefined){this.breakpointWidth=FLBuilderLayoutConfig.breakpoints[breakpoint];}
else{this.breakpointWidth=FLBuilderLayoutConfig.breakpoints.medium;}}
if(Number(header.attr('data-sticky'))){this.header.data('original-top',this.header.offset().top);this.win.on('resize',$.throttle(500,$.proxy(this._initSticky,this)));this._initSticky();}},this));}},_initSticky:function(e){var header=$('.fl-builder-content[data-type=header]'),windowSize=this.win.width(),makeSticky=false;makeSticky=this._makeWindowSticky(windowSize);if(makeSticky||(this.breakpointWidth>0&&windowSize>=this.breakpointWidth)){this.win.on('scroll.fl-theme-builder-header-sticky',$.proxy(this._doSticky,this));if(e&&'resize'===e.type){if(this.header.hasClass('fl-theme-builder-header-sticky')){this._doSticky(e);}
this._adjustStickyHeaderWidth();}
if(Number(header.attr('data-shrink'))){this.header.data('original-height',this.header.outerHeight());this.win.on('resize',$.throttle(500,$.proxy(this._initShrink,this)));this._initShrink();}
this._initFlyoutMenuFix(e);}else{this.win.off('scroll.fl-theme-builder-header-sticky');this.win.off('resize.fl-theme-builder-header-sticky');this.header.removeClass('fl-theme-builder-header-sticky');this.header.removeAttr('style');this.header.parent().css('padding-top','0');}},_makeWindowSticky:function(windowSize){var makeSticky=false;switch(this.stickyOn){case'xl':makeSticky=windowSize>FLBuilderLayoutConfig.breakpoints['large'];break;case'':case'desktop':makeSticky=windowSize>=FLBuilderLayoutConfig.breakpoints['medium'];break;case'desktop-medium':makeSticky=windowSize>FLBuilderLayoutConfig.breakpoints['small'];break;case'large':makeSticky=windowSize>FLBuilderLayoutConfig.breakpoints['medium']&&windowSize<=FLBuilderLayoutConfig.breakpoints['large'];break;case'large-medium':makeSticky=windowSize>FLBuilderLayoutConfig.breakpoints['small']&&windowSize<=FLBuilderLayoutConfig.breakpoints['large'];break;case'medium':makeSticky=(windowSize<=FLBuilderLayoutConfig.breakpoints['medium']&&windowSize>FLBuilderLayoutConfig.breakpoints['small']);break;case'medium-mobile':makeSticky=(windowSize<=FLBuilderLayoutConfig.breakpoints['medium']);break;case'mobile':makeSticky=(windowSize<=FLBuilderLayoutConfig.breakpoints['small']);break;case'all':makeSticky=true;break;}
return makeSticky;},_doSticky:function(e){var winTop=Math.floor(this.win.scrollTop()),headerTop=Math.floor(this.header.data('original-top')),hasStickyClass=this.header.hasClass('fl-theme-builder-header-sticky'),hasScrolledClass=this.header.hasClass('fl-theme-builder-header-scrolled'),beforeHeader=this.header.prevAll('.fl-builder-content'),bodyTopPadding=parseInt(jQuery('body').css('padding-top')),winBarHeight=$('#wpadminbar').length?$('#wpadminbar').outerHeight():0,headerHeight=0;if(isNaN(bodyTopPadding)){bodyTopPadding=0;}
if(this.hasAdminBar&&this.win.width()>600){winTop+=Math.floor(winBarHeight);}
if(winTop>headerTop){if(!hasStickyClass){if(e&&('scroll'===e.type||'smartscroll'===e.type)){this.header.addClass('fl-theme-builder-header-sticky');if(this.overlay&&beforeHeader.length){this.header.css('top',winBarHeight);}}
if(!this.overlay){this._adjustHeaderHeight();}}}
else if(hasStickyClass){this.header.removeClass('fl-theme-builder-header-sticky');this.header.removeAttr('style');this.header.parent().css('padding-top','0');}
this._adjustStickyHeaderWidth();if(winTop>headerTop){if(!hasScrolledClass){this.header.addClass('fl-theme-builder-header-scrolled');}}else if(hasScrolledClass){this.header.removeClass('fl-theme-builder-header-scrolled');}
this._flyoutMenuFix(e);},_initFlyoutMenuFix:function(e){var header=this.header,menuModule=header.find('.fl-menu'),flyoutMenu=menuModule.find('.fl-menu-mobile-flyout'),isPushMenu=menuModule.hasClass('fl-menu-responsive-flyout-push')||menuModule.hasClass('fl-menu-responsive-flyout-push-opacity'),isSticky=header.hasClass('fl-theme-builder-header-sticky'),isOverlay=menuModule.hasClass('fl-menu-responsive-flyout-overlay'),flyoutPos=menuModule.hasClass('fl-flyout-right')?'right':'left',flyoutParent=header.parent().is('header')?header.parent().parent():header.parent();isFullWidth=this.win.width()===header.width(),flyoutLayout='',activePos=250,headerPos=0;if(!flyoutMenu.length){return;}
if(this.win.width()>header.parent().width()){headerPos=(this.win.width()-header.width())/ 2;}
if(isOverlay){activePos=headerPos;}
else if(isPushMenu){activePos=activePos+headerPos;}
flyoutMenu.data('activePos',activePos);if(isPushMenu){flyoutLayout='push-'+flyoutPos;}
else if(isOverlay){flyoutLayout='overlay-'+flyoutPos;}
if(isPushMenu&&!$('html').hasClass('fl-theme-builder-has-flyout-menu')){$('html').addClass('fl-theme-builder-has-flyout-menu');}
if(!flyoutParent.hasClass('fl-theme-builder-flyout-menu-'+flyoutLayout)){flyoutParent.addClass('fl-theme-builder-flyout-menu-'+flyoutLayout);}
if(!header.hasClass('fl-theme-builder-flyout-menu-overlay')&&isOverlay){header.addClass('fl-theme-builder-flyout-menu-overlay');}
if(!header.hasClass('fl-theme-builder-header-full-width')&&isFullWidth){header.addClass('fl-theme-builder-header-full-width');}
else if(!isFullWidth){header.removeClass('fl-theme-builder-header-full-width');}
menuModule.on('click','.fl-menu-mobile-toggle',$.proxy(function(event){if(menuModule.find('.fl-menu-mobile-toggle.fl-active').length){$('html').addClass('fl-theme-builder-flyout-menu-active');event.stopImmediatePropagation();}
else{$('html').removeClass('fl-theme-builder-flyout-menu-active');}
this._flyoutMenuFix(event);},this));},_flyoutMenuFix:function(e){var header=this.header,menuModule=header.find('.fl-menu'),flyoutMenu=menuModule.find('.fl-menu-mobile-flyout'),isPushMenu=menuModule.hasClass('fl-menu-responsive-flyout-push')||menuModule.hasClass('fl-menu-responsive-flyout-push-opacity'),flyoutPos=menuModule.hasClass('fl-flyout-right')?'right':'left',menuOpacity=menuModule.find('.fl-menu-mobile-opacity'),isScroll='undefined'!==typeof e&&'scroll'===e.handleObj.type,activePos='undefined'!==typeof flyoutMenu.data('activePos')?flyoutMenu.data('activePos'):0,headerPos=(this.win.width()-header.width())/ 2,inactivePos=headerPos>0?activePos+4:254;if(!flyoutMenu.length){return;}
if(this.overlay){return;}
if($('.fl-theme-builder-flyout-menu-active').length){if(isScroll&&!flyoutMenu.hasClass('fl-menu-disable-transition')){flyoutMenu.addClass('fl-menu-disable-transition');}
if(header.hasClass('fl-theme-builder-header-sticky')){if(!isScroll){setTimeout($.proxy(function(){flyoutMenu.css(flyoutPos,'-'+activePos+'px');},this),1);}
else{flyoutMenu.css(flyoutPos,'-'+activePos+'px');}}
else{flyoutMenu.css(flyoutPos,'0px');}}
else{if(flyoutMenu.hasClass('fl-menu-disable-transition')){flyoutMenu.removeClass('fl-menu-disable-transition');}
if(header.hasClass('fl-theme-builder-flyout-menu-overlay')&&headerPos>0&&headerPos<250){if(header.hasClass('fl-theme-builder-header-sticky')){inactivePos=headerPos+254;}
else{inactivePos=254;}}
if(e&&e.type==='resize'){inactivePos=headerPos+254;}
flyoutMenu.css(flyoutPos,'-'+inactivePos+'px');}
if(e&&menuModule.is('.fl-menu-responsive-flyout-overlay')&&$.infinitescroll){e.stopImmediatePropagation();}
if(menuOpacity.length){if(header.hasClass('fl-theme-builder-header-sticky')){if('0px'===menuOpacity.css('left')){menuOpacity.css('left','-'+headerPos+'px');}}
else{menuOpacity.css('left','');}}},_adjustStickyHeaderWidth:function(){if($('body').hasClass('fl-fixed-width')){var parentWidth=this.header.parent().width();if(this.win.width()>=992){this.header.css({'margin':'0 auto','max-width':parentWidth,});}
else{this.header.css({'margin':'','max-width':'',});}}},_adjustHeaderHeight:function(){var beforeHeader=this.header.prevAll('.fl-builder-content'),beforeHeaderHeight=0,beforeHeaderFix=0,headerHeight=Math.floor(this.header.outerHeight()),bodyTopPadding=parseInt($('body').css('padding-top')),wpAdminBarHeight=0,totalHeaderHeight=0;if(isNaN(bodyTopPadding)){bodyTopPadding=0;}
if(beforeHeader.length){$.each(beforeHeader,function(){beforeHeaderHeight+=Math.floor($(this).outerHeight());});beforeHeaderFix=2;}
if(this.hasAdminBar&&this.win.width()<=600){wpAdminBarHeight=Math.floor($('#wpadminbar').outerHeight());}
totalHeaderHeight=Math.floor(beforeHeaderHeight+headerHeight);if(headerHeight>0){var headerParent=this.header.parent(),headerParentTopPadding=0;if($(headerParent).is('body')){headerParentTopPadding=Math.floor(headerHeight-wpAdminBarHeight);}else{headerParentTopPadding=Math.floor(headerHeight-bodyTopPadding-wpAdminBarHeight);}
$(headerParent).css('padding-top',(headerParentTopPadding-beforeHeaderFix)+'px');this.header.css({'-webkit-transform':'translate(0px, -'+totalHeaderHeight+'px)','-ms-transform':'translate(0px, -'+totalHeaderHeight+'px)','transform':'translate(0px, -'+totalHeaderHeight+'px)'});}},_initShrink:function(e){if(this.win.width()>=this.breakpointWidth){this.win.on('scroll.fl-theme-builder-header-shrink',$.proxy(this._doShrink,this));this._setImageMaxHeight();if(this.win.scrollTop()>0){this._doShrink();}}else{this.header.parent().css('padding-top','0');this.win.off('scroll.fl-theme-builder-header-shrink');this._removeShrink();this._removeImageMaxHeight();}},_doShrink:function(e){var winTop=this.win.scrollTop(),headerTop=this.header.data('original-top'),headerHeight=this.header.data('original-height'),shrinkImageHeight=this.header.data('shrink-image-height'),windowSize=this.win.width(),makeSticky=this._makeWindowSticky(windowSize),hasClass=this.header.hasClass('fl-theme-builder-header-shrink');if(this.hasAdminBar){winTop+=32;}
if(makeSticky&&(winTop>headerTop+headerHeight)){if(!hasClass){this.header.addClass('fl-theme-builder-header-shrink');this.header.find('img').each(function(i){var image=$(this),maxMegaMenu=image.closest('.max-mega-menu').length,imageInLightbox=image.closest('.fl-button-lightbox-content').length,imageInNavMenu=image.closest('li.menu-item').length;if(!(imageInLightbox||imageInNavMenu||maxMegaMenu)){image.css('max-height',shrinkImageHeight);}});this.header.find('.fl-row-content-wrap').each(function(){var row=$(this);if(parseInt(row.css('padding-bottom'))>5){row.addClass('fl-theme-builder-header-shrink-row-bottom');}
if(parseInt(row.css('padding-top'))>5){row.addClass('fl-theme-builder-header-shrink-row-top');}});this.header.find('.fl-module-content').each(function(){var module=$(this);if(parseInt(module.css('margin-bottom'))>5){module.addClass('fl-theme-builder-header-shrink-module-bottom');}
if(parseInt(module.css('margin-top'))>5){module.addClass('fl-theme-builder-header-shrink-module-top');}});}}else if(hasClass){this.header.find('img').css('max-height','');this._removeShrink();}
if('undefined'===typeof(e)&&$('body').hasClass('fl-fixed-width')){if(!this.overlay){this._adjustHeaderHeight();}}},_removeShrink:function(){var rows=this.header.find('.fl-row-content-wrap'),modules=this.header.find('.fl-module-content');rows.removeClass('fl-theme-builder-header-shrink-row-bottom');rows.removeClass('fl-theme-builder-header-shrink-row-top');modules.removeClass('fl-theme-builder-header-shrink-module-bottom');modules.removeClass('fl-theme-builder-header-shrink-module-top');this.header.removeClass('fl-theme-builder-header-shrink');},_setImageMaxHeight:function(){var head=$('head'),stylesId='fl-header-styles-'+this.header.data('post-id'),styles='',images=this.header.find('.fl-module-content img');if($('#'+stylesId).length){return;}
images.each(function(i){var image=$(this),height=image.height(),node=image.closest('.fl-module').data('node'),className='fl-node-'+node+'-img-'+i,maxMegaMenu=image.closest('.max-mega-menu').length,imageInLightbox=image.closest('.fl-button-lightbox-content').length,imageInNavMenu=image.closest('li.menu-item').length;if(!(imageInLightbox||imageInNavMenu||maxMegaMenu)){image.addClass(className);styles+='.'+className+' { max-height: '+(height?height:image[0].height)+'px }';}});if(''!==styles){head.append('<style id="'+stylesId+'">'+styles+'</style>');}},_removeImageMaxHeight:function(){$('#fl-header-styles-'+this.header.data('post-id')).remove();},};$(function(){FLThemeBuilderHeaderLayout.init();});})(jQuery);
https://www.tp88trk.com/scripts/sdk/everflow.js
https://cdn.p-n.io/pushly-sdk.min.js
