var gform;gform||(document.addEventListener("gform_main_scripts_loaded",function(){gform.scriptsLoaded=!0}),window.addEventListener("DOMContentLoaded",function(){gform.domLoaded=!0}),gform={domLoaded:!1,scriptsLoaded:!1,initializeOnLoaded:function(o){gform.domLoaded&&gform.scriptsLoaded?o():!gform.domLoaded&&gform.scriptsLoaded?window.addEventListener("DOMContentLoaded",o):document.addEventListener("gform_main_scripts_loaded",o)},hooks:{action:{},filter:{}},addAction:function(o,n,r,t){gform.addHook("action",o,n,r,t)},addFilter:function(o,n,r,t){gform.addHook("filter",o,n,r,t)},doAction:function(o){gform.doHook("action",o,arguments)},applyFilters:function(o){return gform.doHook("filter",o,arguments)},removeAction:function(o,n){gform.removeHook("action",o,n)},removeFilter:function(o,n,r){gform.removeHook("filter",o,n,r)},addHook:function(o,n,r,t,i){null==gform.hooks[o][n]&&(gform.hooks[o][n]=[]);var e=gform.hooks[o][n];null==i&&(i=n+"_"+e.length),gform.hooks[o][n].push({tag:i,callable:r,priority:t=null==t?10:t})},doHook:function(n,o,r){var t;if(r=Array.prototype.slice.call(r,1),null!=gform.hooks[n][o]&&((o=gform.hooks[n][o]).sort(function(o,n){return o.priority-n.priority}),o.forEach(function(o){"function"!=typeof(t=o.callable)&&(t=window[t]),"action"==n?t.apply(null,r):r[0]=t.apply(null,r)})),"filter"==n)return r[0]},removeHook:function(o,n,t,i){var r;null!=gform.hooks[o][n]&&(r=(r=gform.hooks[o][n]).filter(function(o,n,r){return!!(null!=i&&i!=o.tag||null!=t&&t!=o.priority)}),gform.hooks[o][n]=r)}});
window._wpemojiSettings = {"baseUrl":"https:\/\/s.w.org\/images\/core\/emoji\/14.0.0\/72x72\/","ext":".png","svgUrl":"https:\/\/s.w.org\/images\/core\/emoji\/14.0.0\/svg\/","svgExt":".svg","source":{"concatemoji":"https:\/\/cleanplates.com\/wp-includes\/js\/wp-emoji-release.min.js?ver=6.4.3"}};
/*! This file is auto-generated */
!function(i,n){var o,s,e;function c(e){try{var t={supportTests:e,timestamp:(new Date).valueOf()};sessionStorage.setItem(o,JSON.stringify(t))}catch(e){}}function p(e,t,n){e.clearRect(0,0,e.canvas.width,e.canvas.height),e.fillText(t,0,0);var t=new Uint32Array(e.getImageData(0,0,e.canvas.width,e.canvas.height).data),r=(e.clearRect(0,0,e.canvas.width,e.canvas.height),e.fillText(n,0,0),new Uint32Array(e.getImageData(0,0,e.canvas.width,e.canvas.height).data));return t.every(function(e,t){return e===r[t]})}function u(e,t,n){switch(t){case"flag":return n(e,"\ud83c\udff3\ufe0f\u200d\u26a7\ufe0f","\ud83c\udff3\ufe0f\u200b\u26a7\ufe0f")?!1:!n(e,"\ud83c\uddfa\ud83c\uddf3","\ud83c\uddfa\u200b\ud83c\uddf3")&&!n(e,"\ud83c\udff4\udb40\udc67\udb40\udc62\udb40\udc65\udb40\udc6e\udb40\udc67\udb40\udc7f","\ud83c\udff4\u200b\udb40\udc67\u200b\udb40\udc62\u200b\udb40\udc65\u200b\udb40\udc6e\u200b\udb40\udc67\u200b\udb40\udc7f");case"emoji":return!n(e,"\ud83e\udef1\ud83c\udffb\u200d\ud83e\udef2\ud83c\udfff","\ud83e\udef1\ud83c\udffb\u200b\ud83e\udef2\ud83c\udfff")}return!1}function f(e,t,n){var r="undefined"!=typeof WorkerGlobalScope&&self instanceof WorkerGlobalScope?new OffscreenCanvas(300,150):i.createElement("canvas"),a=r.getContext("2d",{willReadFrequently:!0}),o=(a.textBaseline="top",a.font="600 32px Arial",{});return e.forEach(function(e){o[e]=t(a,e,n)}),o}function t(e){var t=i.createElement("script");t.src=e,t.defer=!0,i.head.appendChild(t)}"undefined"!=typeof Promise&&(o="wpEmojiSettingsSupports",s=["flag","emoji"],n.supports={everything:!0,everythingExceptFlag:!0},e=new Promise(function(e){i.addEventListener("DOMContentLoaded",e,{once:!0})}),new Promise(function(t){var n=function(){try{var e=JSON.parse(sessionStorage.getItem(o));if("object"==typeof e&&"number"==typeof e.timestamp&&(new Date).valueOf()<e.timestamp+604800&&"object"==typeof e.supportTests)return e.supportTests}catch(e){}return null}();if(!n){if("undefined"!=typeof Worker&&"undefined"!=typeof OffscreenCanvas&&"undefined"!=typeof URL&&URL.createObjectURL&&"undefined"!=typeof Blob)try{var e="postMessage("+f.toString()+"("+[JSON.stringify(s),u.toString(),p.toString()].join(",")+"));",r=new Blob([e],{type:"text/javascript"}),a=new Worker(URL.createObjectURL(r),{name:"wpTestEmojiSupports"});return void(a.onmessage=function(e){c(n=e.data),a.terminate(),t(n)})}catch(e){}c(n=f(s,u,p))}t(n)}).then(function(e){for(var t in e)n.supports[t]=e[t],n.supports.everything=n.supports.everything&&n.supports[t],"flag"!==t&&(n.supports.everythingExceptFlag=n.supports.everythingExceptFlag&&n.supports[t]);n.supports.everythingExceptFlag=n.supports.everythingExceptFlag&&!n.supports.flag,n.DOMReady=!1,n.readyCallback=function(){n.DOMReady=!0}}).then(function(){return e}).then(function(){var e;n.supports.everything||(n.readyCallback(),(e=n.source||{}).concatemoji?t(e.concatemoji):e.wpemoji&&e.twemoji&&(t(e.twemoji),t(e.wpemoji)))}))}((window,document),window._wpemojiSettings);
https://cleanplates.com/wp-includes/js/jquery/jquery.min.js
https://cleanplates.com/wp-includes/js/jquery/jquery-migrate.min.js
https://cleanplates.com/wp-includes/js/underscore.min.js
https://cleanplates.com/wp-includes/js/dist/vendor/wp-polyfill-inert.min.js
https://cleanplates.com/wp-includes/js/dist/vendor/regenerator-runtime.min.js
https://cleanplates.com/wp-includes/js/dist/vendor/wp-polyfill.min.js
https://cleanplates.com/wp-includes/js/dist/hooks.min.js
https://cleanplates.com/wp-includes/js/dist/i18n.min.js
wp.i18n.setLocaleData( { 'text direction\u0004ltr': [ 'ltr' ] } );
https://cleanplates.com/wp-content/plugins/memberpress/js/login.js
https://cleanplates.com/wp-content/plugins/memberpress/js/jquery.payment.js
https://cleanplates.com/wp-content/plugins/memberpress/js/validate.js
var MeprI18n = {"states":{"IR":{"KHZ":"Khuzestan (\u062e\u0648\u0632\u0633\u062a\u0627\u0646)","THR":"Tehran (\u062a\u0647\u0631\u0627\u0646)","ILM":"Ilaam (\u0627\u06cc\u0644\u0627\u0645)","BHR":"Bushehr (\u0628\u0648\u0634\u0647\u0631)","ADL":"Ardabil (\u0627\u0631\u062f\u0628\u06cc\u0644)","ESF":"Isfahan (\u0627\u0635\u0641\u0647\u0627\u0646)","YZD":"Yazd (\u06cc\u0632\u062f)","KRH":"Kermanshah (\u06a9\u0631\u0645\u0627\u0646\u0634\u0627\u0647)","KRN":"Kerman (\u06a9\u0631\u0645\u0627\u0646)","HDN":"Hamadan (\u0647\u0645\u062f\u0627\u0646)","GZN":"Ghazvin (\u0642\u0632\u0648\u06cc\u0646)","ZJN":"Zanjan (\u0632\u0646\u062c\u0627\u0646)","LRS":"Luristan (\u0644\u0631\u0633\u062a\u0627\u0646)","ABZ":"Alborz (\u0627\u0644\u0628\u0631\u0632)","EAZ":"East Azarbaijan (\u0622\u0630\u0631\u0628\u0627\u06cc\u062c\u0627\u0646 \u0634\u0631\u0642\u06cc)","WAZ":"West Azarbaijan (\u0622\u0630\u0631\u0628\u0627\u06cc\u062c\u0627\u0646 \u063a\u0631\u0628\u06cc)","CHB":"Chaharmahal and Bakhtiari (\u0686\u0647\u0627\u0631\u0645\u062d\u0627\u0644 \u0648 \u0628\u062e\u062a\u06cc\u0627\u0631\u06cc)","SKH":"South Khorasan (\u062e\u0631\u0627\u0633\u0627\u0646 \u062c\u0646\u0648\u0628\u06cc)","RKH":"Razavi Khorasan (\u062e\u0631\u0627\u0633\u0627\u0646 \u0631\u0636\u0648\u06cc)","NKH":"North Khorasan (\u062e\u0631\u0627\u0633\u0627\u0646 \u062c\u0646\u0648\u0628\u06cc)","SMN":"Semnan (\u0633\u0645\u0646\u0627\u0646)","FRS":"Fars (\u0641\u0627\u0631\u0633)","QHM":"Qom (\u0642\u0645)","KRD":"Kurdistan \/ \u06a9\u0631\u062f\u0633\u062a\u0627\u0646)","KBD":"Kohgiluyeh and BoyerAhmad (\u06a9\u0647\u06af\u06cc\u0644\u0648\u06cc\u06cc\u0647 \u0648 \u0628\u0648\u06cc\u0631\u0627\u062d\u0645\u062f)","GLS":"Golestan (\u06af\u0644\u0633\u062a\u0627\u0646)","GIL":"Gilan (\u06af\u06cc\u0644\u0627\u0646)","MZN":"Mazandaran (\u0645\u0627\u0632\u0646\u062f\u0631\u0627\u0646)","MKZ":"Markazi (\u0645\u0631\u06a9\u0632\u06cc)","HRZ":"Hormozgan (\u0647\u0631\u0645\u0632\u06af\u0627\u0646)","SBN":"Sistan and Baluchestan (\u0633\u06cc\u0633\u062a\u0627\u0646 \u0648 \u0628\u0644\u0648\u0686\u0633\u062a\u0627\u0646)"},"TH":{"TH-37":"Amnat Charoen (อำนาจเจริญ)","TH-15":"Ang Thong (อ่างทอง)","TH-14":"Ayutthaya (พระนครศรีอยุธยา)","TH-10":"Bangkok (กรุงเทพมหานคร)","TH-38":"Bueng Kan (บึงกาฬ)","TH-31":"Buri Ram (บุรีรัมย์)","TH-24":"Chachoengsao (ฉะเชิงเทรา)","TH-18":"Chai Nat (ชัยนาท)","TH-36":"Chaiyaphum (ชัยภูมิ)","TH-22":"Chanthaburi (จันทบุรี)","TH-50":"Chiang Mai (เชียงใหม่)","TH-57":"Chiang Rai (เชียงราย)","TH-20":"Chonburi (ชลบุรี)","TH-86":"Chumphon (ชุมพร)","TH-46":"Kalasin (กาฬสินธุ์)","TH-62":"Kamphaeng Phet (กำแพงเพชร)","TH-71":"Kanchanaburi (กาญจนบุรี)","TH-40":"Khon Kaen (ขอนแก่น)","TH-81":"Krabi (กระบี่)","TH-52":"Lampang (ลำปาง)","TH-51":"Lamphun (ลำพูน)","TH-42":"Loei (เลย)","TH-16":"Lopburi (ลพบุรี)","TH-58":"Mae Hong Son (แม่ฮ่องสอน)","TH-44":"Maha Sarakham (มหาสารคาม)","TH-49":"Mukdahan (มุกดาหาร)","TH-26":"Nakhon Nayok (นครนายก)","TH-73":"Nakhon Pathom (นครปฐม)","TH-48":"Nakhon Phanom (นครพนม)","TH-30":"Nakhon Ratchasima (นครราชสีมา)","TH-60":"Nakhon Sawan (นครสวรรค์)","TH-80":"Nakhon Si Thammarat (นครศรีธรรมราช)","TH-55":"Nan (น่าน)","TH-96":"Narathiwat (นราธิวาส)","TH-39":"Nong Bua Lam Phu (หนองบัวลำภู)","TH-43":"Nong Khai (หนองคาย)","TH-12":"Nonthaburi (นนทบุรี)","TH-13":"Pathum Thani (ปทุมธานี)","TH-94":"Pattani (ปัตตานี)","TH-82":"Phang Nga (พังงา)","TH-93":"Phatthalung (พัทลุง)","TH-56":"Phayao (พะเยา)","TH-67":"Phetchabun (เพชรบูรณ์)","TH-76":"Phetchaburi (เพชรบุรี)","TH-66":"Phichit (พิจิตร)","TH-65":"Phitsanulok (พิษณุโลก)","TH-54":"Phrae (แพร่)","TH-83":"Phuket (ภูเก็ต)","TH-25":"Prachin Buri (ปราจีนบุรี)","TH-77":"Prachuap Khiri Khan (ประจวบคีรีขันธ์)","TH-85":"Ranong (ระนอง)","TH-70":"Ratchaburi (ราชบุรี)","TH-21":"Rayong (ระยอง)","TH-45":"Roi Et (ร้อยเอ็ด)","TH-27":"Sa Kaeo (สระแก้ว)","TH-47":"Sakon Nakhon (สกลนคร)","TH-11":"Samut Prakan (สมุทรปราการ)","TH-74":"Samut Sakhon (สมุทรสาคร)","TH-75":"Samut Songkhram (สมุทรสงคราม)","TH-19":"Saraburi (สระบุรี)","TH-91":"Satun (สตูล)","TH-17":"Sing Buri (สิงห์บุรี)","TH-33":"Sisaket (ศรีสะเกษ)","TH-90":"Songkhla (สงขลา)","TH-64":"Sukhothai (สุโขทัย)","TH-72":"Suphan Buri (สุพรรณบุรี)","TH-84":"Surat Thani (สุราษฎร์ธานี)","TH-32":"Surin (สุรินทร์)","TH-63":"Tak (ตาก)","TH-92":"Trang (ตรัง)","TH-23":"Trat (ตราด)","TH-34":"Ubon Ratchathani (อุบลราชธานี)","TH-41":"Udon Thani (อุดรธานี)","TH-61":"Uthai Thani (อุทัยธานี)","TH-53":"Uttaradit (อุตรดิตถ์)","TH-95":"Yala (ยะลา)","TH-35":"Yasothon (ยโสธร)"},"JP":{"JP01":"Hokkaido","JP02":"Aomori","JP03":"Iwate","JP04":"Miyagi","JP05":"Akita","JP06":"Yamagata","JP07":"Fukushima","JP08":"Ibaraki","JP09":"Tochigi","JP10":"Gunma","JP11":"Saitama","JP12":"Chiba","JP13":"Tokyo","JP14":"Kanagawa","JP15":"Niigata","JP16":"Toyama","JP17":"Ishikawa","JP18":"Fukui","JP19":"Yamanashi","JP20":"Nagano","JP21":"Gifu","JP22":"Shizuoka","JP23":"Aichi","JP24":"Mie","JP25":"Shiga","JP26":"Kyouto","JP27":"Osaka","JP28":"Hyougo","JP29":"Nara","JP30":"Wakayama","JP31":"Tottori","JP32":"Shimane","JP33":"Okayama","JP34":"Hiroshima","JP35":"Yamaguchi","JP36":"Tokushima","JP37":"Kagawa","JP38":"Ehime","JP39":"Kochi","JP40":"Fukuoka","JP41":"Saga","JP42":"Nagasaki","JP43":"Kumamoto","JP44":"Oita","JP45":"Miyazaki","JP46":"Kagoshima","JP47":"Okinawa"},"IT":{"AG":"Agrigento","AL":"Alessandria","AN":"Ancona","AO":"Aosta","AR":"Arezzo","AP":"Ascoli Piceno","AT":"Asti","AV":"Avellino","BA":"Bari","BT":"Barletta-Andria-Trani","BL":"Belluno","BN":"Benevento","BG":"Bergamo","BI":"Biella","BO":"Bologna","BZ":"Bolzano","BS":"Brescia","BR":"Brindisi","CA":"Cagliari","CL":"Caltanissetta","CB":"Campobasso","CI":"Carbonia-Iglesias","CE":"Caserta","CT":"Catania","CZ":"Catanzaro","CH":"Chieti","CO":"Como","CS":"Cosenza","CR":"Cremona","KR":"Crotone","CN":"Cuneo","EN":"Enna","FM":"Fermo","FE":"Ferrara","FI":"Firenze","FG":"Foggia","FC":"Forl\u00ec-Cesena","FR":"Frosinone","GE":"Genova","GO":"Gorizia","GR":"Grosseto","IM":"Imperia","IS":"Isernia","SP":"La Spezia","AQ":"L'Aquila","LT":"Latina","LE":"Lecce","LC":"Lecco","LI":"Livorno","LO":"Lodi","LU":"Lucca","MC":"Macerata","MN":"Mantova","MS":"Massa-Carrara","MT":"Matera","ME":"Messina","MI":"Milano","MO":"Modena","MB":"Monza e della Brianza","NA":"Napoli","NO":"Novara","NU":"Nuoro","OT":"Olbia-Tempio","OR":"Oristano","PD":"Padova","PA":"Palermo","PR":"Parma","PV":"Pavia","PG":"Perugia","PU":"Pesaro e Urbino","PE":"Pescara","PC":"Piacenza","PI":"Pisa","PT":"Pistoia","PN":"Pordenone","PZ":"Potenza","PO":"Prato","RG":"Ragusa","RA":"Ravenna","RC":"Reggio Calabria","RE":"Reggio Emilia","RI":"Rieti","RN":"Rimini","RM":"Roma","RO":"Rovigo","SA":"Salerno","VS":"Medio Campidano","SS":"Sassari","SV":"Savona","SI":"Siena","SR":"Siracusa","SO":"Sondrio","TA":"Taranto","TE":"Teramo","TR":"Terni","TO":"Torino","OG":"Ogliastra","TP":"Trapani","TN":"Trento","TV":"Treviso","TS":"Trieste","UD":"Udine","VA":"Varese","VE":"Venezia","VB":"Verbano-Cusio-Ossola","VC":"Vercelli","VR":"Verona","VV":"Vibo Valentia","VI":"Vicenza","VT":"Viterbo"},"TR":{"TR01":"Adana","TR02":"Adıyaman","TR03":"Afyon","TR04":"Ağrı","TR05":"Amasya","TR06":"Ankara","TR07":"Antalya","TR08":"Artvin","TR09":"Aydın","TR10":"Balıkesir","TR11":"Bilecik","TR12":"Bingöl","TR13":"Bitlis","TR14":"Bolu","TR15":"Burdur","TR16":"Bursa","TR17":"Çanakkale","TR18":"Çankırı","TR19":"Çorum","TR20":"Denizli","TR21":"Diyarbakır","TR22":"Edirne","TR23":"Elazığ","TR24":"Erzincan","TR25":"Erzurum","TR26":"Eskişehir","TR27":"Gaziantep","TR28":"Giresun","TR29":"Gümüşhane","TR30":"Hakkari","TR31":"Hatay","TR32":"Isparta","TR33":"İçel","TR34":"İstanbul","TR35":"İzmir","TR36":"Kars","TR37":"Kastamonu","TR38":"Kayseri","TR39":"Kırklareli","TR40":"Kırşehir","TR41":"Kocaeli","TR42":"Konya","TR43":"Kütahya","TR44":"Malatya","TR45":"Manisa","TR46":"Kahramanmaraş","TR47":"Mardin","TR48":"Muğla","TR49":"Muş","TR50":"Nevşehir","TR51":"Niğde","TR52":"Ordu","TR53":"Rize","TR54":"Sakarya","TR55":"Samsun","TR56":"Siirt","TR57":"Sinop","TR58":"Sivas","TR59":"Tekirdağ","TR60":"Tokat","TR61":"Trabzon","TR62":"Tunceli","TR63":"Şanlıurfa","TR64":"Uşak","TR65":"Van","TR66":"Yozgat","TR67":"Zonguldak","TR68":"Aksaray","TR69":"Bayburt","TR70":"Karaman","TR71":"Kırıkkale","TR72":"Batman","TR73":"Şırnak","TR74":"Bartın","TR75":"Ardahan","TR76":"Iğdır","TR77":"Yalova","TR78":"Karabük","TR79":"Kilis","TR80":"Osmaniye","TR81":"Düzce"},"HK":{"HONG KONG":"Hong Kong Island","KOWLOON":"Kowloon","NEW TERRITORIES":"New Territories"},"PE":{"CAL":"El Callao","LMA":"Municipalidad Metropolitana de Lima","AMA":"Amazonas","ANC":"Ancash","APU":"Apurímac","ARE":"Arequipa","AYA":"Ayacucho","CAJ":"Cajamarca","CUS":"Cusco","HUV":"Huancavelica","HUC":"Huánuco","ICA":"Ica","JUN":"Junín","LAL":"La Libertad","LAM":"Lambayeque","LIM":"Lima","LOR":"Loreto","MDD":"Madre de Dios","MOQ":"Moquegua","PAS":"Pasco","PIU":"Piura","PUN":"Puno","SAM":"San Martín","TAC":"Tacna","TUM":"Tumbes","UCA":"Ucayali"},"US":{"AL":"Alabama","AK":"Alaska","AZ":"Arizona","AR":"Arkansas","CA":"California","CO":"Colorado","CT":"Connecticut","DE":"Delaware","DC":"District Of Columbia","FL":"Florida","GA":"Georgia","HI":"Hawaii","ID":"Idaho","IL":"Illinois","IN":"Indiana","IA":"Iowa","KS":"Kansas","KY":"Kentucky","LA":"Louisiana","ME":"Maine","MD":"Maryland","MA":"Massachusetts","MI":"Michigan","MN":"Minnesota","MS":"Mississippi","MO":"Missouri","MT":"Montana","NE":"Nebraska","NV":"Nevada","NH":"New Hampshire","NJ":"New Jersey","NM":"New Mexico","NY":"New York","NC":"North Carolina","ND":"North Dakota","OH":"Ohio","OK":"Oklahoma","OR":"Oregon","PA":"Pennsylvania","RI":"Rhode Island","SC":"South Carolina","SD":"South Dakota","TN":"Tennessee","TX":"Texas","UT":"Utah","VT":"Vermont","VA":"Virginia","WA":"Washington","WV":"West Virginia","WI":"Wisconsin","WY":"Wyoming","AA":"Armed Forces (AA)","AE":"Armed Forces (AE)","AP":"Armed Forces (AP)","AS":"American Samoa","GU":"Guam","MP":"Northern Mariana Islands","PR":"Puerto Rico","UM":"US Minor Outlying Islands","VI":"US Virgin Islands"},"BR":{"AC":"Acre","AL":"Alagoas","AP":"Amapá","AM":"Amazonas","BA":"Bahia","CE":"Ceará","DF":"Distrito Federal","ES":"Espírito Santo","GO":"Goiás","MA":"Maranhão","MT":"Mato Grosso","MS":"Mato Grosso do Sul","MG":"Minas Gerais","PA":"Pará","PB":"Paraíba","PR":"Paraná","PE":"Pernambuco","PI":"Piauí","RJ":"Rio de Janeiro","RN":"Rio Grande do Norte","RS":"Rio Grande do Sul","RO":"Rondônia","RR":"Roraima","SC":"Santa Catarina","SP":"São Paulo","SE":"Sergipe","TO":"Tocantins"},"BD":{"BAG":"Bagerhat","BAN":"Bandarban","BAR":"Barguna","BARI":"Barisal","BHO":"Bhola","BOG":"Bogra","BRA":"Brahmanbaria","CHA":"Chandpur","CHI":"Chittagong","CHU":"Chuadanga","COM":"Comilla","COX":"Cox's Bazar","DHA":"Dhaka","DIN":"Dinajpur","FAR":"Faridpur ","FEN":"Feni","GAI":"Gaibandha","GAZI":"Gazipur","GOP":"Gopalganj","HAB":"Habiganj","JAM":"Jamalpur","JES":"Jessore","JHA":"Jhalokati","JHE":"Jhenaidah","JOY":"Joypurhat","KHA":"Khagrachhari","KHU":"Khulna","KIS":"Kishoreganj","KUR":"Kurigram","KUS":"Kushtia","LAK":"Lakshmipur","LAL":"Lalmonirhat","MAD":"Madaripur","MAG":"Magura","MAN":"Manikganj ","MEH":"Meherpur","MOU":"Moulvibazar","MUN":"Munshiganj","MYM":"Mymensingh","NAO":"Naogaon","NAR":"Narail","NARG":"Narayanganj","NARD":"Narsingdi","NAT":"Natore","NAW":"Nawabganj","NET":"Netrakona","NIL":"Nilphamari","NOA":"Noakhali","PAB":"Pabna","PAN":"Panchagarh","PAT":"Patuakhali","PIR":"Pirojpur","RAJB":"Rajbari","RAJ":"Rajshahi","RAN":"Rangamati","RANP":"Rangpur","SAT":"Satkhira","SHA":"Shariatpur","SHE":"Sherpur","SIR":"Sirajganj","SUN":"Sunamganj","SYL":"Sylhet","TAN":"Tangail","THA":"Thakurgaon"},"HU":{"BK":"B\u00e1cs-Kiskun","BE":"B\u00e9k\u00e9s","BA":"Baranya","BZ":"Borsod-Aba\u00faj-Zempl\u00e9n","BU":"Budapest","CS":"Csongr\u00e1d","FE":"Fej\u00e9r","GS":"Gy\u0151r-Moson-Sopron","HB":"Hajd\u00fa-Bihar","HE":"Heves","JN":"J\u00e1sz-Nagykun-Szolnok","KE":"Kom\u00e1rom-Esztergom","NO":"N\u00f3gr\u00e1d","PE":"Pest","SO":"Somogy","SZ":"Szabolcs-Szatm\u00e1r-Bereg","TO":"Tolna","VA":"Vas","VE":"Veszpr\u00e9m","ZA":"Zala"},"NZ":{"NL":"Northland","AK":"Auckland","WA":"Waikato","BP":"Bay of Plenty","TK":"Taranaki","HB":"Hawke’s Bay","MW":"Manawatu-Wanganui","WE":"Wellington","NS":"Nelson","MB":"Marlborough","TM":"Tasman","WC":"West Coast","CT":"Canterbury","OT":"Otago","SL":"Southland"},"CA":{"AB":"Alberta","BC":"British Columbia","MB":"Manitoba","NB":"New Brunswick","NL":"Newfoundland","NT":"Northwest Territories","NS":"Nova Scotia","NU":"Nunavut","ON":"Ontario","PE":"Prince Edward Island","QC":"Quebec","SK":"Saskatchewan","YT":"Yukon Territory"},"BG":{"BG-01":"Blagoevgrad","BG-02":"Burgas","BG-08":"Dobrich","BG-07":"Gabrovo","BG-26":"Haskovo","BG-09":"Kardzhali","BG-10":"Kyustendil","BG-11":"Lovech","BG-12":"Montana","BG-13":"Pazardzhik","BG-14":"Pernik","BG-15":"Pleven","BG-16":"Plovdiv","BG-17":"Razgrad","BG-18":"Ruse","BG-27":"Shumen","BG-19":"Silistra","BG-20":"Sliven","BG-21":"Smolyan","BG-23":"Sofia","BG-22":"Sofia-Grad","BG-24":"Stara Zagora","BG-25":"Targovishte","BG-03":"Varna","BG-04":"Veliko Tarnovo","BG-05":"Vidin","BG-06":"Vratsa","BG-28":"Yambol"},"NP":{"ILL":"Illam","JHA":"Jhapa","PAN":"Panchthar","TAP":"Taplejung","BHO":"Bhojpur","DKA":"Dhankuta","MOR":"Morang","SUN":"Sunsari","SAN":"Sankhuwa","TER":"Terhathum","KHO":"Khotang","OKH":"Okhaldhunga","SAP":"Saptari","SIR":"Siraha","SOL":"Solukhumbu","UDA":"Udayapur","DHA":"Dhanusa","DLK":"Dolakha","MOH":"Mohottari","RAM":"Ramechha","SAR":"Sarlahi","SIN":"Sindhuli","BHA":"Bhaktapur","DHD":"Dhading","KTM":"Kathmandu","KAV":"Kavrepalanchowk","LAL":"Lalitpur","NUW":"Nuwakot","RAS":"Rasuwa","SPC":"Sindhupalchowk","BAR":"Bara","CHI":"Chitwan","MAK":"Makwanpur","PAR":"Parsa","RAU":"Rautahat","GOR":"Gorkha","KAS":"Kaski","LAM":"Lamjung","MAN":"Manang","SYN":"Syangja","TAN":"Tanahun","BAG":"Baglung","PBT":"Parbat","MUS":"Mustang","MYG":"Myagdi","AGR":"Agrghakanchi","GUL":"Gulmi","KAP":"Kapilbastu","NAW":"Nawalparasi","PAL":"Palpa","RUP":"Rupandehi","DAN":"Dang","PYU":"Pyuthan","ROL":"Rolpa","RUK":"Rukum","SAL":"Salyan","BAN":"Banke","BDA":"Bardiya","DAI":"Dailekh","JAJ":"Jajarkot","SUR":"Surkhet","DOL":"Dolpa","HUM":"Humla","JUM":"Jumla","KAL":"Kalikot","MUG":"Mugu","ACH":"Achham","BJH":"Bajhang","BJU":"Bajura","DOT":"Doti","KAI":"Kailali","BAI":"Baitadi","DAD":"Dadeldhura","DAR":"Darchula","KAN":"Kanchanpur"},"PT":{"NO":"Norte","CE":"Centro","LT":"Lisboa e Vale do Tejo","AG":"Algarve","AT":"Alentejo","MD":"Madeira","AC":"A\u00e7ores"},"DE":{"BW":"Baden-W\u00fcrttemberg","BY":"Bavaria","BE":"Berlin","BB":"Brandenburg","HB":"Bremen","HH":"Hamburg","HE":"Hesse","NI":"Lower Saxony","MV":"Mecklenburg-Vorpommern","NW":"North Rhine-Westphalia","RP":"Rhineland-Palatinate","SL":"Saarland","SN":"Saxony","ST":"Saxony-Anhalt","SH":"Schleswig-Holstein","TH":"Thuringia"},"CN":{"CN1":"Yunnan \/ 云南","CN2":"Beijing \/ 北京","CN3":"Tianjin \/ 天津","CN4":"Hebei \/ 河北","CN5":"Shanxi \/ 山西","CN6":"Inner Mongolia \/ 內蒙古","CN7":"Liaoning \/ 辽宁","CN8":"Jilin \/ 吉林","CN9":"Heilongjiang \/ 黑龙江","CN10":"Shanghai \/ 上海","CN11":"Jiangsu \/ 江苏","CN12":"Zhejiang \/ 浙江","CN13":"Anhui \/ 安徽","CN14":"Fujian \/ 福建","CN15":"Jiangxi \/ 江西","CN16":"Shandong \/ 山东","CN17":"Henan \/ 河南","CN18":"Hubei \/ 湖北","CN19":"Hunan \/ 湖南","CN20":"Guangdong \/ 广东","CN21":"Guangxi Zhuang \/ 广西壮族","CN22":"Hainan \/ 海南","CN23":"Chongqing \/ 重庆","CN24":"Sichuan \/ 四川","CN25":"Guizhou \/ 贵州","CN26":"Shaanxi \/ 陕西","CN27":"Gansu \/ 甘肃","CN28":"Qinghai \/ 青海","CN29":"Ningxia Hui \/ 宁夏","CN30":"Macau \/ 澳门","CN31":"Tibet \/ 西藏","CN32":"Xinjiang \/ 新疆"},"MY":{"JHR":"Johor","KDH":"Kedah","KTN":"Kelantan","MLK":"Melaka","NSN":"Negeri Sembilan","PHG":"Pahang","PRK":"Perak","PLS":"Perlis","PNG":"Pulau Pinang","SBH":"Sabah","SWK":"Sarawak","SGR":"Selangor","TRG":"Terengganu","KUL":"W.P. Kuala Lumpur","LBN":"W.P. Labuan","PJY":"W.P. Putrajaya"},"ID":{"AC":"Daerah Istimewa Aceh","SU":"Sumatera Utara","SB":"Sumatera Barat","RI":"Riau","KR":"Kepulauan Riau","JA":"Jambi","SS":"Sumatera Selatan","BB":"Bangka Belitung","BE":"Bengkulu","LA":"Lampung","JK":"DKI Jakarta","JB":"Jawa Barat","BT":"Banten","JT":"Jawa Tengah","JI":"Jawa Timur","YO":"Daerah Istimewa Yogyakarta","BA":"Bali","NB":"Nusa Tenggara Barat","NT":"Nusa Tenggara Timur","KB":"Kalimantan Barat","KT":"Kalimantan Tengah","KI":"Kalimantan Timur","KS":"Kalimantan Selatan","KU":"Kalimantan Utara","SA":"Sulawesi Utara","ST":"Sulawesi Tengah","SG":"Sulawesi Tenggara","SR":"Sulawesi Barat","SN":"Sulawesi Selatan","GO":"Gorontalo","MA":"Maluku","MU":"Maluku Utara","PA":"Papua","PB":"Papua Barat"},"ZA":{"EC":"Eastern Cape","FS":"Free State","GP":"Gauteng","KZN":"KwaZulu-Natal","LP":"Limpopo","MP":"Mpumalanga","NC":"Northern Cape","NW":"North West","WC":"Western Cape"},"AU":{"ACT":"Australian Capital Territory","NSW":"New South Wales","NT":"Northern Territory","QLD":"Queensland","SA":"South Australia","TAS":"Tasmania","VIC":"Victoria","WA":"Western Australia"},"MX":{"Distrito Federal":"Distrito Federal","Jalisco":"Jalisco","Nuevo Leon":"Nuevo Le\u00f3n","Aguascalientes":"Aguascalientes","Baja California":"Baja California","Baja California Sur":"Baja California Sur","Campeche":"Campeche","Chiapas":"Chiapas","Chihuahua":"Chihuahua","Coahuila":"Coahuila","Colima":"Colima","Durango":"Durango","Guanajuato":"Guanajuato","Guerrero":"Guerrero","Hidalgo":"Hidalgo","Estado de Mexico":"Edo. de M\u00e9xico","Michoacan":"Michoac\u00e1n","Morelos":"Morelos","Nayarit":"Nayarit","Oaxaca":"Oaxaca","Puebla":"Puebla","Queretaro":"Quer\u00e9taro","Quintana Roo":"Quintana Roo","San Luis Potosi":"San Luis Potos\u00ed","Sinaloa":"Sinaloa","Sonora":"Sonora","Tabasco":"Tabasco","Tamaulipas":"Tamaulipas","Tlaxcala":"Tlaxcala","Veracruz":"Veracruz","Yucatan":"Yucat\u00e1n","Zacatecas":"Zacatecas"},"ES":{"C":"A Coruña","VI":"Araba\/Álava","AB":"Albacete","A":"Alicante","AL":"Almería","O":"Asturias","AV":"Ávila","BA":"Badajoz","PM":"Baleares","B":"Barcelona","BU":"Burgos","CC":"Cáceres","CA":"Cádiz","S":"Cantabria","CS":"Castellón","CE":"Ceuta","CR":"Ciudad Real","CO":"Córdoba","CU":"Cuenca","GI":"Girona","GR":"Granada","GU":"Guadalajara","SS":"Gipuzkoa","H":"Huelva","HU":"Huesca","J":"Jaén","LO":"La Rioja","GC":"Las Palmas","LE":"León","L":"Lleida","LU":"Lugo","M":"Madrid","MA":"Málaga","ML":"Melilla","MU":"Murcia","NA":"Navarra","OR":"Ourense","P":"Palencia","PO":"Pontevedra","SA":"Salamanca","TF":"Santa Cruz de Tenerife","SG":"Segovia","SE":"Sevilla","SO":"Soria","T":"Tarragona","TE":"Teruel","TO":"Toledo","V":"Valencia","VA":"Valladolid","BI":"Bizkaia","ZA":"Zamora","Z":"Zaragoza"},"IN":{"AP":"Andra Pradesh","AR":"Arunachal Pradesh","AS":"Assam","BR":"Bihar","CT":"Chhattisgarh","GA":"Goa","GJ":"Gujarat","HR":"Haryana","HP":"Himachal Pradesh","JK":"Jammu and Kashmir","JH":"Jharkhand","KA":"Karnataka","KL":"Kerala","MP":"Madhya Pradesh","MH":"Maharashtra","MN":"Manipur","ML":"Meghalaya","MZ":"Mizoram","NL":"Nagaland","OR":"Orissa","PB":"Punjab","RJ":"Rajasthan","SK":"Sikkim","TN":"Tamil Nadu","TS":"Telangana","TR":"Tripura","UK":"Uttarakhand","UP":"Uttar Pradesh","WB":"West Bengal","AN":"Andaman and Nicobar Islands","CH":"Chandigarh","DN":"Dadar and Nagar Haveli","DD":"Daman and Diu","DL":"Delhi","LD":"Lakshadeep","PY":"Pondicherry (Puducherry)"}},"ajaxurl":"https:\/\/cleanplates.com\/wp-admin\/admin-ajax.php","please_select_state":"-- Select State --"};
https://cleanplates.com/wp-content/plugins/memberpress/js/i18n.js
https://cleanplates.com/wp-includes/js/jquery/ui/core.min.js
https://cleanplates.com/wp-includes/js/jquery/ui/datepicker.min.js
jQuery(function(jQuery){jQuery.datepicker.setDefaults({"closeText":"Close","currentText":"Today","monthNames":["January","February","March","April","May","June","July","August","September","October","November","December"],"monthNamesShort":["Jan","Feb","Mar","Apr","May","Jun","Jul","Aug","Sep","Oct","Nov","Dec"],"nextText":"Next","prevText":"Previous","dayNames":["Sunday","Monday","Tuesday","Wednesday","Thursday","Friday","Saturday"],"dayNamesShort":["Sun","Mon","Tue","Wed","Thu","Fri","Sat"],"dayNamesMin":["S","M","T","W","T","F","S"],"dateFormat":"MM d, yy","firstDay":1,"isRTL":false});});
https://cleanplates.com/wp-content/plugins/memberpress/js/jquery-ui-timepicker-addon.js
var MeprDatePicker = {"translations":{"closeText":"Done","currentText":"Today","monthNamesShort":["Jan","Feb","Mar","Apr","May","Jun","Jul","Aug","Sep","Oct","Nov","Dec"],"dayNamesMin":["Su","Mo","Tu","We","Th","Fr","Sa"]},"timeFormat":"","dateFormat":"MM d, yy","showTime":""};
https://cleanplates.com/wp-content/plugins/memberpress/js/date_picker.js
var MeprSignup = {"coupon_nonce":"dc4ac2d9f9","spc_enabled":"1","spc_invoice":"1","no_compatible_pms":"There are no payment methods available that can purchase this product, please contact the site administrator or purchase it separately.","switch_pm_prompt":"It looks like your purchase requires %s. No problem! Just click below to switch.","switch_pm":"Switch to %s","cancel":"Cancel","warning_icon_url":"https:\/\/cleanplates.com\/wp-content\/plugins\/memberpress\/images\/mepr-notice-icon-error.png"};
https://cleanplates.com/wp-content/plugins/toolbox/src/uikit/js/uikit-icons.min.js
var PushlySDK = window.PushlySDK || [];
function pushly() { PushlySDK.push(arguments) }
pushly('load', {
domainKey: decodeURIComponent("i84DPRHUIod7WNMyqEXSpROsyv2hU2aZYrur"),
sw: "/wp-content/plugins/pushly/assets/js/pushly-sdk-worker.js.php",
swScope: "/wp-content/plugins/pushly/" });
/** DO NOT MODIFY THIS CODE**/
!function(_window, _document) {
var OB_ADV_ID = '00115c545f4ece0b9fad1739176d766745';
if (_window.obApi) {
var toArray = function(object) {
return Object.prototype.toString.call(object) === '[object Array]' ? object : [object];
};
_window.obApi.marketerId = toArray(_window.obApi.marketerId).concat(toArray(OB_ADV_ID));
return;
}
var api = _window.obApi = function() {
api.dispatch ? api.dispatch.apply(api, arguments) : api.queue.push(arguments);
};
api.version = '1.1';
api.loaded = true;
api.marketerId = OB_ADV_ID;
api.queue = [];
var tag = _document.createElement('script');
tag.async = true;
tag.src = '//amplify.outbrain.com/cp/obtp.js';
tag.type = 'text/javascript';
var script = _document.getElementsByTagName('script')[0];
script.parentNode.insertBefore(tag, script);
}(window, document);obApi('track', 'PAGE_VIEW');(function ($) {
$(document).ready(function() {
var contentContainer = $(".articleBody");
var paragraphs = contentContainer.find("p");if (paragraphs.length >= 2) {
// Create the <ins> element
var chatDiv = $('<ins class="direqt-embed" style="display: block; width: 100%" data-start-hint="faq" data-story-id="auto" data-bot-id="65f06f674337adcf907e29eb"></ins>')
.insertAfter(paragraphs.eq(1));// Create the <script> element using plain JavaScript
var scriptElement = document.createElement('script');
scriptElement.src = 'https://chat.direqt.ai/embed.js';
scriptElement.async = true;// Use plain JavaScript to insert the <script> element directly after the <ins> tag
// Convert chatDiv to a native DOM element to use native DOM methods
chatDiv.get(0).parentNode.insertBefore(scriptElement, chatDiv.get(0).nextSibling);
}
});
})(jQuery);
https://cdn.tpdads.com/configs/cleanplates.js
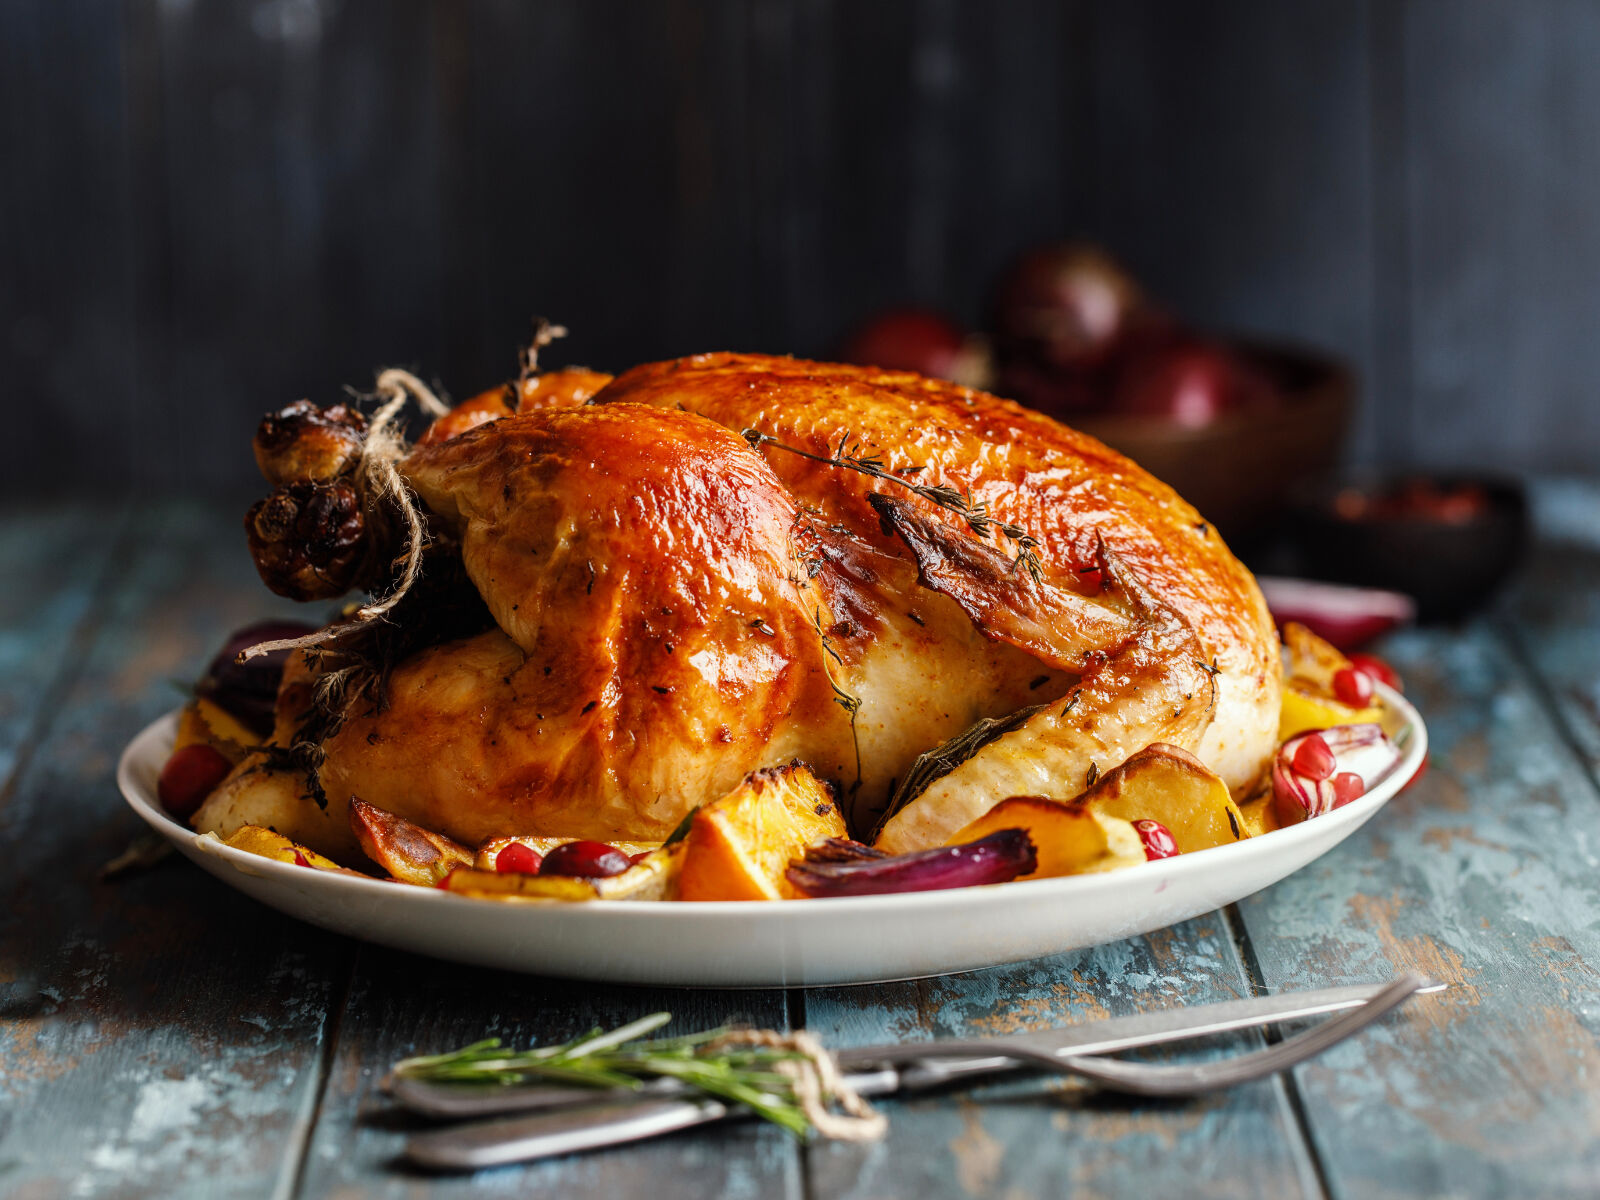
Skip to content This Is the Best Way To Cook a Turkey This Thanksgiving
Shutterstock
The world was completely turned on its axis during 2020, and so were our usual Thanksgiving plans. While I typically attended a massive Thanksgiving hosted by my parents, during a year of social distancing and forced solitude, I was assigned the task of hosting a small Thanksgiving for my immediate family. This, of course, meant that I was roasting the turkey for the very first time, which I thought I would inevitably screw up like most first-timers. Yet thankfully, after countless hours of research for the absolute best way to cook a turkey, I came across a method that is practically full-proof.
The origin of this best way to cook a turkey came from Tieghan Gerard from Half Baked Harvest . I followed her method for a Herb and Butter Roasted Turkey that, to quote my father, was “the best turkey I ever had.”
After roasting this beautiful turkey, I made a few tweaks to simplify the process and found that the method was still the best way to cook a turkey, and I now use it constantly when I roast a bird. Turkey, and yes, even chicken!
From buying the right bird to properly getting it ready, here’s my easy guide on how to cook the best turkey for Thanksgiving that won’t have you waking up at 4 a.m.
Related: Sign up to receive delicious recipes, expert advice, and shopping tips in your inbox!
Aim for a 10 to 16-pound turkey. For the size of the turkey, I would aim for anything between 10 to 16 pounds. Technically this will serve eight to 12 people, but with all of the other Thanksgiving sides you’re serving, your guests likely won’t take as much turkey that equates to a serving. So I still recommend cooking a smaller bird for a crowd.
This particular cooking method works well for a turkey that size, and won’t take all day to cook in the oven (taking up precious oven space , might I add).
Start with a room-temperature bird. If you bought your turkey days (or weeks) in advance of the big day, you likely decided to freeze your turkey — or perhaps even bought it frozen — to keep it fresh. To properly defrost your turkey, the USDA recommends doing so in the refrigerator. It will likely take one day for every four to five pounds of turkey, so if you’re dealing with a 15-pound bird, it will need to defrost in the fridge for at least three days, maybe four.
Now for the best results, you want your turkey to be at room temperature for roasting. Take your turkey out one hour before roasting to bring it to room temperature (placing it in your roasting pan for prep), giving you time to properly get your turkey ready to roast.
Season it with homemade lemon herb butter. While some like to brine their turkey days in advance, I skip this laborious step and instead, find that a generous layer of lemon herb butter on the turkey helps immensely with the flavor. To make, mix together two sticks of room-temperature unsalted butter with two tablespoons each of fresh thyme, fresh sage, fresh rosemary, zest of one lemon, three teaspoons of salt, and one teaspoon of pepper.
Now I recommend spreading the butter underneath the skin of the turkey as well as on top of it, so with clean hands, carefully lift the skin on the breast of the turkey and spread some of that butter using a small spatula. Then spread the rest of the butter on top of the skin all along the turkey; the breast, the legs, the wings, all of it.
Add onion, lemon, garlic, and herbs into the cavity. While some experts say that adding anything to the cavity can cook the bird unevenly, unless you are working with a bronze turkey , a conventional white turkey from the grocery store will likely need a little something added to it to give it more flavor. Don’t worry, with this method, the turkey will still cook perfectly.
Before stuffing the cavity of the bird, be sure to remove the giblets and the neck; this is typically where these parts are stored when buying a turkey. You can either discard them or, if you’re feeling ambitious, you can use them to make a tasty gravy.
Stuff the bird with a quartered onion, a quartered lemon, a few garlic cloves, and a handful of your leftover herbs.
While trussing the bird (tieing the legs together) isn’t necessary for roasting, it can help with keeping these items stuffed in the bird. Plus, it makes the turkey look nice when you serve it at the table. Again, it’s not necessary if you don’t have the proper string.
Pour broth into the pan. Now that the bird is ready, you’ll want to pour some chicken broth into the pan so the turkey has some moisture to work with and won’t dry out. Again, the amount of broth is another topic of debate among experts, but many say that covering 1/2-inch of the bottom of the roasting pan with chicken broth will work. This could be anywhere between one to four cups, depending on your bird and roasting pan size.
Roast at 450 for 45 minutes. For crispy outer skin and a juicy interior, you are going to want to start roasting your bird at a high temperature. I follow the cook times exactly to Gerard’s method, starting the bird at a 450-degree oven for 45 minutes.
I recommend leaving the bird uncovered while you roast. Gerard does mention covering your bird with a damp cheesecloth covered in butter. While this can help with flavor and texture, I don’t find it necessary. I’ve roasted beautiful birds without this method, so leave your bird as is.
Reduce heat to 350 for 2 hours. To ensure that your bird cooks evenly, reduce the temperature to 350 degrees for the rest of your roast. This usually takes two hours, but you can check the temperature periodically to ensure that it cooks through. Remember, the cooking time may not be exact; it will likely vary based on the size of your bird. So be sure to be armed with a meat thermometer (and other helpful Thanksgiving kitchen tools ) to ensure your bird doesn’t overcook.
Baste the bird a couple of times. Basting the bird helps to bring flavor back to the meat and keep it moist. I would baste it when you change the roasting temperature, as well as at the halfway mark of your two hours. You could also squeeze in a third time if you want a half hour before taking out the bird.
Allow the bird to sit for 30 minutes — and do not cover it. Now the USDA says that poultry, such as turkey and chicken, should be properly cooked to 165 degrees to avoid food-borne illness. However, this does not mean that your bird has to be 165 degrees exactly for you to take it out. In fact, you should avoid waiting this long. Unless you prefer an overcooked, dry turkey, but I highly doubt that.
A roasted turkey will actually continue cooking at room temperature after you take it out. So removing the turkey from the oven between 155 to 160 degrees is wise so you avoid overcooking it while it sits on the counter. Plus, because the turkey still retains heat, covering it will also create a mini oven and also overcook the turkey. So avoid covering it with aluminum foil as well.
Resting the turkey on the counter before slicing and serving is key for the meat to retain that flavor and juiciness. When the turkey has cooled, begin to slice and serve with all of your favorite sides .
Read next: 10 Vegetarian Thanksgiving Recipes If You’re Not Serving Turkey
What our editors love right now
Be the first to know.
Sign Up Today
https://cleanplates.com/wp-content/plugins/memberpress/js/signup.js
// Create a new script element
var script = document.createElement('script');
const version = new Date().valueOf()
// Set the source attribute with the dynamic version
script.src = 'https://instaread.co/js/instaread_playerslug.min.js?version=' + version;
// Append the script to the document
document.head.appendChild(script);
// Define a function to be executed after the script is loaded
script.onload = function () {
const titleSlug = instareadPlayerTitleSlug(
document.querySelector("title").innerHTML
);
const article_url = instareadPlayerTitleSlug(document.location.href);
const instareadPlayerIframe = document.getElementById("instaread_iframe");
const publication = "cleanplates"
instareadPlayerIframe.setAttribute(
"src", `https://instaread.co/player?article=${titleSlug}&publication=${publication}&article_encoder=slugjs&article_key=titletag&version=${version}&article_url=${article_url}`
);
}
(function(w, d, s, id) {
w.PUBX=w.PUBX || {pub: "clean_plates", discover: false, lazy: true};
var js, pjs = d.getElementsByTagName(s)[0];
if (d.getElementById(id)) return;
js = d.createElement(s); js.id = id; js.async = true;
js.src = "https://main.pubexchange.com/loader.min.js";
pjs.parentNode.insertBefore(js, pjs);
}(window, document, "script", "pubexchange-jssdk"));
gform.initializeOnLoaded( function() {gformInitSpinner( 57736263, 'https://cleanplates.com/wp-content/plugins/gravityforms/images/spinner.svg', true );jQuery('#gform_ajax_frame_57736263').on('load',function(){var contents = jQuery(this).contents().find('*').html();var is_postback = contents.indexOf('GF_AJAX_POSTBACK') >= 0;if(!is_postback){return;}var form_content = jQuery(this).contents().find('#gform_wrapper_57736263');var is_confirmation = jQuery(this).contents().find('#gform_confirmation_wrapper_57736263').length > 0;var is_redirect = contents.indexOf('gformRedirect(){') >= 0;var is_form = form_content.length > 0 && ! is_redirect && ! is_confirmation;var mt = parseInt(jQuery('html').css('margin-top'), 10) + parseInt(jQuery('body').css('margin-top'), 10) + 100;if(is_form){jQuery('#gform_wrapper_57736263').html(form_content.html());if(form_content.hasClass('gform_validation_error')){jQuery('#gform_wrapper_57736263').addClass('gform_validation_error');} else {jQuery('#gform_wrapper_57736263').removeClass('gform_validation_error');}setTimeout( function() { /* delay the scroll by 50 milliseconds to fix a bug in chrome */ jQuery(document).scrollTop(jQuery('#gform_wrapper_57736263').offset().top - mt); }, 50 );if(window['gformInitDatepicker']) {gformInitDatepicker();}if(window['gformInitPriceFields']) {gformInitPriceFields();}var current_page = jQuery('#gform_source_page_number_8').val();gformInitSpinner( 57736263, 'https://cleanplates.com/wp-content/plugins/gravityforms/images/spinner.svg', true );jQuery(document).trigger('gform_page_loaded', [57736263, current_page]);window['gf_submitting_57736263'] = false;}else if(!is_redirect){var confirmation_content = jQuery(this).contents().find('.GF_AJAX_POSTBACK').html();if(!confirmation_content){confirmation_content = contents;}setTimeout(function(){jQuery('#gform_wrapper_57736263').replaceWith(confirmation_content);jQuery(document).scrollTop(jQuery('#gf_57736263').offset().top - mt);jQuery(document).trigger('gform_confirmation_loaded', [57736263]);window['gf_submitting_57736263'] = false;wp.a11y.speak(jQuery('#gform_confirmation_message_57736263').text());}, 50);}else{jQuery('#gform_57736263').append(contents);if(window['gformRedirect']) {gformRedirect();}}jQuery(document).trigger("gform_pre_post_render", [{ formId: "8", currentPage: "current_page", abort: function() { this.preventDefault(); } }]); if (event.defaultPrevented) { return; } const gformWrapperDiv = document.getElementById( "gform_wrapper_8" ); if ( gformWrapperDiv ) { const visibilitySpan = document.createElement( "span" ); visibilitySpan.id = "gform_visibility_test_8"; gformWrapperDiv.insertAdjacentElement( "afterend", visibilitySpan ); } const visibilityTestDiv = document.getElementById( "gform_visibility_test_8" ); let postRenderFired = false; function triggerPostRender() { if ( postRenderFired ) { return; } postRenderFired = true; jQuery( document ).trigger( 'gform_post_render', [8, current_page] ); gform.utils.trigger( { event: 'gform/postRender', native: false, data: { formId: 8, currentPage: current_page } } ); if ( visibilityTestDiv ) { visibilityTestDiv.parentNode.removeChild( visibilityTestDiv ); } } function debounce( func, wait, immediate ) { var timeout; return function() { var context = this, args = arguments; var later = function() { timeout = null; if ( !immediate ) func.apply( context, args ); }; var callNow = immediate && !timeout; clearTimeout( timeout ); timeout = setTimeout( later, wait ); if ( callNow ) func.apply( context, args ); }; } const debouncedTriggerPostRender = debounce( function() { triggerPostRender(); }, 200 ); if ( visibilityTestDiv && visibilityTestDiv.offsetParent === null ) { const observer = new MutationObserver( ( mutations ) => { mutations.forEach( ( mutation ) => { if ( mutation.type === 'attributes' && visibilityTestDiv.offsetParent !== null ) { debouncedTriggerPostRender(); observer.disconnect(); } }); }); observer.observe( document.body, { attributes: true, childList: false, subtree: true, attributeFilter: [ 'style', 'class' ], }); } else { triggerPostRender(); } } );} );
gform.initializeOnLoaded( function() {gformInitSpinner( 2043079089, 'https://cleanplates.com/wp-content/plugins/gravityforms/images/spinner.svg', true );jQuery('#gform_ajax_frame_2043079089').on('load',function(){var contents = jQuery(this).contents().find('*').html();var is_postback = contents.indexOf('GF_AJAX_POSTBACK') >= 0;if(!is_postback){return;}var form_content = jQuery(this).contents().find('#gform_wrapper_2043079089');var is_confirmation = jQuery(this).contents().find('#gform_confirmation_wrapper_2043079089').length > 0;var is_redirect = contents.indexOf('gformRedirect(){') >= 0;var is_form = form_content.length > 0 && ! is_redirect && ! is_confirmation;var mt = parseInt(jQuery('html').css('margin-top'), 10) + parseInt(jQuery('body').css('margin-top'), 10) + 100;if(is_form){jQuery('#gform_wrapper_2043079089').html(form_content.html());if(form_content.hasClass('gform_validation_error')){jQuery('#gform_wrapper_2043079089').addClass('gform_validation_error');} else {jQuery('#gform_wrapper_2043079089').removeClass('gform_validation_error');}setTimeout( function() { /* delay the scroll by 50 milliseconds to fix a bug in chrome */ jQuery(document).scrollTop(jQuery('#gform_wrapper_2043079089').offset().top - mt); }, 50 );if(window['gformInitDatepicker']) {gformInitDatepicker();}if(window['gformInitPriceFields']) {gformInitPriceFields();}var current_page = jQuery('#gform_source_page_number_8').val();gformInitSpinner( 2043079089, 'https://cleanplates.com/wp-content/plugins/gravityforms/images/spinner.svg', true );jQuery(document).trigger('gform_page_loaded', [2043079089, current_page]);window['gf_submitting_2043079089'] = false;}else if(!is_redirect){var confirmation_content = jQuery(this).contents().find('.GF_AJAX_POSTBACK').html();if(!confirmation_content){confirmation_content = contents;}setTimeout(function(){jQuery('#gform_wrapper_2043079089').replaceWith(confirmation_content);jQuery(document).scrollTop(jQuery('#gf_2043079089').offset().top - mt);jQuery(document).trigger('gform_confirmation_loaded', [2043079089]);window['gf_submitting_2043079089'] = false;wp.a11y.speak(jQuery('#gform_confirmation_message_2043079089').text());}, 50);}else{jQuery('#gform_2043079089').append(contents);if(window['gformRedirect']) {gformRedirect();}}jQuery(document).trigger("gform_pre_post_render", [{ formId: "8", currentPage: "current_page", abort: function() { this.preventDefault(); } }]); if (event.defaultPrevented) { return; } const gformWrapperDiv = document.getElementById( "gform_wrapper_8" ); if ( gformWrapperDiv ) { const visibilitySpan = document.createElement( "span" ); visibilitySpan.id = "gform_visibility_test_8"; gformWrapperDiv.insertAdjacentElement( "afterend", visibilitySpan ); } const visibilityTestDiv = document.getElementById( "gform_visibility_test_8" ); let postRenderFired = false; function triggerPostRender() { if ( postRenderFired ) { return; } postRenderFired = true; jQuery( document ).trigger( 'gform_post_render', [8, current_page] ); gform.utils.trigger( { event: 'gform/postRender', native: false, data: { formId: 8, currentPage: current_page } } ); if ( visibilityTestDiv ) { visibilityTestDiv.parentNode.removeChild( visibilityTestDiv ); } } function debounce( func, wait, immediate ) { var timeout; return function() { var context = this, args = arguments; var later = function() { timeout = null; if ( !immediate ) func.apply( context, args ); }; var callNow = immediate && !timeout; clearTimeout( timeout ); timeout = setTimeout( later, wait ); if ( callNow ) func.apply( context, args ); }; } const debouncedTriggerPostRender = debounce( function() { triggerPostRender(); }, 200 ); if ( visibilityTestDiv && visibilityTestDiv.offsetParent === null ) { const observer = new MutationObserver( ( mutations ) => { mutations.forEach( ( mutation ) => { if ( mutation.type === 'attributes' && visibilityTestDiv.offsetParent !== null ) { debouncedTriggerPostRender(); observer.disconnect(); } }); }); observer.observe( document.body, { attributes: true, childList: false, subtree: true, attributeFilter: [ 'style', 'class' ], }); } else { triggerPostRender(); } } );} );
(function(d,u,ac){var s=d.createElement('script');s.type='text/javascript';s.src='https://a.omappapi.com/app/js/api.min.js';s.async=true;s.dataset.user=u;s.dataset.campaign=ac;d.getElementsByTagName('head')[0].appendChild(s);})(document,163062,'ar3bevprumlagpkwgohv');
(function(d,u,ac){var s=d.createElement('script');s.type='text/javascript';s.src='https://a.omappapi.com/app/js/api.min.js';s.async=true;s.dataset.user=u;s.dataset.campaign=ac;d.getElementsByTagName('head')[0].appendChild(s);})(document,163062,'bch9zgxf3xlbqcbrurtg');
var ar3bevprumlagpkwgohv_shortcode = true;var bch9zgxf3xlbqcbrurtg_shortcode = true;
https://cleanplates.com/wp-content/plugins/bb-plugin/js/jquery.imagesloaded.min.js
https://cleanplates.com/wp-content/plugins/bb-plugin/js/jquery.ba-throttle-debounce.min.js
window.wpParselySiteId = 'cleanplates.com';
https://cleanplates.com/wp-content/plugins/wp-parsely/build/loader.js
https://cleanplates.com/wp-content/themes/bb-theme-child/js/footer.min.js
https://cleanplates.com/wp-content/plugins/page-links-to/dist/new-tab.js
(function(d){var s=d.createElement("script");s.type="text/javascript";s.src="https://a.omappapi.com/app/js/api.min.js";s.async=true;s.id="omapi-script";d.getElementsByTagName("head")[0].appendChild(s);})(document);
https://cleanplates.com/wp-content/plugins/bb-plugin/js/jquery.magnificpopup.min.js
https://cleanplates.com/wp-content/plugins/bb-plugin/js/jquery.fitvids.min.js
var themeopts = {"medium_breakpoint":"990","mobile_breakpoint":"641","scrollTopPosition":"800"};
https://cleanplates.com/wp-content/themes/bb-theme/js/theme.min.js
https://cleanplates.com/wp-includes/js/dist/vendor/react.min.js
https://cleanplates.com/wp-includes/js/dist/vendor/react-dom.min.js
https://cleanplates.com/wp-includes/js/dist/escape-html.min.js
https://cleanplates.com/wp-includes/js/dist/element.min.js
https://cleanplates.com/wp-content/plugins/clean-plates-timber/js/clean-plates.js
https://cleanplates.com/wp-includes/js/dist/dom-ready.min.js
https://cleanplates.com/wp-includes/js/dist/a11y.min.js
https://cleanplates.com/wp-content/plugins/gravityforms/js/jquery.json.min.js
var gform_i18n = {"datepicker":{"days":{"monday":"Mo","tuesday":"Tu","wednesday":"We","thursday":"Th","friday":"Fr","saturday":"Sa","sunday":"Su"},"months":{"january":"January","february":"February","march":"March","april":"April","may":"May","june":"June","july":"July","august":"August","september":"September","october":"October","november":"November","december":"December"},"firstDay":1,"iconText":"Select date"}};
var gf_legacy_multi = [];
var gform_gravityforms = {"strings":{"invalid_file_extension":"This type of file is not allowed. Must be one of the following:","delete_file":"Delete this file","in_progress":"in progress","file_exceeds_limit":"File exceeds size limit","illegal_extension":"This type of file is not allowed.","max_reached":"Maximum number of files reached","unknown_error":"There was a problem while saving the file on the server","currently_uploading":"Please wait for the uploading to complete","cancel":"Cancel","cancel_upload":"Cancel this upload","cancelled":"Cancelled"},"vars":{"images_url":"https:\/\/cleanplates.com\/wp-content\/plugins\/gravityforms\/images"}};
var gf_global = {"gf_currency_config":{"name":"U.S. Dollar","symbol_left":"$","symbol_right":"","symbol_padding":"","thousand_separator":",","decimal_separator":".","decimals":2,"code":"USD"},"base_url":"https:\/\/cleanplates.com\/wp-content\/plugins\/gravityforms","number_formats":[],"spinnerUrl":"https:\/\/cleanplates.com\/wp-content\/plugins\/gravityforms\/images\/spinner.svg","version_hash":"0938534ff5b9526067049ff54826e9d2","strings":{"newRowAdded":"New row added.","rowRemoved":"Row removed","formSaved":"The form has been saved. The content contains the link to return and complete the form."}};
var gf_global = {"gf_currency_config":{"name":"U.S. Dollar","symbol_left":"$","symbol_right":"","symbol_padding":"","thousand_separator":",","decimal_separator":".","decimals":2,"code":"USD"},"base_url":"https:\/\/cleanplates.com\/wp-content\/plugins\/gravityforms","number_formats":[],"spinnerUrl":"https:\/\/cleanplates.com\/wp-content\/plugins\/gravityforms\/images\/spinner.svg","version_hash":"0938534ff5b9526067049ff54826e9d2","strings":{"newRowAdded":"New row added.","rowRemoved":"Row removed","formSaved":"The form has been saved. The content contains the link to return and complete the form."}};
https://cleanplates.com/wp-content/plugins/gravityforms/js/gravityforms.min.js
https://cleanplates.com/wp-content/plugins/gravityforms/js/placeholders.jquery.min.js
https://cleanplates.com/wp-content/plugins/gravityforms/assets/js/dist/utils.min.js
https://cleanplates.com/wp-content/plugins/gravityforms/assets/js/dist/vendor-theme.min.js
var gform_theme_config = {"common":{"form":{"honeypot":{"version_hash":"0938534ff5b9526067049ff54826e9d2"}}},"hmr_dev":"","public_path":"https:\/\/cleanplates.com\/wp-content\/plugins\/gravityforms\/assets\/js\/dist\/"};
https://cleanplates.com/wp-content/plugins/gravityforms/assets/js/dist/scripts-theme.min.js
https://cleanplates.com/wp-content/plugins/optinmonster/assets/dist/js/helper.min.js
jQuery('.soliloquy-container').removeClass('no-js');
gform.initializeOnLoaded( function() { jQuery(document).on('gform_post_render', function(event, formId, currentPage){if(formId == 8) {if(typeof Placeholders != 'undefined'){
Placeholders.enable();
}jQuery( "#gform_8" ).on( 'submit', function( event ) {
jQuery( '<input>' )
.attr( 'type', 'hidden' )
.attr( 'name', 'gf_zero_spam_key' )
.attr( 'value', 'IX0ESiTziYfmVNNQOMy3z9RHjgGf0VgF9I0IpzL8Qa87yM0lRradVjPFvaF8FS1T' )
.attr( 'autocomplete', 'new-password' )
.appendTo( jQuery( this ) );
} );} } );jQuery(document).on('gform_post_conditional_logic', function(event, formId, fields, isInit){} ) } );
gform.initializeOnLoaded( function() {jQuery(document).trigger("gform_pre_post_render", [{ formId: "8", currentPage: "1", abort: function() { this.preventDefault(); } }]); if (event.defaultPrevented) { return; } const gformWrapperDiv = document.getElementById( "gform_wrapper_8" ); if ( gformWrapperDiv ) { const visibilitySpan = document.createElement( "span" ); visibilitySpan.id = "gform_visibility_test_8"; gformWrapperDiv.insertAdjacentElement( "afterend", visibilitySpan ); } const visibilityTestDiv = document.getElementById( "gform_visibility_test_8" ); let postRenderFired = false; function triggerPostRender() { if ( postRenderFired ) { return; } postRenderFired = true; jQuery( document ).trigger( 'gform_post_render', [8, 1] ); gform.utils.trigger( { event: 'gform/postRender', native: false, data: { formId: 8, currentPage: 1 } } ); if ( visibilityTestDiv ) { visibilityTestDiv.parentNode.removeChild( visibilityTestDiv ); } } function debounce( func, wait, immediate ) { var timeout; return function() { var context = this, args = arguments; var later = function() { timeout = null; if ( !immediate ) func.apply( context, args ); }; var callNow = immediate && !timeout; clearTimeout( timeout ); timeout = setTimeout( later, wait ); if ( callNow ) func.apply( context, args ); }; } const debouncedTriggerPostRender = debounce( function() { triggerPostRender(); }, 200 ); if ( visibilityTestDiv && visibilityTestDiv.offsetParent === null ) { const observer = new MutationObserver( ( mutations ) => { mutations.forEach( ( mutation ) => { if ( mutation.type === 'attributes' && visibilityTestDiv.offsetParent !== null ) { debouncedTriggerPostRender(); observer.disconnect(); } }); }); observer.observe( document.body, { attributes: true, childList: false, subtree: true, attributeFilter: [ 'style', 'class' ], }); } else { triggerPostRender(); } } );
var omapi_localized = {
ajax: 'https://cleanplates.com/wp-admin/admin-ajax.php?optin-monster-ajax-route=1',
nonce: '40b2694e22',
slugs:
{"ar3bevprumlagpkwgohv":{"slug":"ar3bevprumlagpkwgohv","mailpoet":false},"bch9zgxf3xlbqcbrurtg":{"slug":"bch9zgxf3xlbqcbrurtg","mailpoet":false}} };
var omapi_data = {"object_id":34923,"object_key":"post","object_type":"post","term_ids":[3954,3174,64,2863],"wp_json":"https:\/\/cleanplates.com\/wp-json","wc_active":false,"edd_active":false,"nonce":"eddc3ddf94"};
var wpAjaxUrl='https://cleanplates.com/wp-admin/admin-ajax.php';var flBuilderUrl='https://cleanplates.com/wp-content/plugins/bb-plugin/';var FLBuilderLayoutConfig={anchorLinkAnimations:{duration:1000,easing:'swing',offset:100},paths:{pluginUrl:'https://cleanplates.com/wp-content/plugins/bb-plugin/',wpAjaxUrl:'https://cleanplates.com/wp-admin/admin-ajax.php'},breakpoints:{small:641,medium:961,large:1200},waypoint:{offset:80}};(function($){if(typeof FLBuilderLayout!='undefined'){return;}
FLBuilderLayout={init:function(){FLBuilderLayout._destroy();FLBuilderLayout._initClasses();FLBuilderLayout._initBackgrounds();FLBuilderLayout._initRowShapeLayerHeight();if(0===$('.fl-builder-edit').length){FLBuilderLayout._initModuleAnimations();FLBuilderLayout._initAnchorLinks();FLBuilderLayout._initHash();FLBuilderLayout._initForms();FLBuilderLayout._reorderMenu();}},refreshGalleries:function(element){var $element='undefined'==typeof element?$('body'):$(element),mfContent=$element.find('.fl-mosaicflow-content'),wmContent=$element.find('.fl-gallery'),mfObject=null;if(mfContent){mfObject=mfContent.data('mosaicflow');if(mfObject){mfObject.columns=$([]);mfObject.columnsHeights=[];mfContent.data('mosaicflow',mfObject);mfContent.mosaicflow('refill');}}
if(wmContent){wmContent.trigger('refreshWookmark');}},refreshGridLayout:function(element){var $element='undefined'==typeof element?$('body'):$(element),msnryContent=$element.find('.masonry');if(msnryContent.length){msnryContent.masonry('layout');}},reloadSlider:function(content){var $content='undefined'==typeof content?$('body'):$(content);if($content.find('.bx-viewport > div').length>0){$.each($content.find('.bx-viewport > div'),function(key,slider){setTimeout(function(){$(slider).data('bxSlider').reloadSlider();},100);});}},resizeAudio:function(element){var $element='undefined'==typeof element?$('body'):$(element),audioPlayers=$element.find('.wp-audio-shortcode.mejs-audio'),player=null,mejsPlayer=null,rail=null,railWidth=400;if(audioPlayers.length&&typeof mejs!=='undefined'){audioPlayers.each(function(){player=$(this);mejsPlayer=mejs.players[player.attr('id')];rail=player.find('.mejs-controls .mejs-time-rail');var innerMejs=player.find('.mejs-inner'),total=player.find('.mejs-controls .mejs-time-total');if(typeof mejsPlayer!=='undefined'){railWidth=Math.ceil(player.width()*0.8);if(innerMejs.length){rail.css('width',railWidth+'px!important');mejsPlayer.options.autosizeProgress=true;setTimeout(function(){mejsPlayer.setControlsSize();},50);player.find('.mejs-inner').css({visibility:'visible',height:'inherit'});}}});}},preloadAudio:function(element){var $element='undefined'==typeof element?$('body'):$(element),contentWrap=$element.closest('.fl-accordion-item'),audioPlayers=$element.find('.wp-audio-shortcode.mejs-audio');if(!contentWrap.hasClass('fl-accordion-item-active')&&audioPlayers.find('.mejs-inner').length){audioPlayers.find('.mejs-inner').css({visibility:'hidden',height:0});}},resizeSlideshow:function(){if(typeof YUI!=='undefined'){YUI().use('node-event-simulate',function(Y){Y.one(window).simulate("resize");});}},reloadGoogleMap:function(element){var $element='undefined'==typeof element?$('body'):$(element),googleMap=$element.find('iframe[src*="google.com/maps"]');if(googleMap.length){googleMap.attr('src',function(i,val){return val;});}},_destroy:function(){var win=$(window);win.off('scroll.fl-bg-parallax');win.off('resize.fl-bg-video');},_isTouch:function(){if(('ontouchstart'in window)||(window.DocumentTouch&&document instanceof DocumentTouch)){return true;}
return false;},_isMobile:function(){return/Mobile|Android|Silk\/|Kindle|BlackBerry|Opera Mini|Opera Mobi|webOS/i.test(navigator.userAgent);},_initClasses:function(){var body=$('body'),ua=navigator.userAgent;if(!body.hasClass('archive')&&$('.fl-builder-content-primary').length>0){body.addClass('fl-builder');}
if(FLBuilderLayout._isTouch()){body.addClass('fl-builder-touch');}
if(FLBuilderLayout._isMobile()){body.addClass('fl-builder-mobile');}
if($(window).width()<FLBuilderLayoutConfig.breakpoints.small){body.addClass('fl-builder-breakpoint-small');}
if($(window).width()>FLBuilderLayoutConfig.breakpoints.small&&$(window).width()<FLBuilderLayoutConfig.breakpoints.medium){body.addClass('fl-builder-breakpoint-medium');}
if($(window).width()>FLBuilderLayoutConfig.breakpoints.medium&&$(window).width()<FLBuilderLayoutConfig.breakpoints.large){body.addClass('fl-builder-breakpoint-large');}
if($(window).width()>FLBuilderLayoutConfig.breakpoints.large){body.addClass('fl-builder-breakpoint-default');}
if(ua.indexOf('Trident/7.0')>-1&&ua.indexOf('rv:11.0')>-1){body.addClass('fl-builder-ie-11');}},_initBackgrounds:function(){var win=$(window);if($('.fl-row-bg-parallax').length>0&&!FLBuilderLayout._isMobile()){FLBuilderLayout._scrollParallaxBackgrounds();FLBuilderLayout._initParallaxBackgrounds();win.on('resize.fl-bg-parallax',FLBuilderLayout._initParallaxBackgrounds);win.on('scroll.fl-bg-parallax',FLBuilderLayout._scrollParallaxBackgrounds);}
if($('.fl-bg-video').length>0){FLBuilderLayout._initBgVideos();FLBuilderLayout._resizeBgVideos();var resizeBGTimer=null;win.on('resize.fl-bg-video',function(e){clearTimeout(resizeBGTimer);resizeBGTimer=setTimeout(function(){FLBuilderLayout._resizeBgVideos(e);},100);});}},_initParallaxBackgrounds:function(){$('.fl-row-bg-parallax').each(FLBuilderLayout._initParallaxBackground);},_initParallaxBackground:function(){var row=$(this),content=row.find('> .fl-row-content-wrap'),winWidth=$(window).width(),screenSize='',imageSrc={default:'',medium:'',responsive:'',};imageSrc.default=row.data('parallax-image')||'';imageSrc.medium=row.data('parallax-image-medium')||imageSrc.default;imageSrc.responsive=row.data('parallax-image-responsive')||imageSrc.medium;if(winWidth>FLBuilderLayoutConfig.breakpoints.medium){screenSize='default';}else if(winWidth>FLBuilderLayoutConfig.breakpoints.small&&winWidth<=FLBuilderLayoutConfig.breakpoints.medium){screenSize='medium';}else if(winWidth<=FLBuilderLayoutConfig.breakpoints.small){screenSize='responsive';}
content.css('background-image','url('+imageSrc[screenSize]+')');row.data('current-image-loaded',screenSize);},_scrollParallaxBackgrounds:function(){$('.fl-row-bg-parallax').each(FLBuilderLayout._scrollParallaxBackground);},_scrollParallaxBackground:function(){var win=$(window),row=$(this),content=row.find('> .fl-row-content-wrap'),speed=row.data('parallax-speed'),offset=content.offset(),yPos=-((win.scrollTop()-offset.top)/ speed),initialOffset=(row.data('parallax-offset')!=null)?row.data('parallax-offset'):0,totalOffset=yPos-initialOffset;content.css('background-position','center '+totalOffset+'px');},_initBgVideos:function(){$('.fl-bg-video').each(FLBuilderLayout._initBgVideo);},_initBgVideo:function(){var wrap=$(this),width=wrap.data('width'),height=wrap.data('height'),mp4=wrap.data('mp4'),youtube=wrap.data('youtube'),vimeo=wrap.data('vimeo'),mp4Type=wrap.data('mp4-type'),webm=wrap.data('webm'),webmType=wrap.data('webm-type'),fallback=wrap.data('fallback'),loaded=wrap.data('loaded'),videoMobile=wrap.data('video-mobile'),fallbackTag='',videoTag=null,mp4Tag=null,webmTag=null;if(loaded){return;}
videoTag=$('<video autoplay loop muted playsinline></video>');if('undefined'!=typeof fallback&&''!=fallback){videoTag.attr('poster','data:image/gif;base64,R0lGODlhAQABAIAAAAAAAP///yH5BAEAAAAALAAAAAABAAEAAAIBRAA7')
videoTag.css({backgroundImage:'url("'+fallback+'")',backgroundColor:'transparent',backgroundRepeat:'no-repeat',backgroundSize:'cover',backgroundPosition:'center center',})}
if('undefined'!=typeof mp4&&''!=mp4){mp4Tag=$('<source />');mp4Tag.attr('src',mp4);mp4Tag.attr('type',mp4Type);videoTag.append(mp4Tag);}
if('undefined'!=typeof webm&&''!=webm){webmTag=$('<source />');webmTag.attr('src',webm);webmTag.attr('type',webmType);videoTag.append(webmTag);}
if(!FLBuilderLayout._isMobile()||(FLBuilderLayout._isMobile()&&"yes"==videoMobile)){if('undefined'!=typeof youtube){FLBuilderLayout._initYoutubeBgVideo.apply(this);}
else if('undefined'!=typeof vimeo){FLBuilderLayout._initVimeoBgVideo.apply(this);}
else{wrap.append(videoTag);}}
else{videoTag.attr('src','')
wrap.append(videoTag);}
wrap.data('loaded',true);},_initYoutubeBgVideo:function(){var playerWrap=$(this),videoId=playerWrap.data('video-id'),videoPlayer=playerWrap.find('.fl-bg-video-player'),enableAudio=playerWrap.data('enable-audio'),audioButton=playerWrap.find('.fl-bg-video-audio'),startTime='undefined'!==typeof playerWrap.data('start')?playerWrap.data('start'):0,startTime='undefined'!==typeof playerWrap.data('t')&&startTime===0?playerWrap.data('t'):startTime,endTime='undefined'!==typeof playerWrap.data('end')?playerWrap.data('end'):0,loop='undefined'!==typeof playerWrap.data('loop')?playerWrap.data('loop'):1,stateCount=0,player,fallback_showing;if(videoId){fallback=playerWrap.data('fallback')||false
if(fallback){playerWrap.find('iframe').remove()
fallbackTag=$('<div></div>');fallbackTag.addClass('fl-bg-video-fallback');fallbackTag.css('background-image','url('+playerWrap.data('fallback')+')');fallbackTag.css('background-size','cover');fallbackTag.css('transition','background-image 1s')
playerWrap.append(fallbackTag);fallback_showing=true;}
FLBuilderLayout._onYoutubeApiReady(function(YT){setTimeout(function(){player=new YT.Player(videoPlayer[0],{videoId:videoId,events:{onReady:function(event){if("no"===enableAudio||FLBuilderLayout._isMobile()){event.target.mute();}
else if("yes"===enableAudio&&event.target.isMuted){event.target.unMute();}
playerWrap.data('YTPlayer',player);FLBuilderLayout._resizeYoutubeBgVideo.apply(playerWrap);event.target.playVideo();if(audioButton.length>0&&!FLBuilderLayout._isMobile()){audioButton.on('click',{button:audioButton,player:player},FLBuilderLayout._toggleBgVideoAudio);}},onStateChange:function(event){if(event.data===1){if(fallback_showing){$('.fl-bg-video-fallback').css('background-image','url(data:image/gif;base64,R0lGODlhAQABAIAAAAAAAP///yH5BAEAAAAALAAAAAABAAEAAAIBRAA7)')}}
if(stateCount<4){stateCount++;}
if(stateCount>1&&(-1===event.data||2===event.data)&&"yes"===enableAudio){player.mute();player.playVideo();audioButton.show();}
if(event.data===YT.PlayerState.ENDED&&1===loop){if(startTime>0){player.seekTo(startTime);}
else{player.playVideo();}}},onError:function(event){console.info('YT Error: '+event.data)
FLBuilderLayout._onErrorYoutubeVimeo(playerWrap)}},playerVars:{playsinline:FLBuilderLayout._isMobile()?1:0,controls:0,showinfo:0,rel:0,start:startTime,end:endTime,}});},1);});}},_onErrorYoutubeVimeo:function(playerWrap){fallback=playerWrap.data('fallback')||false
if(!fallback){return false;}
playerWrap.find('iframe').remove()
fallbackTag=$('<div></div>');fallbackTag.addClass('fl-bg-video-fallback');fallbackTag.css('background-image','url('+playerWrap.data('fallback')+')');playerWrap.append(fallbackTag);},_onYoutubeApiReady:function(callback){if(window.YT&&YT.loaded){callback(YT);}else{setTimeout(function(){FLBuilderLayout._onYoutubeApiReady(callback);},350);}},_initVimeoBgVideo:function(){var playerWrap=$(this),videoId=playerWrap.data('video-id'),videoPlayer=playerWrap.find('.fl-bg-video-player'),enableAudio=playerWrap.data('enable-audio'),audioButton=playerWrap.find('.fl-bg-video-audio'),player,width=playerWrap.outerWidth(),ua=navigator.userAgent;if(typeof Vimeo!=='undefined'&&videoId){player=new Vimeo.Player(videoPlayer[0],{id:videoId,loop:true,title:false,portrait:false,background:true,autopause:false,muted:true});playerWrap.data('VMPlayer',player);if("no"===enableAudio){player.setVolume(0);}
else if("yes"===enableAudio){if(ua.indexOf("Safari")>-1||ua.indexOf("Chrome")>-1||ua.indexOf("Firefox")>-1){player.setVolume(0);audioButton.show();}
else{player.setVolume(1);}}
player.play().catch(function(error){FLBuilderLayout._onErrorYoutubeVimeo(playerWrap)});if(audioButton.length>0){audioButton.on('click',{button:audioButton,player:player},FLBuilderLayout._toggleBgVideoAudio);}}},_toggleBgVideoAudio:function(e){var player=e.data.player,control=e.data.button.find('.fl-audio-control');if(control.hasClass('fa-volume-off')){control.removeClass('fa-volume-off').addClass('fa-volume-up');e.data.button.find('.fa-times').hide();if('function'===typeof player.unMute){player.unMute();}
else{player.setVolume(1);}}
else{control.removeClass('fa-volume-up').addClass('fa-volume-off');e.data.button.find('.fa-times').show();if('function'===typeof player.unMute){player.mute();}
else{player.setVolume(0);}}},_videoBgSourceError:function(e){var source=$(e.target),wrap=source.closest('.fl-bg-video'),vid=wrap.find('video'),fallback=wrap.data('fallback'),fallbackTag='';source.remove();if(vid.find('source').length){return;}else if(''!==fallback){fallbackTag=$('<div></div>');fallbackTag.addClass('fl-bg-video-fallback');fallbackTag.css('background-image','url('+fallback+')');wrap.append(fallbackTag);vid.remove();}},_resizeBgVideos:function(){$('.fl-bg-video').each(function(){FLBuilderLayout._resizeBgVideo.apply(this);if($(this).parent().find('img').length>0){$(this).parent().imagesLoaded($.proxy(FLBuilderLayout._resizeBgVideo,this));}});},_resizeBgVideo:function(){if(0===$(this).find('video').length&&0===$(this).find('iframe').length){return;}
var wrap=$(this),wrapHeight=wrap.outerHeight(),wrapWidth=wrap.outerWidth(),vid=wrap.find('video'),vidHeight=wrap.data('height'),vidWidth=wrap.data('width'),newWidth=wrapWidth,newHeight=Math.round(vidHeight*wrapWidth/vidWidth),newLeft=0,newTop=0,iframe=wrap.find('iframe'),isRowFullHeight=$(this).closest('.fl-row-bg-video').hasClass('fl-row-full-height'),vidCSS={top:'50%',left:'50%',transform:'translate(-50%,-50%)',};if(vid.length){if(vidHeight===''||typeof vidHeight==='undefined'||vidWidth===''||typeof vidWidth==='undefined'){vid.css({'left':'0px','top':'0px','width':newWidth+'px'});vid.on('loadedmetadata',FLBuilderLayout._resizeOnLoadedMeta);return;}
if(!isRowFullHeight){if(newHeight<wrapHeight){newHeight=wrapHeight;newLeft=-((newWidth-wrapWidth)/ 2);newWidth=vidHeight?Math.round(vidWidth*wrapHeight/vidHeight):newWidth;}
else{newTop=-((newHeight-wrapHeight)/2);}
vidCSS={left:newLeft+'px',top:newTop+'px',height:newHeight+'px',width:newWidth+'px',}}
vid.css(vidCSS);}
else if(iframe.length){if(typeof wrap.data('youtube')!=='undefined'){FLBuilderLayout._resizeYoutubeBgVideo.apply(this);}}},_resizeOnLoadedMeta:function(){var video=$(this),wrapHeight=video.parent().outerHeight(),wrapWidth=video.parent().outerWidth(),vidWidth=video[0].videoWidth,vidHeight=video[0].videoHeight,newHeight=Math.round(vidHeight*wrapWidth/vidWidth),newWidth=wrapWidth,newLeft=0,newTop=0;if(newHeight<wrapHeight){newHeight=wrapHeight;newWidth=Math.round(vidWidth*wrapHeight/vidHeight);newLeft=-((newWidth-wrapWidth)/2);}
else{newTop=-((newHeight-wrapHeight)/2);}
video.parent().data('width',vidWidth);video.parent().data('height',vidHeight);video.css({'left':newLeft+'px','top':newTop+'px','width':newWidth+'px','height':newHeight+'px'});},_resizeYoutubeBgVideo:function(){var wrap=$(this),wrapWidth=wrap.outerWidth(),wrapHeight=wrap.outerHeight(),player=wrap.data('YTPlayer'),video=player?player.getIframe():null,aspectRatioSetting='16:9',aspectRatioArray=aspectRatioSetting.split(':'),aspectRatio=aspectRatioArray[0]/ aspectRatioArray[1],ratioWidth=wrapWidth / aspectRatio,ratioHeight=wrapHeight*aspectRatio,isWidthFixed=wrapWidth / wrapHeight>aspectRatio,width=isWidthFixed?wrapWidth:ratioHeight,height=isWidthFixed?ratioWidth:wrapHeight;if(video){$(video).width(width).height(height);}},_initModuleAnimations:function(){if(typeof jQuery.fn.waypoint!=='undefined'){$('.fl-animation').each(function(){var node=$(this),nodeTop=node.offset().top,winHeight=$(window).height(),bodyHeight=$('body').height(),waypoint=FLBuilderLayoutConfig.waypoint,offset='80%';if(typeof waypoint.offset!==undefined){offset=FLBuilderLayoutConfig.waypoint.offset+'%';}
if(bodyHeight-nodeTop<winHeight*0.2){offset='100%';}
node.waypoint({offset:offset,handler:FLBuilderLayout._doModuleAnimation});});}},_doModuleAnimation:function(){var module='undefined'==typeof this.element?$(this):$(this.element),delay=parseFloat(module.data('animation-delay')),duration=parseFloat(module.data('animation-duration'));if(!isNaN(duration)){module.css('animation-duration',duration+'s');}
if(!isNaN(delay)&&delay>0){setTimeout(function(){module.addClass('fl-animated');},delay*1000);}else{setTimeout(function(){module.addClass('fl-animated');},1);}},_initHash:function(){var hash=window.location.hash.replace('#','').split('/').shift(),element=null,tabs=null,responsiveLabel=null,tabIndex=null,label=null;if(''!==hash){try{element=$('#'+hash);if(element.length>0){if(element.hasClass('fl-accordion-item')){setTimeout(function(){element.find('.fl-accordion-button').trigger('click');},100);}
if(element.hasClass('fl-tabs-panel')){setTimeout(function(){tabs=element.closest('.fl-tabs');responsiveLabel=element.find('.fl-tabs-panel-label');tabIndex=responsiveLabel.data('index');label=tabs.find('.fl-tabs-labels .fl-tabs-label[data-index='+tabIndex+']');label[0].click();FLBuilderLayout._scrollToElement(element);},100);}}}
catch(e){}}},_initAnchorLinks:function(){$('a').each(FLBuilderLayout._initAnchorLink);},_initAnchorLink:function(){var link=$(this),href=link.attr('href'),loc=window.location,id=null,element=null,flNode=false;if('undefined'!=typeof href&&href.indexOf('#')>-1&&link.closest('svg').length<1){if(loc.pathname.replace(/^\//,'')==this.pathname.replace(/^\//,'')&&loc.hostname==this.hostname){try{id=href.split('#').pop();if(!id){return;}
element=$('#'+id);if(element.length>0){flNode=element.hasClass('fl-row')||element.hasClass('fl-col')||element.hasClass('fl-module');if(!element.hasClass('fl-no-scroll')&&(link.hasClass('fl-scroll-link')||flNode)){$(link).on('click',FLBuilderLayout._scrollToElementOnLinkClick);}
if(element.hasClass('fl-accordion-item')){$(link).on('click',FLBuilderLayout._scrollToAccordionOnLinkClick);}
if(element.hasClass('fl-tabs-panel')){$(link).on('click',FLBuilderLayout._scrollToTabOnLinkClick);}}}
catch(e){}}}},_scrollToElementOnLinkClick:function(e,callback){var element=$('#'+$(this).attr('href').split('#').pop());FLBuilderLayout._scrollToElement(element,callback);e.preventDefault();},_scrollToElement:function(element,callback){var config=FLBuilderLayoutConfig.anchorLinkAnimations,dest=0,win=$(window),doc=$(document);if(element.length>0){if('fixed'===element.css('position')||'fixed'===element.parent().css('position')){dest=element.position().top;}
else if(element.offset().top>doc.height()-win.height()){dest=doc.height()-win.height();}
else{dest=element.offset().top-config.offset;}
$('html, body').animate({scrollTop:dest},config.duration,config.easing,function(){if('undefined'!=typeof callback){callback();}
if(undefined!=element.attr('id')){if(history.pushState){history.pushState(null,null,'#'+element.attr('id'));}
else{window.location.hash=element.attr('id');}}});}},_scrollToAccordionOnLinkClick:function(e){var element=$('#'+$(this).attr('href').split('#').pop());if(element.length>0){var callback=function(){if(element){element.find('.fl-accordion-button').trigger('click');element=false;}};FLBuilderLayout._scrollToElementOnLinkClick.call(this,e,callback);}},_scrollToTabOnLinkClick:function(e){var element=$('#'+$(this).attr('href').split('#').pop()),tabs=null,label=null,responsiveLabel=null;if(element.length>0){tabs=element.closest('.fl-tabs');responsiveLabel=element.find('.fl-tabs-panel-label');tabIndex=responsiveLabel.data('index');label=tabs.find('.fl-tabs-labels .fl-tabs-label[data-index='+tabIndex+']');if(responsiveLabel.is(':visible')){var callback=function(){if(element){responsiveLabel.trigger($.Event('click',{which:1}));}};FLBuilderLayout._scrollToElementOnLinkClick.call(this,e,callback);}
else{label[0].click();FLBuilderLayout._scrollToElement(element);}
e.preventDefault();}},_initForms:function(){if(!FLBuilderLayout._hasPlaceholderSupport){$('.fl-form-field input').each(FLBuilderLayout._initFormFieldPlaceholderFallback);}
$('.fl-form-field input').on('focus',FLBuilderLayout._clearFormFieldError);},_hasPlaceholderSupport:function(){var input=document.createElement('input');return'undefined'!=input.placeholder;},_initFormFieldPlaceholderFallback:function(){var field=$(this),val=field.val(),placeholder=field.attr('placeholder');if('undefined'!=placeholder&&''===val){field.val(placeholder);field.on('focus',FLBuilderLayout._hideFormFieldPlaceholderFallback);field.on('blur',FLBuilderLayout._showFormFieldPlaceholderFallback);}},_hideFormFieldPlaceholderFallback:function(){var field=$(this),val=field.val(),placeholder=field.attr('placeholder');if(val==placeholder){field.val('');}},_showFormFieldPlaceholderFallback:function(){var field=$(this),val=field.val(),placeholder=field.attr('placeholder');if(''===val){field.val(placeholder);}},_clearFormFieldError:function(){var field=$(this);field.removeClass('fl-form-error');field.siblings('.fl-form-error-message').hide();},_initRowShapeLayerHeight:function(){FLBuilderLayout._adjustRowShapeLayerHeight();$(window).on('resize',FLBuilderLayout._adjustRowShapeLayerHeight);},_adjustRowShapeLayerHeight:function(){var rowShapeLayers=$('.fl-builder-shape-layer');$(rowShapeLayers).each(function(index){var rowShapeLayer=$(this),shape=$(rowShapeLayer).find('svg'),height=shape.height(),excludeShapes='.fl-builder-shape-circle, .fl-builder-shape-dot-cluster, .fl-builder-shape-topography, .fl-builder-shape-rect';if(!rowShapeLayer.is(excludeShapes)){$(shape).css('height',Math.ceil(height));}});},_string_to_slug:function(str){str=str.replace(/^\s+|\s+$/g,'');if('undefined'==typeof window._fl_string_to_slug_regex){regex=new RegExp('[^a-zA-Z0-9\'":() !.,-_|]','g');}else{regex=new RegExp('[^'+window._fl_string_to_slug_regex+'\'":\(\) !.,-_|\\\p{Letter}]','ug');}
str=str.replace(regex,'').replace(/\s+/g,' ');return str;},_reorderMenu:function(){if($('#wp-admin-bar-fl-builder-frontend-edit-link-default li').length>1){$('#wp-admin-bar-fl-builder-frontend-duplicate-link').appendTo('#wp-admin-bar-fl-builder-frontend-edit-link-default').css('padding-top','5px').css('border-top','2px solid #1D2125').css('margin-top','5px')}}};$(function(){FLBuilderLayout.init();});})(jQuery);jQuery(window).scroll(function(){if(jQuery(this).scrollTop()>90){jQuery('.leaderboard').slideUp("slow");}
else{jQuery('.leaderboard').slideDown("slow");}});(function($){FLThemeBuilderHeaderLayout={win:null,body:null,header:null,overlay:false,hasAdminBar:false,stickyOn:'',breakpointWidth:0,init:function(){var editing=$('html.fl-builder-edit').length,header=$('.fl-builder-content[data-type=header]'),menuModule=header.find('.fl-module-menu'),breakpoint=null;if(!editing&&header.length){header.imagesLoaded($.proxy(function(){this.win=$(window);this.body=$('body');this.header=header.eq(0);this.overlay=!!Number(header.attr('data-overlay'));this.hasAdminBar=!!$('body.admin-bar').length;this.stickyOn=this.header.data('sticky-on');breakpoint=this.header.data('sticky-breakpoint');if(''==this.stickyOn){if(typeof FLBuilderLayoutConfig.breakpoints[breakpoint]!==undefined){this.breakpointWidth=FLBuilderLayoutConfig.breakpoints[breakpoint];}
else{this.breakpointWidth=FLBuilderLayoutConfig.breakpoints.medium;}}
if(Number(header.attr('data-sticky'))){this.header.data('original-top',this.header.offset().top);this.win.on('resize',$.throttle(500,$.proxy(this._initSticky,this)));this._initSticky();}},this));}},_initSticky:function(e){var header=$('.fl-builder-content[data-type=header]'),windowSize=this.win.width(),makeSticky=false;makeSticky=this._makeWindowSticky(windowSize);if(makeSticky||(this.breakpointWidth>0&&windowSize>=this.breakpointWidth)){this.win.on('scroll.fl-theme-builder-header-sticky',$.proxy(this._doSticky,this));if(e&&'resize'===e.type){if(this.header.hasClass('fl-theme-builder-header-sticky')){this._doSticky(e);}
this._adjustStickyHeaderWidth();}
if(Number(header.attr('data-shrink'))){this.header.data('original-height',this.header.outerHeight());this.win.on('resize',$.throttle(500,$.proxy(this._initShrink,this)));this._initShrink();}
this._initFlyoutMenuFix(e);}else{this.win.off('scroll.fl-theme-builder-header-sticky');this.win.off('resize.fl-theme-builder-header-sticky');this.header.removeClass('fl-theme-builder-header-sticky');this.header.removeAttr('style');this.header.parent().css('padding-top','0');}},_makeWindowSticky:function(windowSize){var makeSticky=false;switch(this.stickyOn){case'xl':makeSticky=windowSize>FLBuilderLayoutConfig.breakpoints['large'];break;case'':case'desktop':makeSticky=windowSize>=FLBuilderLayoutConfig.breakpoints['medium'];break;case'desktop-medium':makeSticky=windowSize>FLBuilderLayoutConfig.breakpoints['small'];break;case'large':makeSticky=windowSize>FLBuilderLayoutConfig.breakpoints['medium']&&windowSize<=FLBuilderLayoutConfig.breakpoints['large'];break;case'large-medium':makeSticky=windowSize>FLBuilderLayoutConfig.breakpoints['small']&&windowSize<=FLBuilderLayoutConfig.breakpoints['large'];break;case'medium':makeSticky=(windowSize<=FLBuilderLayoutConfig.breakpoints['medium']&&windowSize>FLBuilderLayoutConfig.breakpoints['small']);break;case'medium-mobile':makeSticky=(windowSize<=FLBuilderLayoutConfig.breakpoints['medium']);break;case'mobile':makeSticky=(windowSize<=FLBuilderLayoutConfig.breakpoints['small']);break;case'all':makeSticky=true;break;}
return makeSticky;},_doSticky:function(e){var winTop=Math.floor(this.win.scrollTop()),headerTop=Math.floor(this.header.data('original-top')),hasStickyClass=this.header.hasClass('fl-theme-builder-header-sticky'),hasScrolledClass=this.header.hasClass('fl-theme-builder-header-scrolled'),beforeHeader=this.header.prevAll('.fl-builder-content'),bodyTopPadding=parseInt(jQuery('body').css('padding-top')),winBarHeight=$('#wpadminbar').length?$('#wpadminbar').outerHeight():0,headerHeight=0;if(isNaN(bodyTopPadding)){bodyTopPadding=0;}
if(this.hasAdminBar&&this.win.width()>600){winTop+=Math.floor(winBarHeight);}
if(winTop>headerTop){if(!hasStickyClass){if(e&&('scroll'===e.type||'smartscroll'===e.type)){this.header.addClass('fl-theme-builder-header-sticky');if(this.overlay&&beforeHeader.length){this.header.css('top',winBarHeight);}}
if(!this.overlay){this._adjustHeaderHeight();}}}
else if(hasStickyClass){this.header.removeClass('fl-theme-builder-header-sticky');this.header.removeAttr('style');this.header.parent().css('padding-top','0');}
this._adjustStickyHeaderWidth();if(winTop>headerTop){if(!hasScrolledClass){this.header.addClass('fl-theme-builder-header-scrolled');}}else if(hasScrolledClass){this.header.removeClass('fl-theme-builder-header-scrolled');}
this._flyoutMenuFix(e);},_initFlyoutMenuFix:function(e){var header=this.header,menuModule=header.find('.fl-menu'),flyoutMenu=menuModule.find('.fl-menu-mobile-flyout'),isPushMenu=menuModule.hasClass('fl-menu-responsive-flyout-push')||menuModule.hasClass('fl-menu-responsive-flyout-push-opacity'),isSticky=header.hasClass('fl-theme-builder-header-sticky'),isOverlay=menuModule.hasClass('fl-menu-responsive-flyout-overlay'),flyoutPos=menuModule.hasClass('fl-flyout-right')?'right':'left',flyoutParent=header.parent().is('header')?header.parent().parent():header.parent();isFullWidth=this.win.width()===header.width(),flyoutLayout='',activePos=250,headerPos=0;if(!flyoutMenu.length){return;}
if(this.win.width()>header.parent().width()){headerPos=(this.win.width()-header.width())/ 2;}
if(isOverlay){activePos=headerPos;}
else if(isPushMenu){activePos=activePos+headerPos;}
flyoutMenu.data('activePos',activePos);if(isPushMenu){flyoutLayout='push-'+flyoutPos;}
else if(isOverlay){flyoutLayout='overlay-'+flyoutPos;}
if(isPushMenu&&!$('html').hasClass('fl-theme-builder-has-flyout-menu')){$('html').addClass('fl-theme-builder-has-flyout-menu');}
if(!flyoutParent.hasClass('fl-theme-builder-flyout-menu-'+flyoutLayout)){flyoutParent.addClass('fl-theme-builder-flyout-menu-'+flyoutLayout);}
if(!header.hasClass('fl-theme-builder-flyout-menu-overlay')&&isOverlay){header.addClass('fl-theme-builder-flyout-menu-overlay');}
if(!header.hasClass('fl-theme-builder-header-full-width')&&isFullWidth){header.addClass('fl-theme-builder-header-full-width');}
else if(!isFullWidth){header.removeClass('fl-theme-builder-header-full-width');}
menuModule.on('click','.fl-menu-mobile-toggle',$.proxy(function(event){if(menuModule.find('.fl-menu-mobile-toggle.fl-active').length){$('html').addClass('fl-theme-builder-flyout-menu-active');event.stopImmediatePropagation();}
else{$('html').removeClass('fl-theme-builder-flyout-menu-active');}
this._flyoutMenuFix(event);},this));},_flyoutMenuFix:function(e){var header=this.header,menuModule=header.find('.fl-menu'),flyoutMenu=menuModule.find('.fl-menu-mobile-flyout'),isPushMenu=menuModule.hasClass('fl-menu-responsive-flyout-push')||menuModule.hasClass('fl-menu-responsive-flyout-push-opacity'),flyoutPos=menuModule.hasClass('fl-flyout-right')?'right':'left',menuOpacity=menuModule.find('.fl-menu-mobile-opacity'),isScroll='undefined'!==typeof e&&'scroll'===e.handleObj.type,activePos='undefined'!==typeof flyoutMenu.data('activePos')?flyoutMenu.data('activePos'):0,headerPos=(this.win.width()-header.width())/ 2,inactivePos=headerPos>0?activePos+4:254;if(!flyoutMenu.length){return;}
if(this.overlay){return;}
if($('.fl-theme-builder-flyout-menu-active').length){if(isScroll&&!flyoutMenu.hasClass('fl-menu-disable-transition')){flyoutMenu.addClass('fl-menu-disable-transition');}
if(header.hasClass('fl-theme-builder-header-sticky')){if(!isScroll){setTimeout($.proxy(function(){flyoutMenu.css(flyoutPos,'-'+activePos+'px');},this),1);}
else{flyoutMenu.css(flyoutPos,'-'+activePos+'px');}}
else{flyoutMenu.css(flyoutPos,'0px');}}
else{if(flyoutMenu.hasClass('fl-menu-disable-transition')){flyoutMenu.removeClass('fl-menu-disable-transition');}
if(header.hasClass('fl-theme-builder-flyout-menu-overlay')&&headerPos>0&&headerPos<250){if(header.hasClass('fl-theme-builder-header-sticky')){inactivePos=headerPos+254;}
else{inactivePos=254;}}
if(e&&e.type==='resize'){inactivePos=headerPos+254;}
flyoutMenu.css(flyoutPos,'-'+inactivePos+'px');}
if(e&&menuModule.is('.fl-menu-responsive-flyout-overlay')&&$.infinitescroll){e.stopImmediatePropagation();}
if(menuOpacity.length){if(header.hasClass('fl-theme-builder-header-sticky')){if('0px'===menuOpacity.css('left')){menuOpacity.css('left','-'+headerPos+'px');}}
else{menuOpacity.css('left','');}}},_adjustStickyHeaderWidth:function(){if($('body').hasClass('fl-fixed-width')){var parentWidth=this.header.parent().width();if(this.win.width()>=992){this.header.css({'margin':'0 auto','max-width':parentWidth,});}
else{this.header.css({'margin':'','max-width':'',});}}},_adjustHeaderHeight:function(){var beforeHeader=this.header.prevAll('.fl-builder-content'),beforeHeaderHeight=0,beforeHeaderFix=0,headerHeight=Math.floor(this.header.outerHeight()),bodyTopPadding=parseInt($('body').css('padding-top')),wpAdminBarHeight=0,totalHeaderHeight=0;if(isNaN(bodyTopPadding)){bodyTopPadding=0;}
if(beforeHeader.length){$.each(beforeHeader,function(){beforeHeaderHeight+=Math.floor($(this).outerHeight());});beforeHeaderFix=2;}
if(this.hasAdminBar&&this.win.width()<=600){wpAdminBarHeight=Math.floor($('#wpadminbar').outerHeight());}
totalHeaderHeight=Math.floor(beforeHeaderHeight+headerHeight);if(headerHeight>0){var headerParent=this.header.parent(),headerParentTopPadding=0;if($(headerParent).is('body')){headerParentTopPadding=Math.floor(headerHeight-wpAdminBarHeight);}else{headerParentTopPadding=Math.floor(headerHeight-bodyTopPadding-wpAdminBarHeight);}
$(headerParent).css('padding-top',(headerParentTopPadding-beforeHeaderFix)+'px');this.header.css({'-webkit-transform':'translate(0px, -'+totalHeaderHeight+'px)','-ms-transform':'translate(0px, -'+totalHeaderHeight+'px)','transform':'translate(0px, -'+totalHeaderHeight+'px)'});}},_initShrink:function(e){if(this.win.width()>=this.breakpointWidth){this.win.on('scroll.fl-theme-builder-header-shrink',$.proxy(this._doShrink,this));this._setImageMaxHeight();if(this.win.scrollTop()>0){this._doShrink();}}else{this.header.parent().css('padding-top','0');this.win.off('scroll.fl-theme-builder-header-shrink');this._removeShrink();this._removeImageMaxHeight();}},_doShrink:function(e){var winTop=this.win.scrollTop(),headerTop=this.header.data('original-top'),headerHeight=this.header.data('original-height'),shrinkImageHeight=this.header.data('shrink-image-height'),windowSize=this.win.width(),makeSticky=this._makeWindowSticky(windowSize),hasClass=this.header.hasClass('fl-theme-builder-header-shrink');if(this.hasAdminBar){winTop+=32;}
if(makeSticky&&(winTop>headerTop+headerHeight)){if(!hasClass){this.header.addClass('fl-theme-builder-header-shrink');this.header.find('img').each(function(i){var image=$(this),maxMegaMenu=image.closest('.max-mega-menu').length,imageInLightbox=image.closest('.fl-button-lightbox-content').length,imageInNavMenu=image.closest('li.menu-item').length;if(!(imageInLightbox||imageInNavMenu||maxMegaMenu)){image.css('max-height',shrinkImageHeight);}});this.header.find('.fl-row-content-wrap').each(function(){var row=$(this);if(parseInt(row.css('padding-bottom'))>5){row.addClass('fl-theme-builder-header-shrink-row-bottom');}
if(parseInt(row.css('padding-top'))>5){row.addClass('fl-theme-builder-header-shrink-row-top');}});this.header.find('.fl-module-content').each(function(){var module=$(this);if(parseInt(module.css('margin-bottom'))>5){module.addClass('fl-theme-builder-header-shrink-module-bottom');}
if(parseInt(module.css('margin-top'))>5){module.addClass('fl-theme-builder-header-shrink-module-top');}});}}else if(hasClass){this.header.find('img').css('max-height','');this._removeShrink();}
if('undefined'===typeof(e)&&$('body').hasClass('fl-fixed-width')){if(!this.overlay){this._adjustHeaderHeight();}}},_removeShrink:function(){var rows=this.header.find('.fl-row-content-wrap'),modules=this.header.find('.fl-module-content');rows.removeClass('fl-theme-builder-header-shrink-row-bottom');rows.removeClass('fl-theme-builder-header-shrink-row-top');modules.removeClass('fl-theme-builder-header-shrink-module-bottom');modules.removeClass('fl-theme-builder-header-shrink-module-top');this.header.removeClass('fl-theme-builder-header-shrink');},_setImageMaxHeight:function(){var head=$('head'),stylesId='fl-header-styles-'+this.header.data('post-id'),styles='',images=this.header.find('.fl-module-content img');if($('#'+stylesId).length){return;}
images.each(function(i){var image=$(this),height=image.height(),node=image.closest('.fl-module').data('node'),className='fl-node-'+node+'-img-'+i,maxMegaMenu=image.closest('.max-mega-menu').length,imageInLightbox=image.closest('.fl-button-lightbox-content').length,imageInNavMenu=image.closest('li.menu-item').length;if(!(imageInLightbox||imageInNavMenu||maxMegaMenu)){image.addClass(className);styles+='.'+className+' { max-height: '+(height?height:image[0].height)+'px }';}});if(''!==styles){head.append('<style id="'+stylesId+'">'+styles+'</style>');}},_removeImageMaxHeight:function(){$('#fl-header-styles-'+this.header.data('post-id')).remove();},};$(function(){FLThemeBuilderHeaderLayout.init();});})(jQuery);
https://www.tp88trk.com/scripts/sdk/everflow.js
https://cdn.p-n.io/pushly-sdk.min.js